Previous lesson: Programming environments
Quickstart guide for running R in Posit Cloud (formerly RStudio Cloud)
This lesson is for people who want to get started programming R as quickly as possible using the Posit Cloud platform with no installation required.
If you want to run RStudio locally on your computer, you can either install it as part of a larger Anaconda installation or do a stand-alone installation of R and RStudio (recommended).
Learning objectives At the end of this lesson, the learner will:
- create an account at Posit Cloud
- deploy a new project
- load an R script from GitHub
Total video time: 8m 03s
Links
What is Posit Cloud?
Posit Cloud (formerly RStudio Cloud) includes a browser-based cloud installation of RStudio. It does not require any installation or configuration and is free for casual, individual use. Its behavior is nearly identical to a local installation of desktop RStudio, so it is easy to switch at any point. The only downside of Posit Cloud is that working with files is slightly more complicated than with the desktop version. Files must be uploaded to the server since posit.cloud cannot directly access files on your local computer.
Getting started with posit.cloud (3m08s)
NOTE: The video shows the old RStudio.cloud interface, but Posit Cloud is similar.
To get started, go to https://posit.cloud/ and click on the Sign Up link in the upper right. The subsequent page will show you the limitations of the free plan. The free plan has ample resources for this lesson series, so just sign up for the free plan (you can always upgrade or switch to desktop later). Click on the Learn more button to get to the actual Sign up button.
After signing up, go to the login page and sign in with the credentials you created. After you log in, you will be taken to the projects page. If you are a new user, you won’t see any existing projects – click on the New Project button, then select New RStudio Project.
There will be a significant delay as the system spins up a cloud server to handle your project. (The delay is similar if you restore an existing project.) Once the project has been deployed, you will see a web interface that looks identical to the RStudio desktop interface.
When you are done working on your project, you can just click on the Your Workspace link in the breadcrumbs at the upper left of the page. The cloud server for your project will remain in place for a while and you can easily return to it by clicking on its link. However, after some period of inactivity, the server will be shut down and will have to be restored. You don’t need to “save” the project – it will remain in the state in which you left it the next time you come back to it.
If you are using posit.cloud on a public computer, you should be sure to log out before closing the browser tab. Otherwise, another user that goes to rstudio.cloud may automatically be logged into your account.
Loading an R script (4m55s)
Now that you know how to get started in posit.cloud, you can try loading and playing with the example script in the Links section at the top of the page. The following video demonstrates two ways to load an existing script into RStudio.
Important notes:
- The second method for loading a script works as demonstrated on desktop RStudio. However, using in with posit.cloud requires an extra step. After downloading the script from GitHub, you need to upload it into the filespace of your project’s cloud server. You can do this by going to the
Filestab in the lower right pane, then selectingUpload. Leave the Target directory at its default. After selecting your file and clicking OK, you can then use the Open command as demonstrated in the video. Unless you have a strong reason to use this method, it’s probably easier just to use the first method (copy and paste). - The demonstration script requires some libraries that aren’t automatically installed when your project is created in posit.cloud (or when you installed desktop RStudio). You’ll need to install them the first time you run the script. Lines 2-4 contain the code to do the installation and they should be run one line at at time. Be patient because the packages can take a long time to install (progress is shown in the Console pane at the lower left). One reason for reusing the same project during these lessons is to avoid having to repeat these installations. The project environment will “remember” them in that project even if you load or create a different script.
- To run the script from the editor window one line at a time, place the cursor on the line, then click the
Runbutton (or press ctrl and Enter on Windows or command and return on Mac). After a line is run, it will automatically advance to the next line, so you can just click run repeatedly to run the whole script.
The editor pane in the upper left of RStudio opens when you either select New File from the File menu, then select R Script or if you open an existing file.
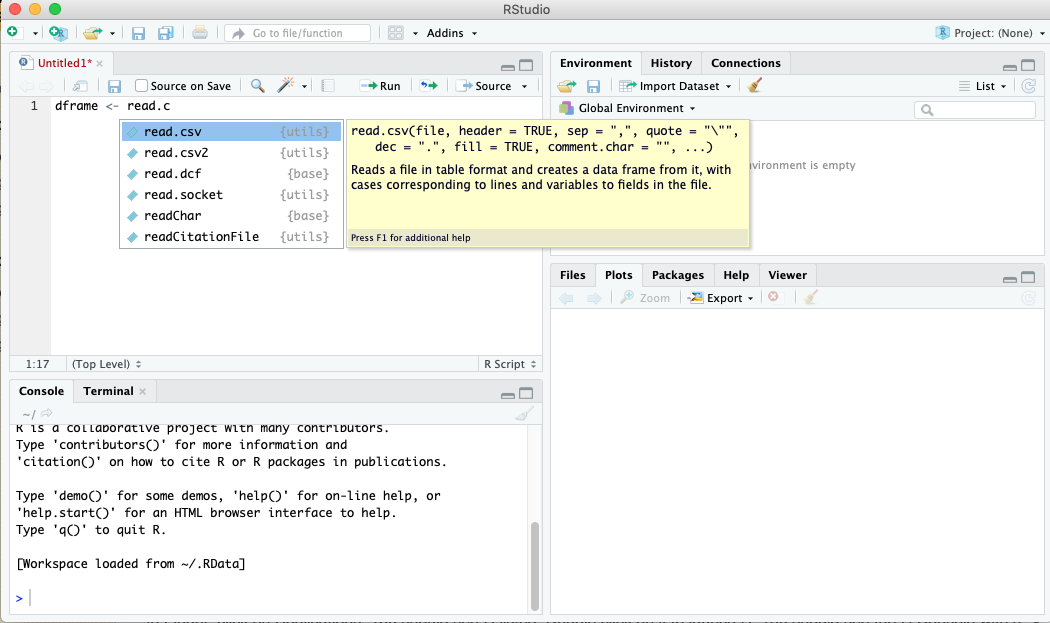
As you work in the editor pane, suggestions will pop up as you type, as shown in the screenshot above.
Next R lesson: R programming basics
Revised 2023-03-20

Questions? Contact us
License: CC BY 4.0.
Credit: "Vanderbilt Libraries Digital Lab - www.library.vanderbilt.edu"