Previous lesson: disaster recovery
GitHub for beginners: Project management and the issues tracker
In this lesson, you will learn how to use the major features of the GitHub issue tracker. You will also learn how to group issues into milestones and how to create a tagged release of the repository.
Learning objectives At the end of this lesson, the learner will be able to:
- describe the relationships between issues, milestones, commits, and releases.
- create an issue using the GitHub issues tracker and format it using Markdown.
- assign an issue to a collaborator.
- ping a collaborator using and “@mention”.
- tag an issue and create a new tag if necessary.
- link an issue to another issue using the
#marker. - close an issue by a commit message.
- set up checkboxes in a task list.
- create a milestone and link issues to it.
- create a tagged release of a repository.
Total video time: 24 m 59 s
Links
The GitHub issues tracker
The issues tracker is a way to keep up with very particular problems associated with a project. They may be associated with a particular document or may be a general, overarching problem.
Introduction (1m10s)
Philosophical outlook on issues (2m31s)
Creating a GitHub issue (3m12s)
.
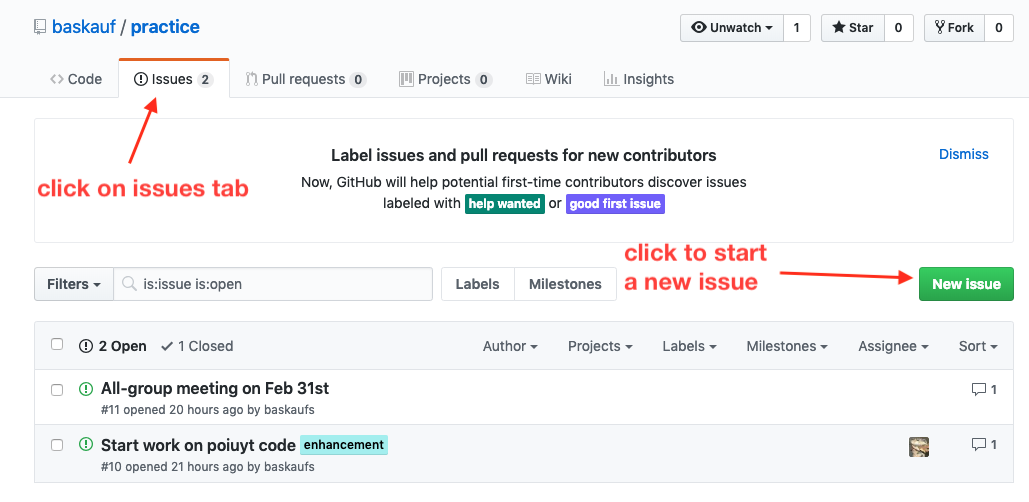
To create a new issue within a particular repo, click the issues tab. You’ll see the list of existing open issues (if any). To create a new issue, click on the New issue button.
Enter a title for the issue and write text explaining the issue in the box. You can use any of the typical Markdown text enhancements, including hyperlinking using this format:
Comment with [link text](http://url.goes.here/) to create a hyperlink.
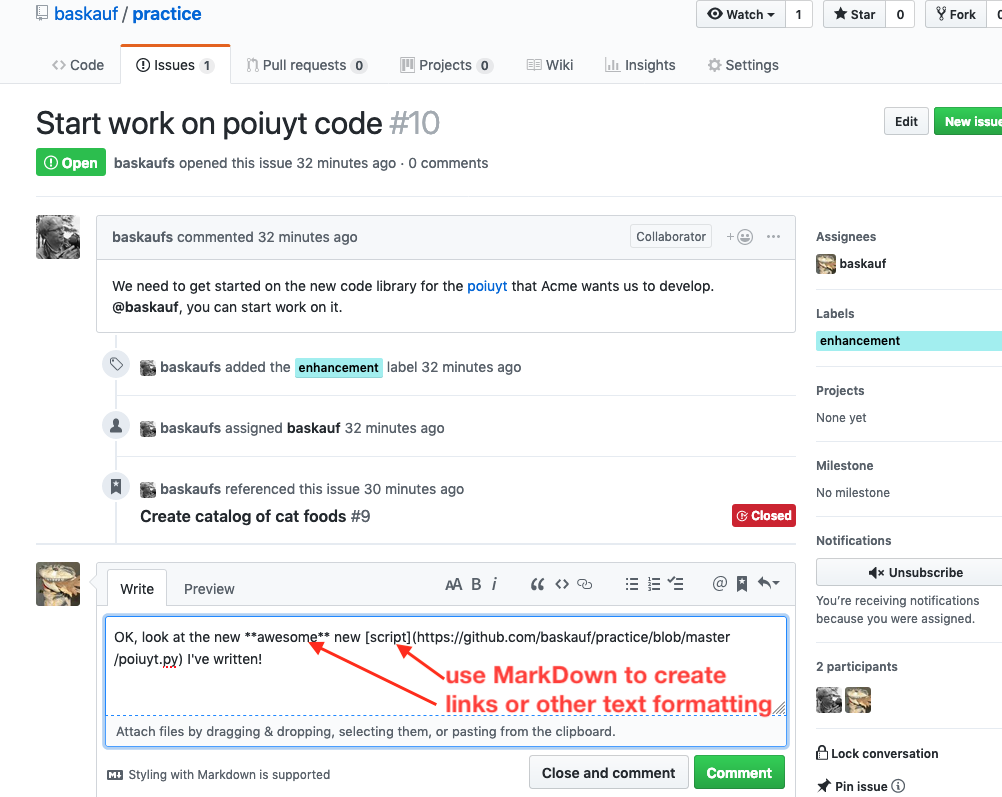
You can use the preview tab to see how it will look. Here’s how the final rendered version looks.

You can also embed images by dragging and dropping them from a file explorer/finder window into the box. The image will automatically be uploaded and embedded in the comment.
Commenting on and linking issues (1m54s)
.
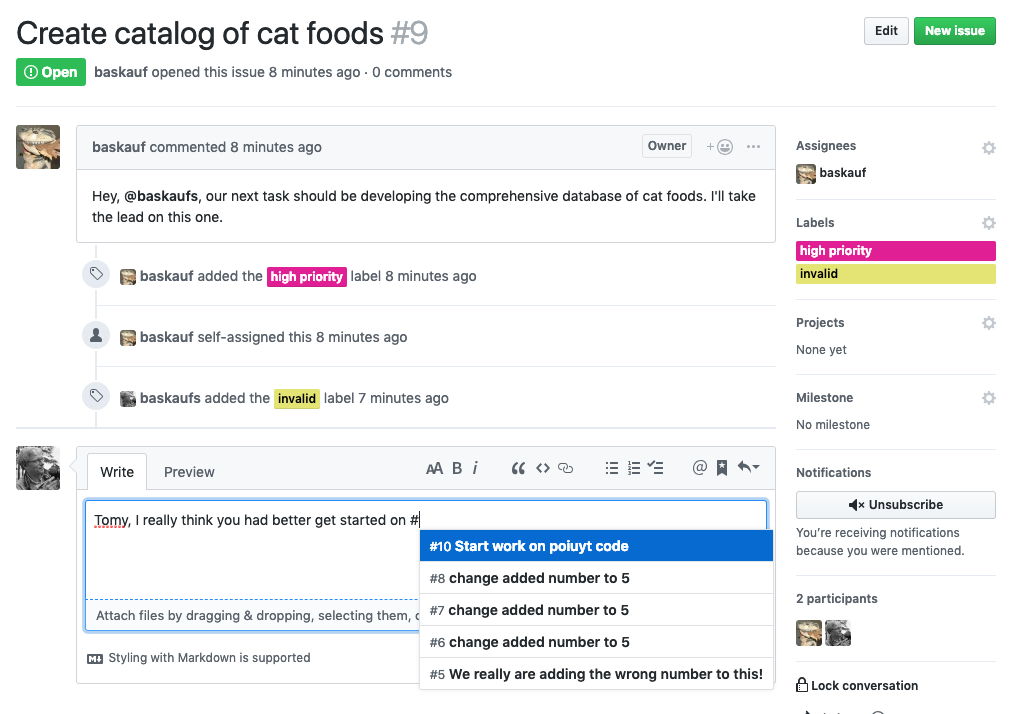
You can cross-reference other issues by typing the issue number after a hash (#) character.
In the rendered comment, you can mouse over the linked issue to see the details.
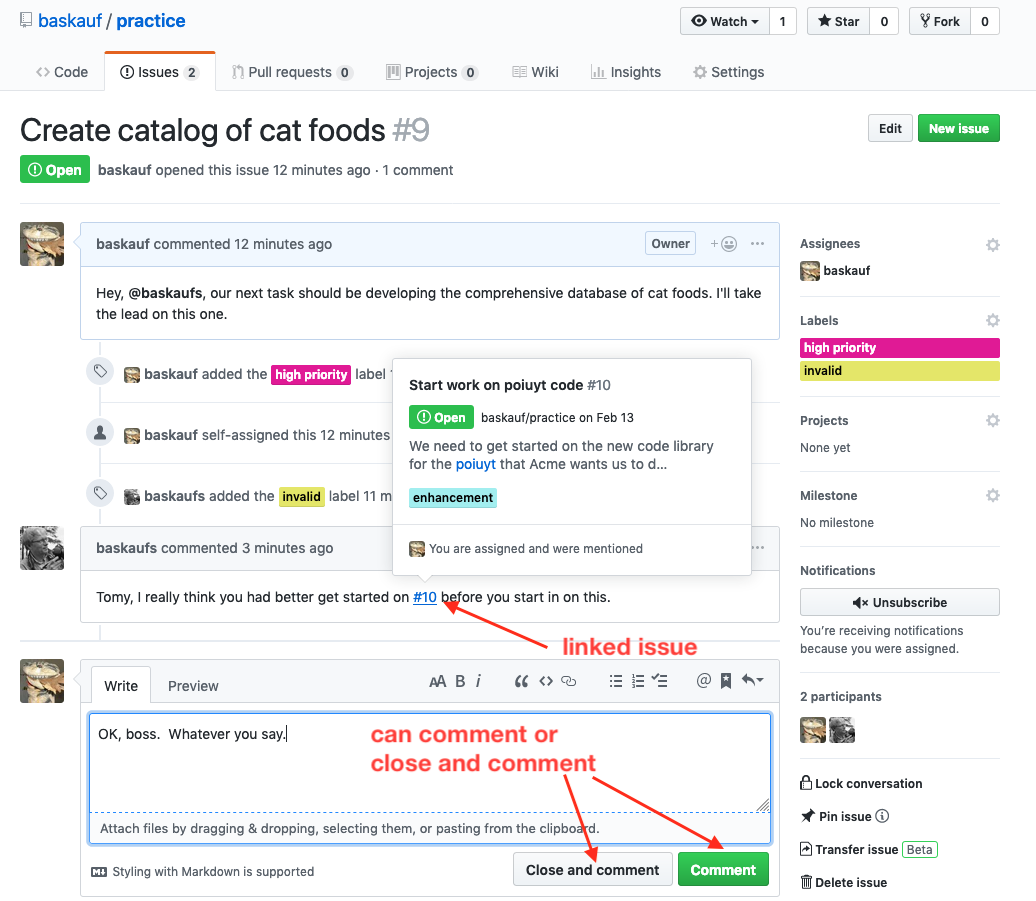
The reference to the issue also shows up in the record of the referenced issue.
Alerting collaborators (2m13s)
.
You can use the @mention system to make sure that relevant people are informed about the issue. In a comment on an issue or pull request, if you type the @ symbol followed immediately by a user or team’s GitHub username, a notification will be generated addressed to that user.
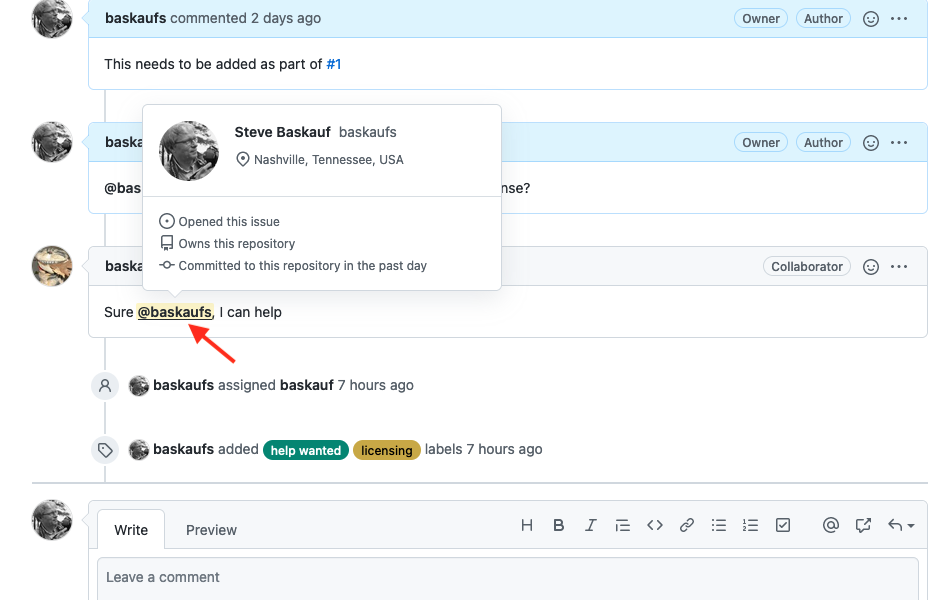
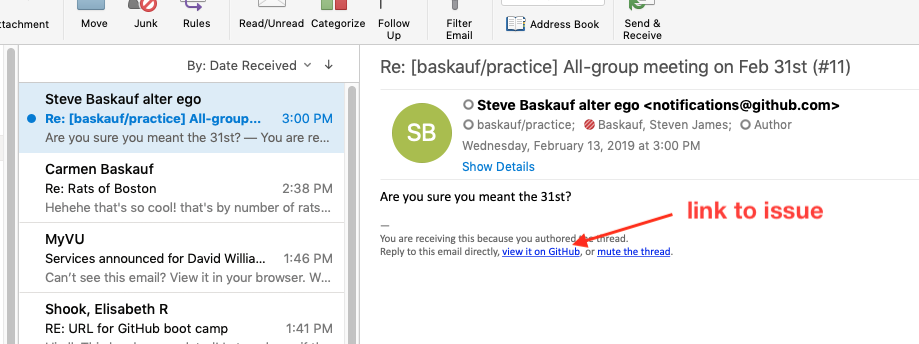
If the user has enabled email notifications, he or she will get an email containing the text of the comment and a link that will jump the user directly to the comment. There is also a link that will take the reader directly to the issue page on GitHub for additional responses. Responding to the email automatically adds the response as a comment to the issue thread.
If you want to assign the issue to some particular collaborator, clicking on the Assignees link will give a dropdown list of possibile names.
Labeling issues (1m51s)
.
It’s also a good thing to assign a label to the project. Labels are like tags in other systems. Assigning a label categorizes the issues so they can be searched. It’s also a very visual way to know the status and category of an issue and shows up in the issues list.

When you click on the Label item and a dropdown of possible labels appears. You can select one of the labels or click on the Edit icon to create a new label.
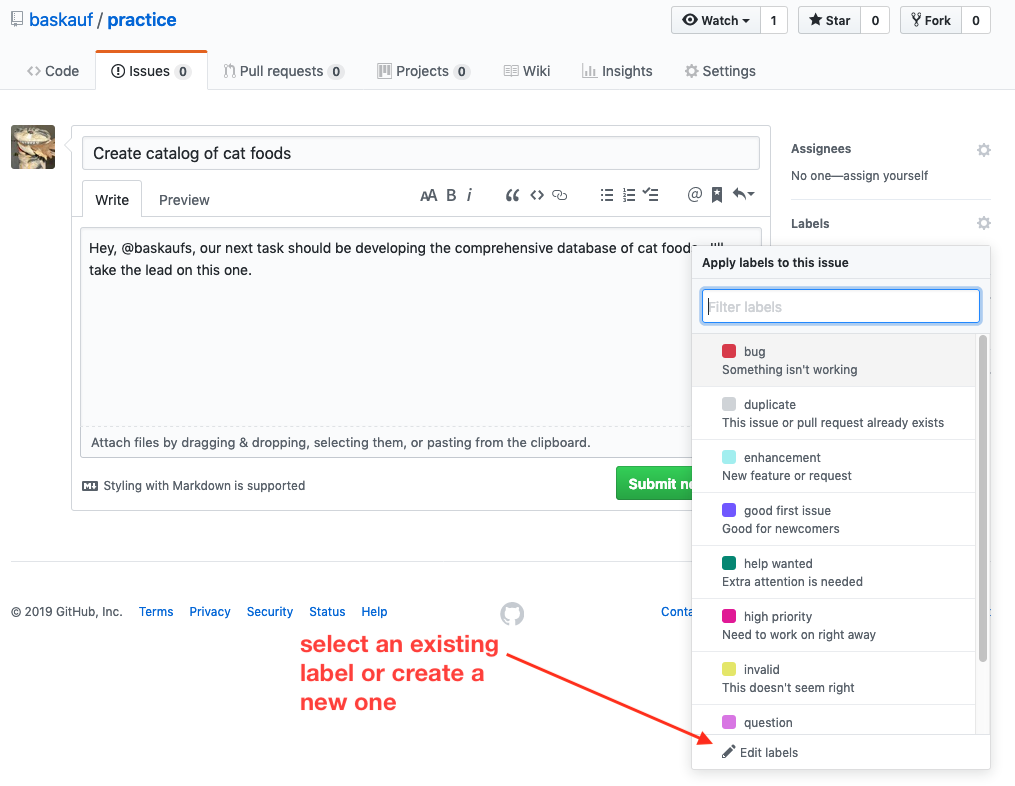
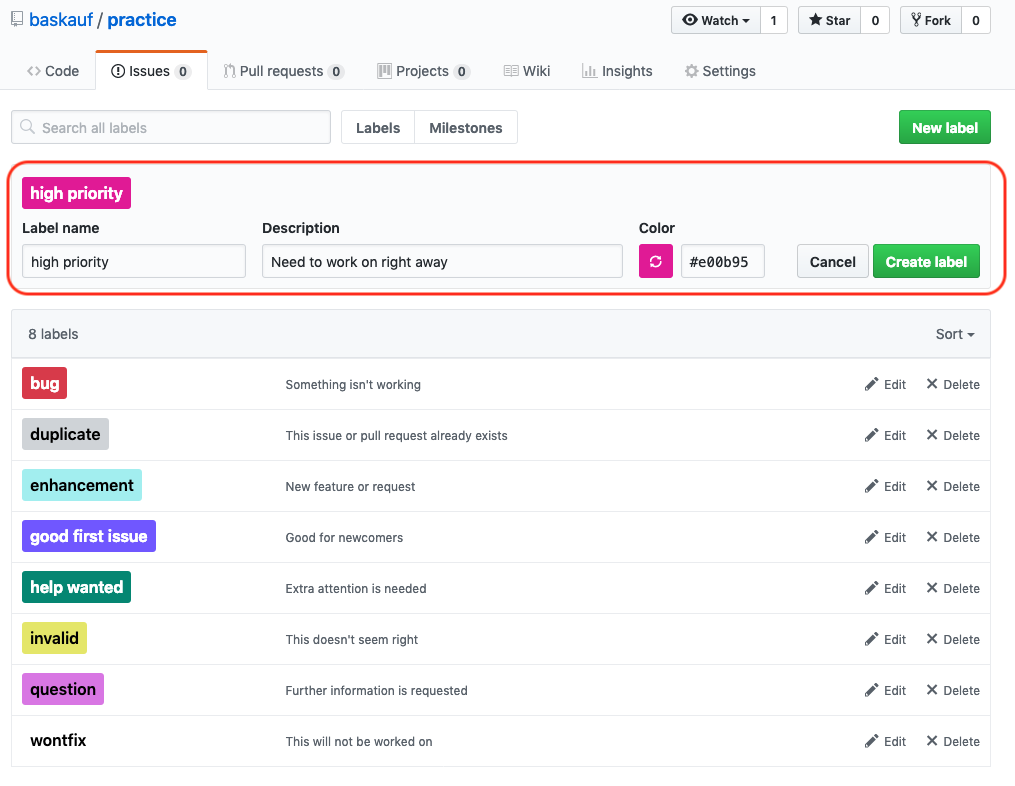
We don’t see the label we need, so click on the New label button. You can select the name, description, and color you want, then click on the Create label button.
Once the label is created, you can select it and any other labels you want to apply.
Closing an issue (2m09s)
.
When an issue is resolved, it can be closed directly by clicking the Close issue (or Close with comment) button.
You can also close the issue by including certain keywords in the text of either the commit message (“Summary”) or the optional detailed “Description”. The keywords are close, closes, closed, fixes, or fixed. In the issue comments, this action will show up along with a link to the commit. Mousing over the commit link will show the summary and description from the commit message.
Task lists (checkboxes) (4m12s)
.
Issues and milestones
When GitHub is used to manage a project, there is a conceptual connnection between milestones (such as completing a phase of the project) and release of a named version of the project. Similarly, there can be a conceptual connection between issues that need to be resolved to reach the milestone and commits that represent concrete steps taken to complete the development required for the release.
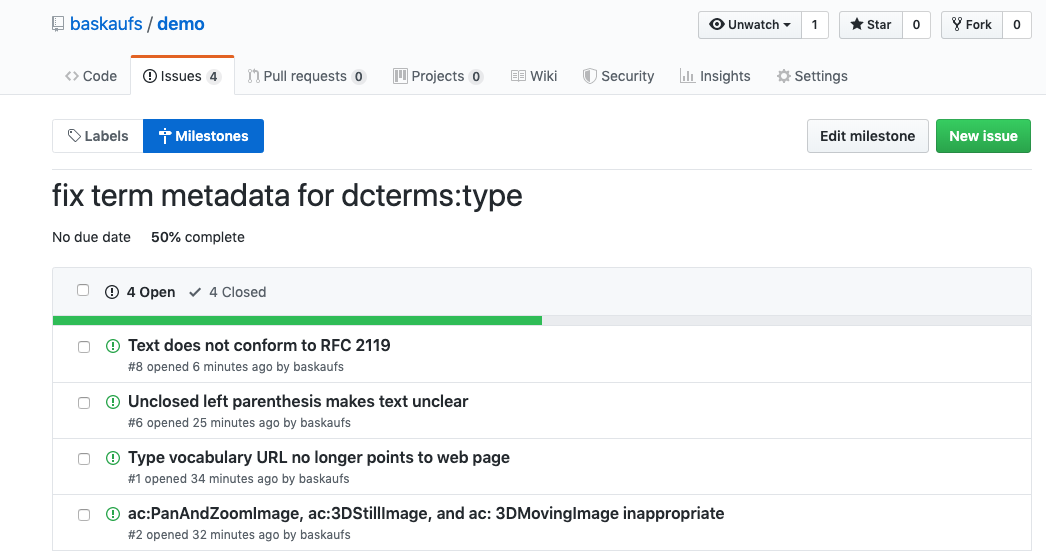
These connections can be illustrated with an editing example. In this example, recommendations for how to use a metadata term were outdated, unclear, and need revision. A review of the text identified a number of problems and an issue were created for each problem. The issues were grouped under a milestone that represented completing the necessary revisions.

Each time an issue was resolved, a corresponding commit was made for the edits necessary to fix the problem.
| Planning | Action |
|---|---|
| Issue: Dublin Core wiki doesn’t exist any more, so URL is broken | Commit: Changed bad DCMI wiki URL to Internet Archive URL |
| Issue: Recommendation for text as image is in both Usage and Notes | Commit: Removed redundant text recommendation from notes |
| Issue: Unclosed left parenthesis makes text unclear | Commit: Removed orphaned text with left parenthesis |
| Milestone: Fix term metadata for dcterms:type | Release: Edits to dcterms:type metadata complete |
As the issues were closed, they disappeared from the list of open issues in the milestone and the “fraction completed” bar for the milestone moved closer to the right side of the screen. When additional problems were discovered, they were added to the partially completed milestone.
Creating a milestone (3m27s)
.
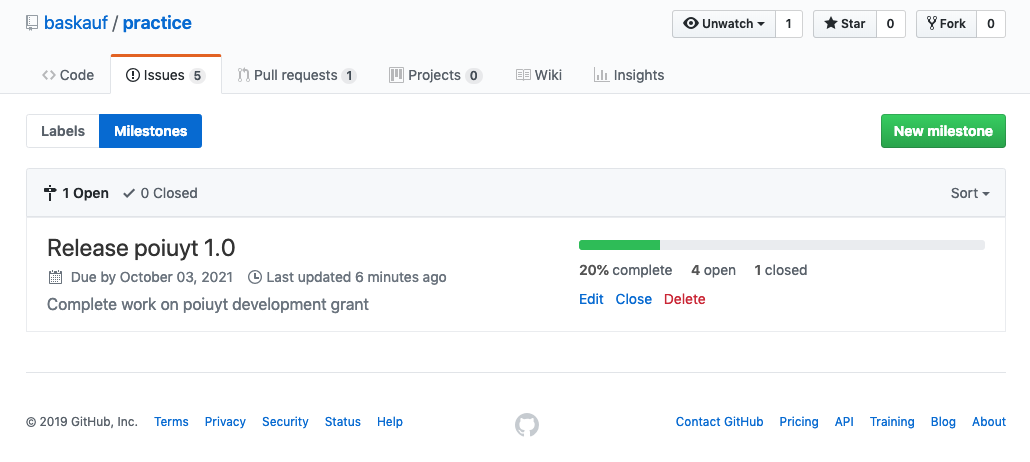
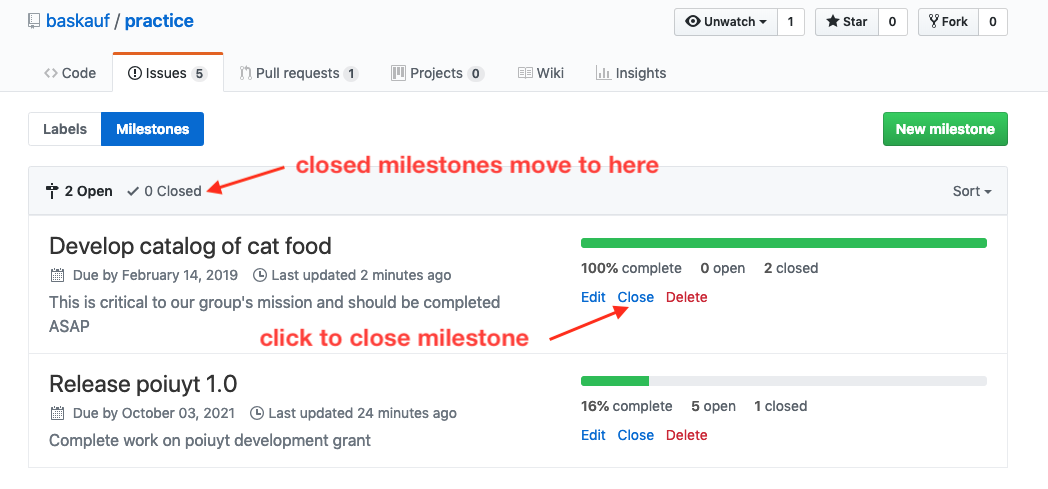
To see milestones or create a new one, click the Milestones tab on either the issues or pull requests page. If you have any existing milestones, you’ll see them listed with an indication of the progress towards completing them. Progress is measured by the fraction of issues or pull requests that have been closed.
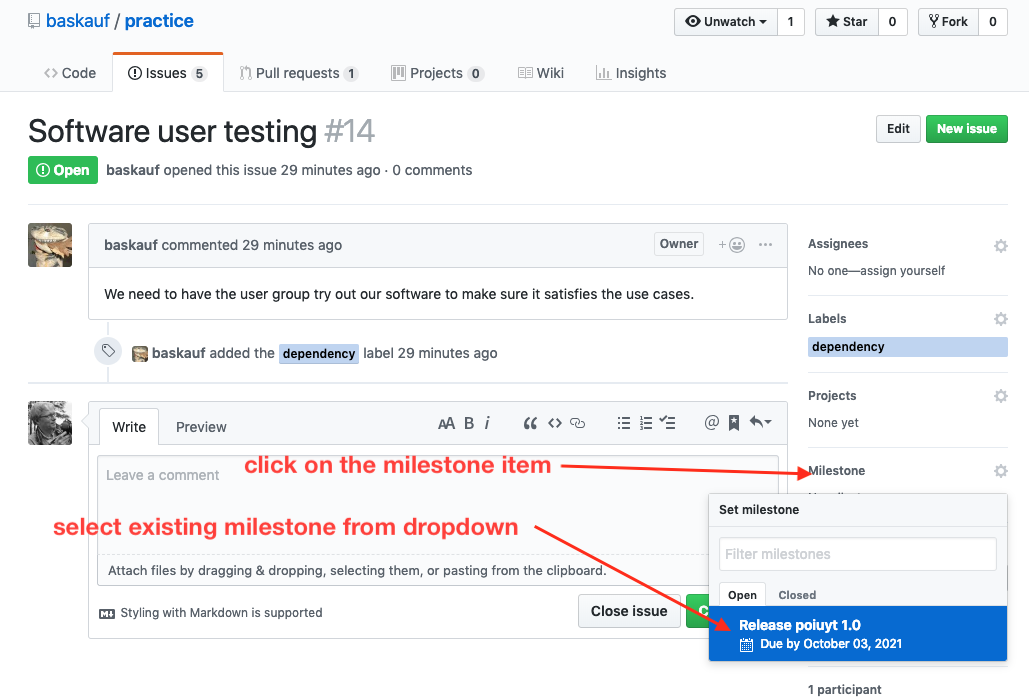
If you have created a new milestone, or want to add to an existing one, open the issue or pull request that you want to add (or add the issue to a milestone as you create it). Click on the milestone item. That will open a dropdown with lists of possible milestones. Select the one to which you want to add the issue.
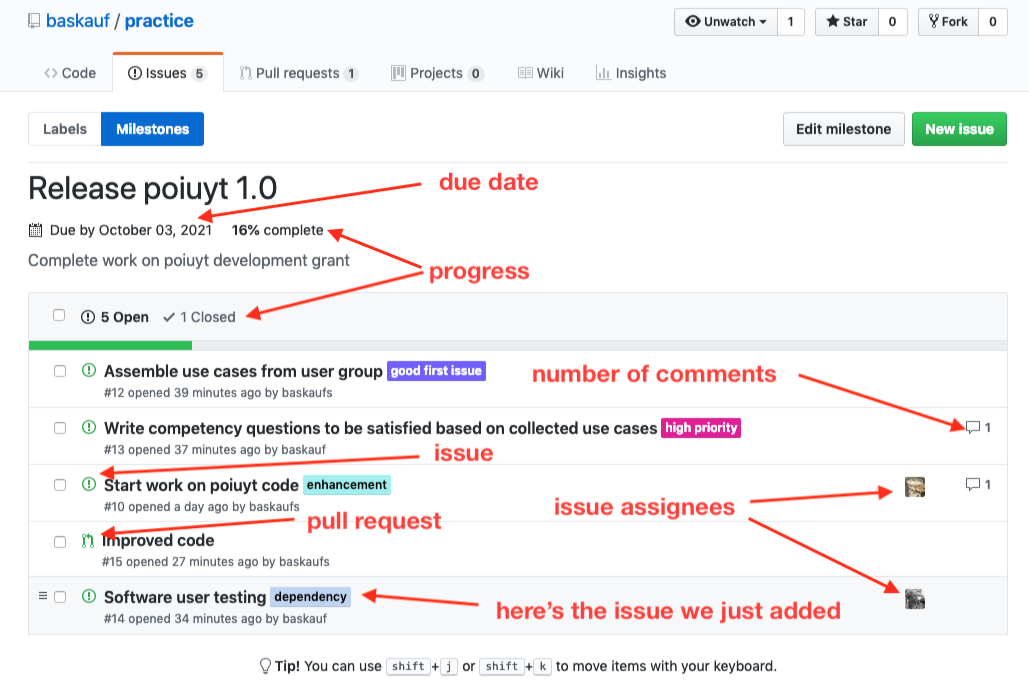
On the milestone summary page (reached from the Milestone tab on the issues or pull request page), there are all kinds of information about the issues in the milestone. If you click and drag the left side of a selected issue, you can order the issues. As issues are resolved, they disappear from the open list and the progress goes towards 100%. Closed issues can still be viewed from the Closed tab. Clicking on an issue or pull request in the list will take you to its page. If a new issue is created from the milestone page, it will automatically be associated with that milestone.
When all issues in a milestone have been completed, the milestone itself can be closed. It does not disappear, it simply moves to the list of closed milestones.
Releases (2m02s)
Releases are tagged versions of the repository at a particular moment in time.
.
All of the components of the repository at the time of the release are available bundled together in a .zip file.
The repository can be configured to use a webhook to automatically transfer a copy of the release to be archived in Zenodo. Zenodo assigns a DOI to the release, making the version of the repository at that time citable. See this page for more information.
Practice assignment
- Create an issue in your repository’s issues tracker.
- Create several tags that are relevant to your project and delete ones that are useless. Tag your issue with one of the new tags.
- Create a commit using Desktop. In the history, right-click on the commit entry and select
View on GitHub. In your issue, add a comment that refers to the commit you just made (past the commit URL into the comment box). - Create another issue related to the first issue. Refer to the first issue using hash
#followed by the issue number. If you know another GitHub user’s username, @mention them in the initial comment of the new issue. - Create a third issue with checkboxes that refer to the first two issues.
- Create a milestone containing all three of your issues.
- Close one of the issues by making a commit and using
closes #in the commit message. - Close one of the first issues. Examine how this affects the appearance in the checkboxes and the milestone. (Reopen an issue if necessary to see the difference in appearance of open and closed issues.)
Next lesson: collaborative project management
Revised 2022-02-10

Questions? Contact us
License: CC BY 4.0.
Credit: "Vanderbilt Libraries Digital Lab - www.library.vanderbilt.edu"