previous page: forking and the Open Source model
Managing a website with GitHub Pages
GitHub Pages is a system for creating free, non-commercial websites using GitHub. It’s a static site generator, meaning that the content of every page is created manually (vs. dynamic sites where pages are generated from a database or based on user input).
For further reference, read GitHub’s documentation about Pages
The Big Picture
The following diagram shows the components of the GitHub pages system and how they interact with each other.
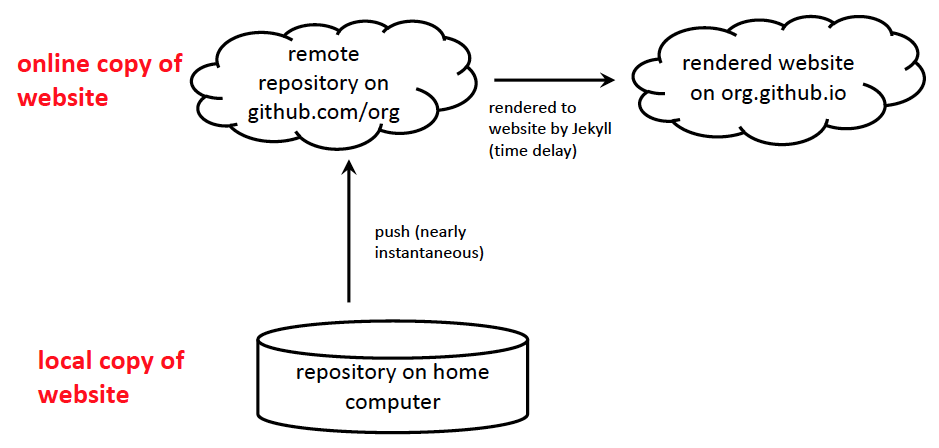
Each of these pieces is illustrated in the screenshots that follow.
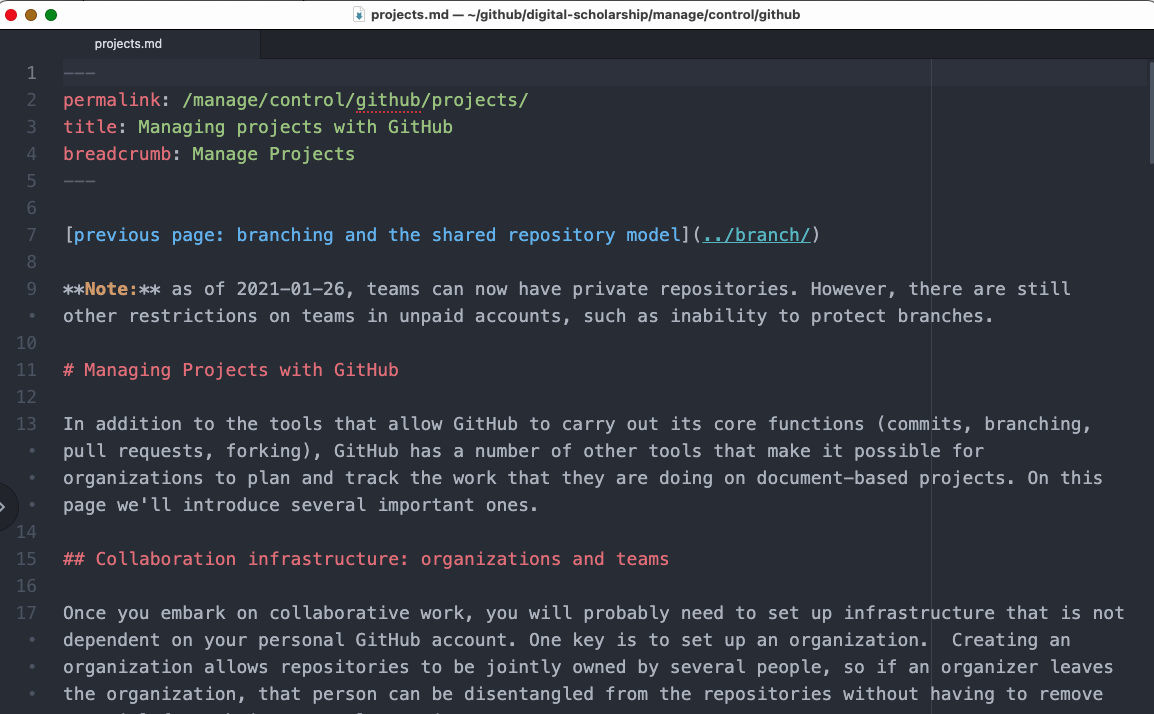
Markdown text file (editing in local repository)
This is how you’ll generate the content by creating a text file using Markdown syntax.
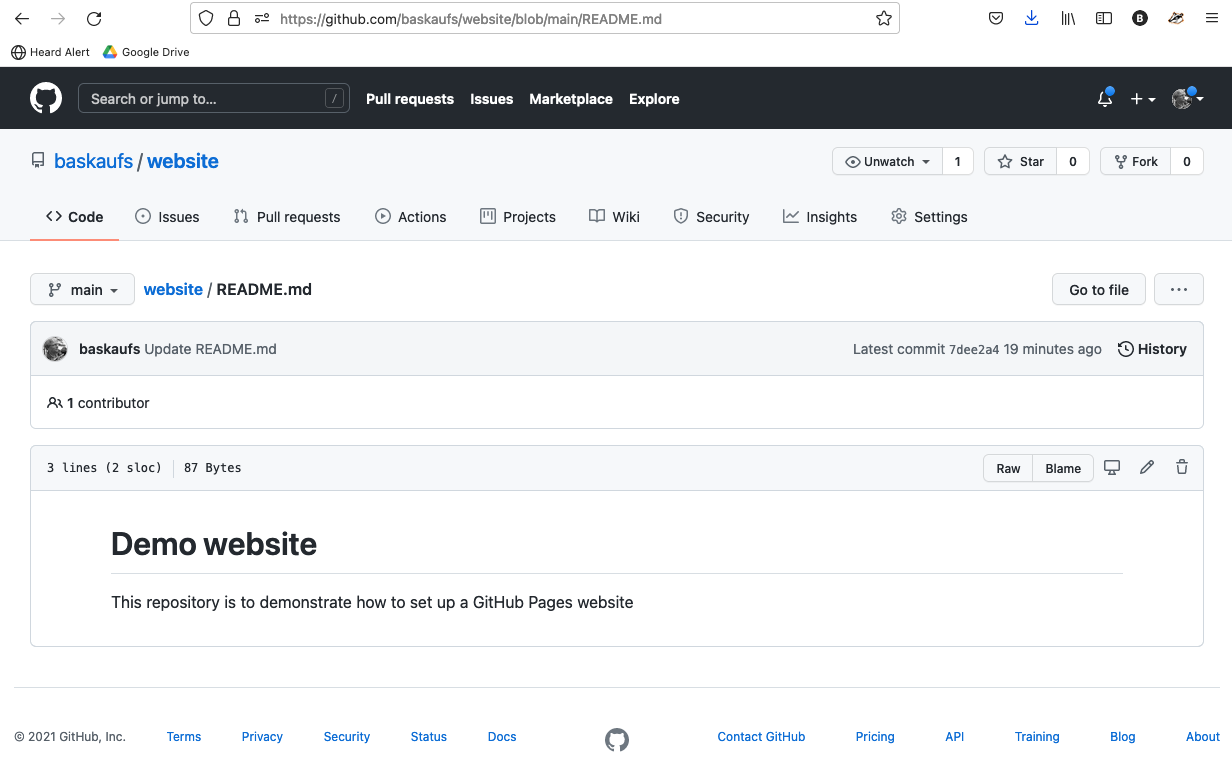
Text file rendered on GitHub (online repository)
URL pattern https://github.com/accountname/repository/blob/branch/path
Example URL https://github.com/HeardLibrary/digital-scholarship/blob/gh-pages/manage/control/github/projects.md
If you look at the text file after it’s been pushed to GitHub, the Markdown will be rendered, but without any styling.
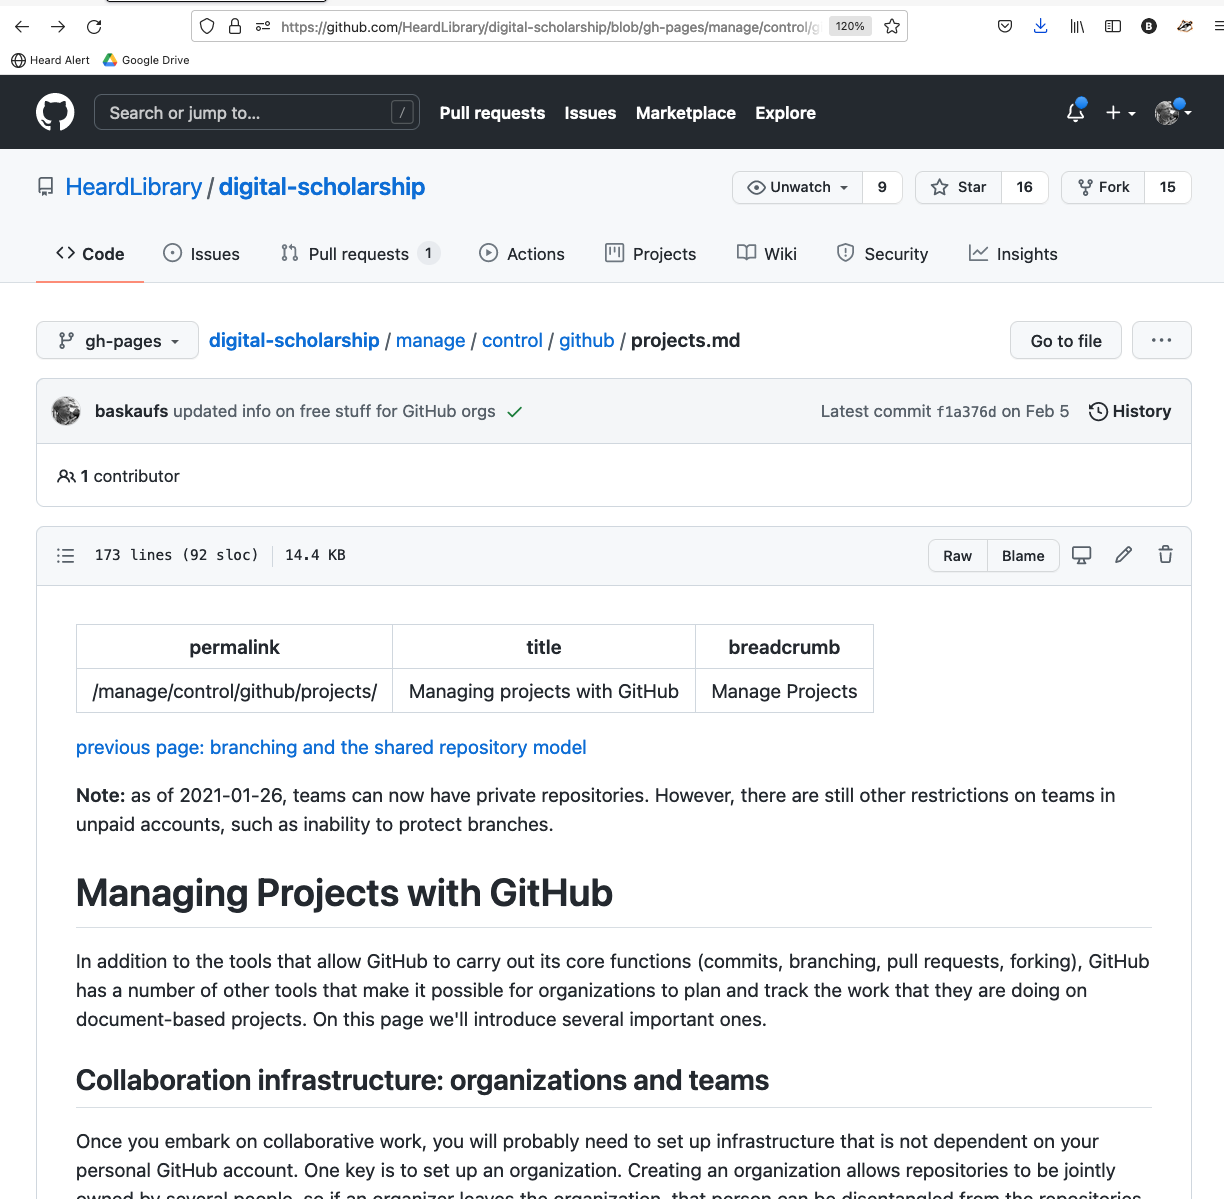
To see the actualy Markdown that you uploaded, click the Raw button.
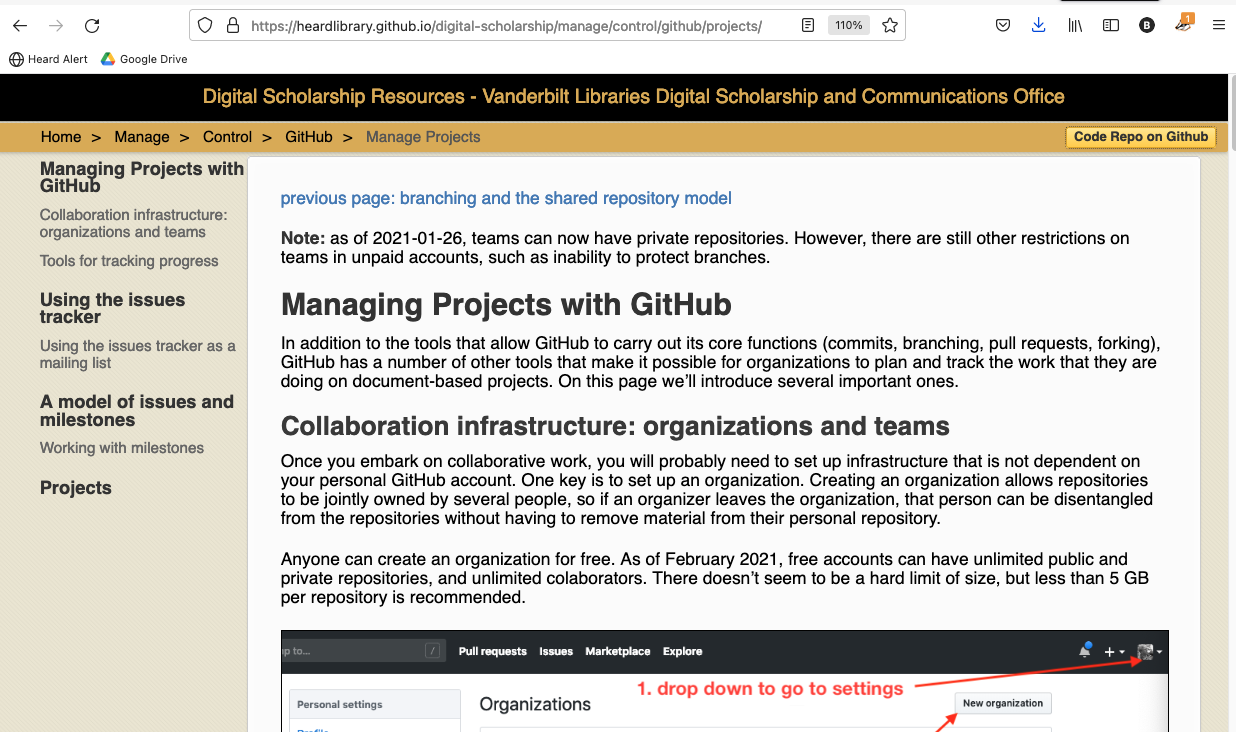
Web page generated by Jekyll from text file (rendered website)
URL pattern https://accountname.github.io/repository/path
Example URL https://heardlibrary.github.io/digital-scholarship/manage/control/github/projects/
After Jekyll renders the website, it will have whatever styling has been applied through a website template or other CSS styling that is added manually.
Note on case sensitivity:
Internet domains and subdomains are not case sensitive. Notice in the example above, the organizational account name is HeardLibrary. However, when that name is used as the subdomain, it can be in any case (upper or lower) and still work, as in the URL above in all lower case. Thus, the URL https://HeardLibrary.github.io/digital-scholarship/manage/control/github/projects/ will work, although it gets re-written in all lower case, (i.e. heardlibrary).
However, case sensitivity in parts of URLs after the domain name depends on the web server. The GitHub pages server IS case sensitive. So the URL https://heardlibrary.github.io/Digital-Scholarship/manage/control/github/projects/ (with capitalization in the repository name) will NOT work.
Because the repository name and directory structure will be used to form the eventual URLs of web pages, it is best to use repository and directory names that are:
- short
- all lower case
- alphabetic only (although names with numerals, underscores
_, and hyphens-are allowable)
We will see how to simplify the URL and use custom domain names in a later lesson.
Setting up Pages for a GitHub repository
Each repository can have a GitHub Pages website associated with it. We use the settings to determine the directory where that website lives. In this example, we will use the repository name website.
Create a new repository called website and initialize it with a README.md file. Don’t worry too much about what’s in the README since most people will never see it.
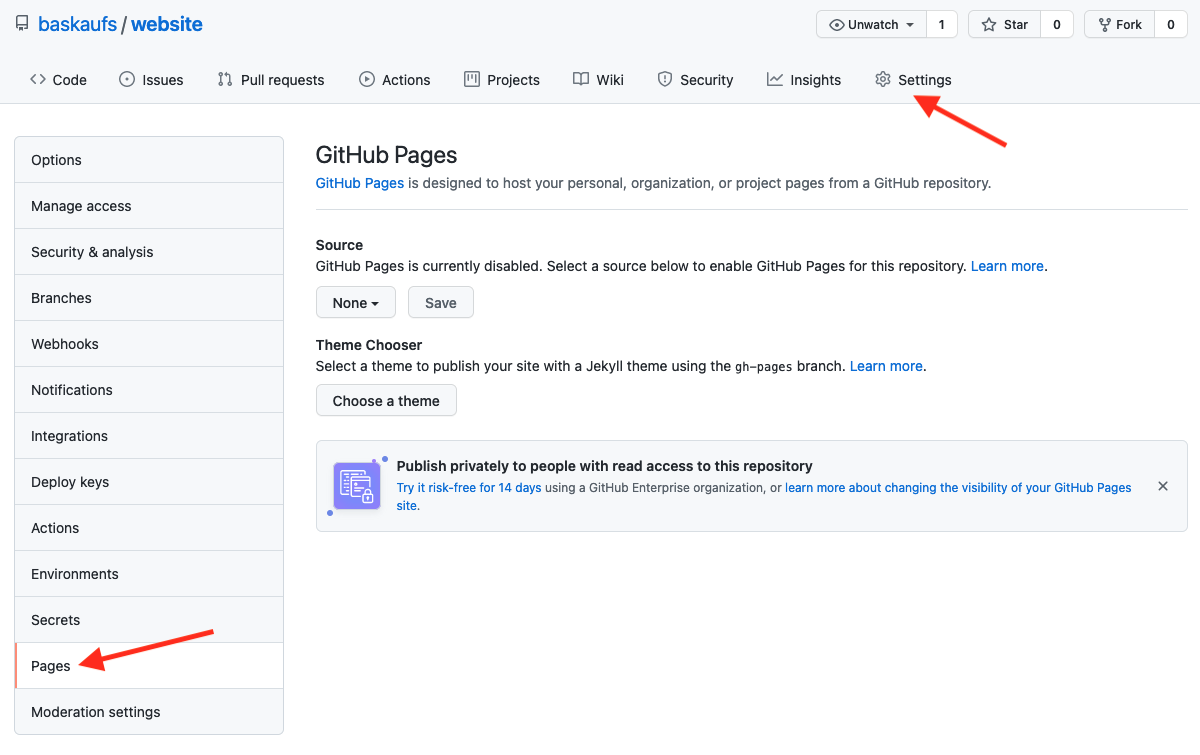
Click on the Settings tab, then click on Pages in the left navigation menu.
Setting up the source of the website
Historically, there have been two typical ways to configure a GitHub Pages website: using the docs directory within the main branch, or using the root directory of a branch called gh-pages. You can use either method, but we recommend using the docs directory for a couple reasons.
One is that it does not require understanding anything about branches and how to switch between them. The other is that it allows you to simultaneously edit the website (within the docs directory) and other files in different directories of the default main branch. If you use the gh-pages branch for the website, you need to commit any changes to files before you switch between the main and gh-pages branches – you can’t work on files within and outside of the website at the same time. If your repository is only going to be used for a website, then it doesn’t matter, but in some cases you might have data files, build scripts, etc. living in other parts of the repository outside of the ‘docs’ directory and the inability to edit them at the same time as the website can be annoying.
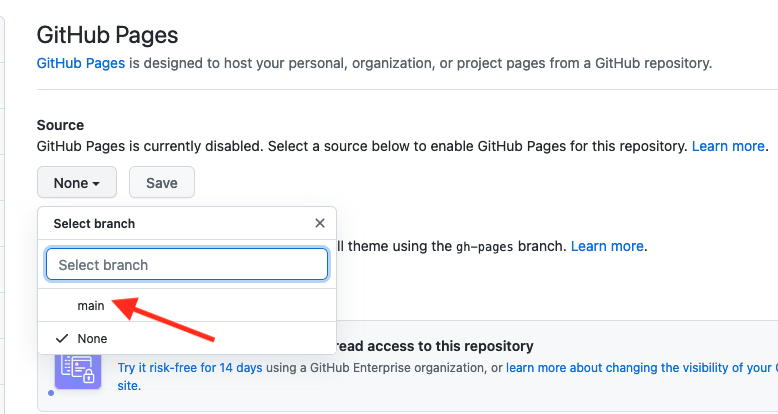
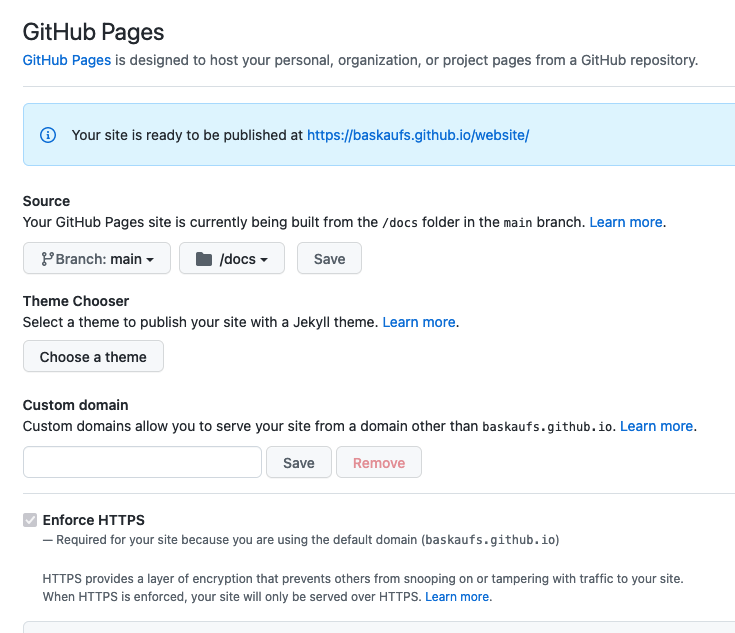
To use the docs directory of the main branch, do the following steps:
Drop down the Select branch (defaulting to None) dropdown and select main.
Drop down the Select folder (defaulting to /(root)) dropdown and select docs.
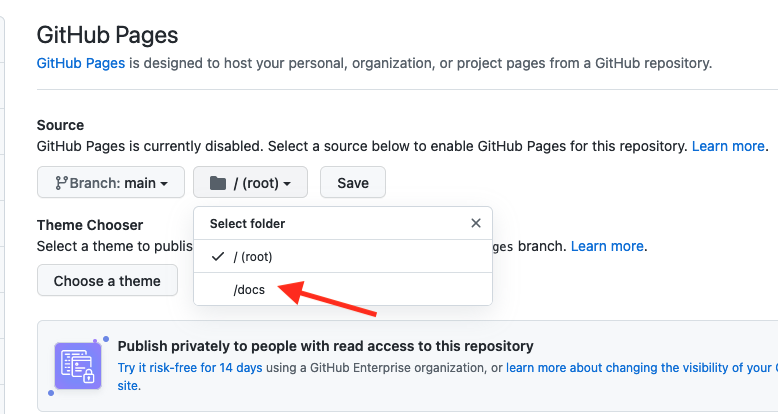
Then click the Save button. If successful, you should see a message saying that your website is ready to be published. For now, we will skip setting up the Theme Chooser and Custom domain. HTTPS is automatically enforced, so the URL will begin with https://.
Setting up the landing page for the website
We are now ready to create the landing page for the website. In theory, you could do all of the editing using the online editor, but that would be annoying and not make use of the tools available with a good code editor. Making your edits locally and pushing them up to GitHub also lets you control when the changes become visible. You can edit the website using a number of commits and when it’s the way you want, you can push them all to GitHub at once.
Clone the new repository to your local drive. If you don’t know how to do that, watch this video and look at the accompanying screenshots.
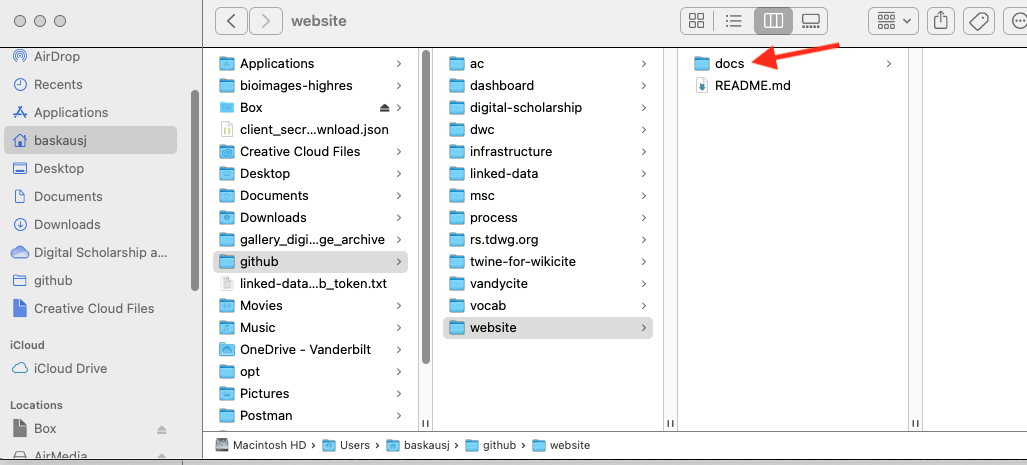
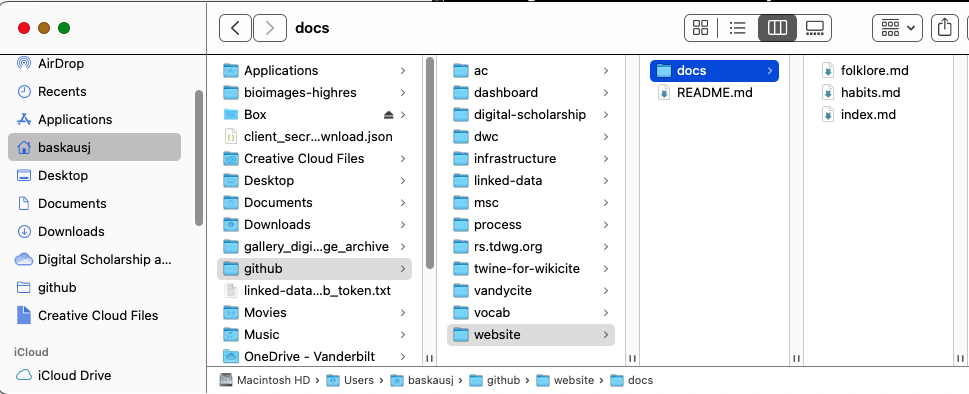
Once you’ve cloned the repo, go to the repository folder and create a subfolder called docs.
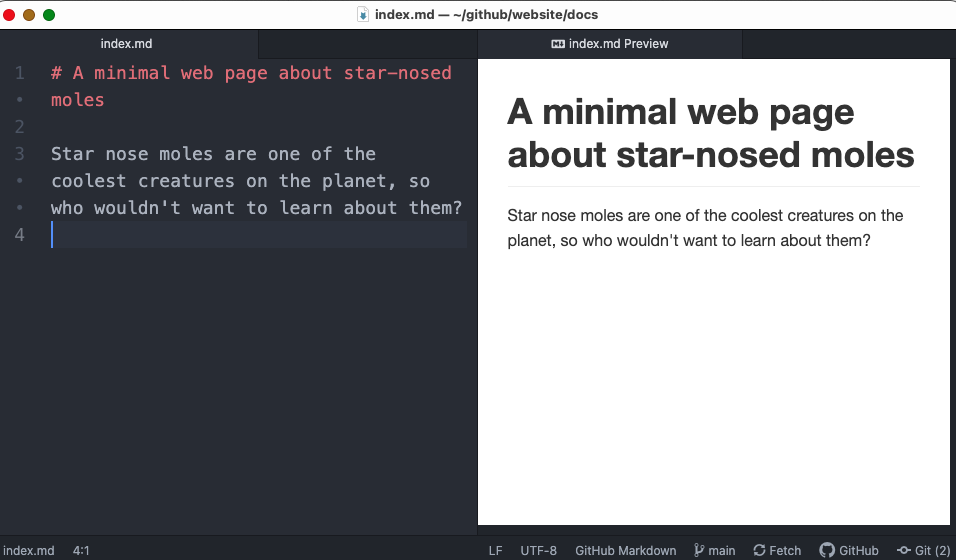
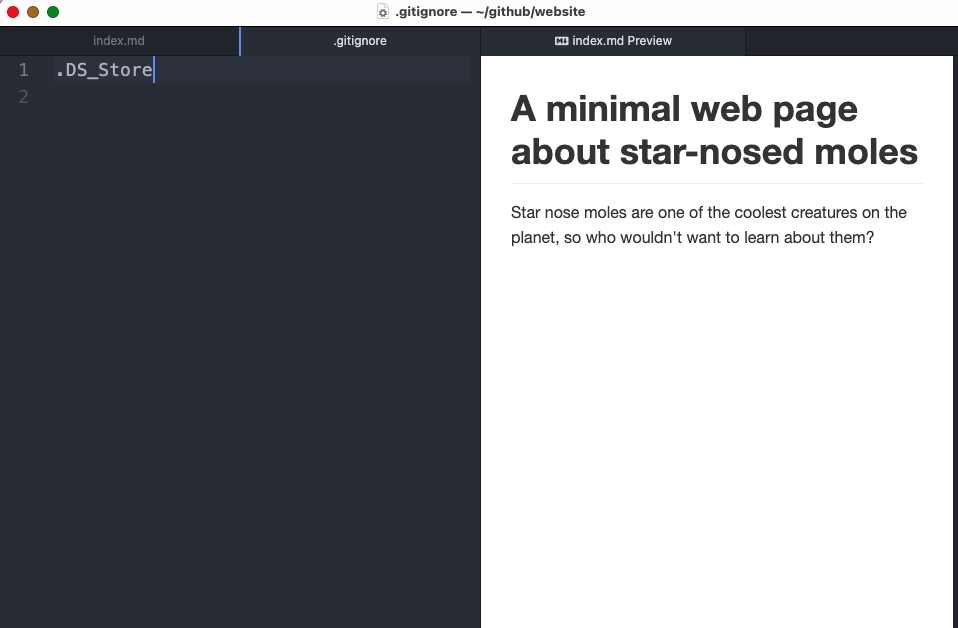
Now open your code editor. We will use Atom since it’s easy to use and has a Markdown preview. (To get rid of the Project pane at the left, go to the View menu and toggle Toggle Tree View.) Create a new file with a first level header line (# at the left margin), a blank line, and another line with text. Save the file as index.md in the docs folder you created. To see what the Markdown will look like when it’s rendered, select Markdown preview and Toggle preview from the Packages menu.
If you look at the GitHub Desktop interface, you’ll see the new page you created.
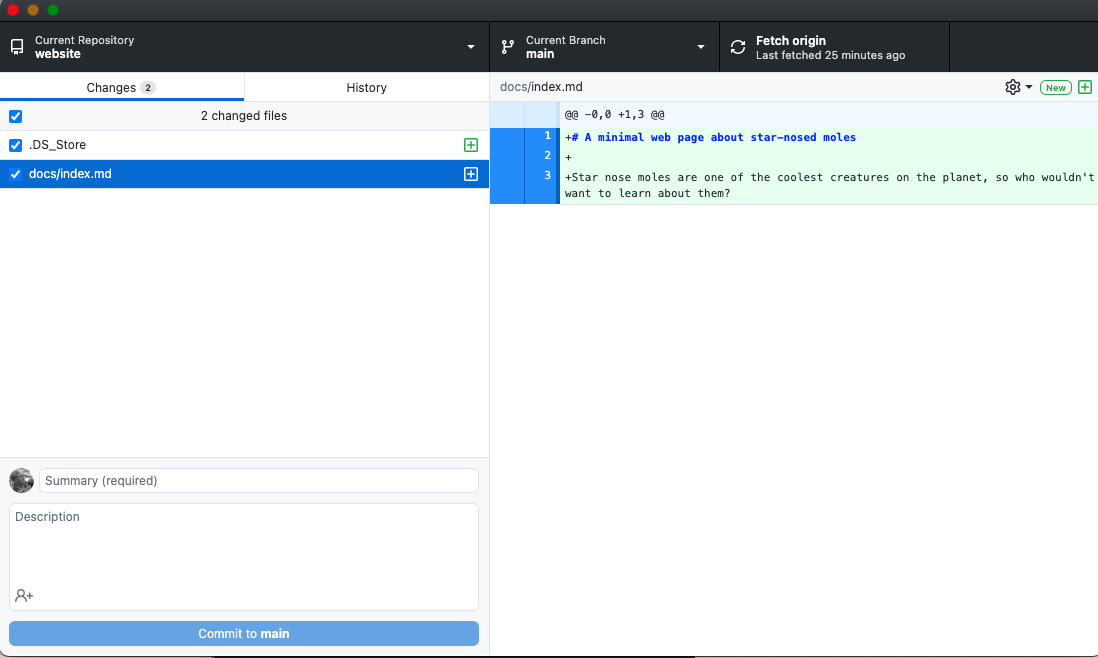
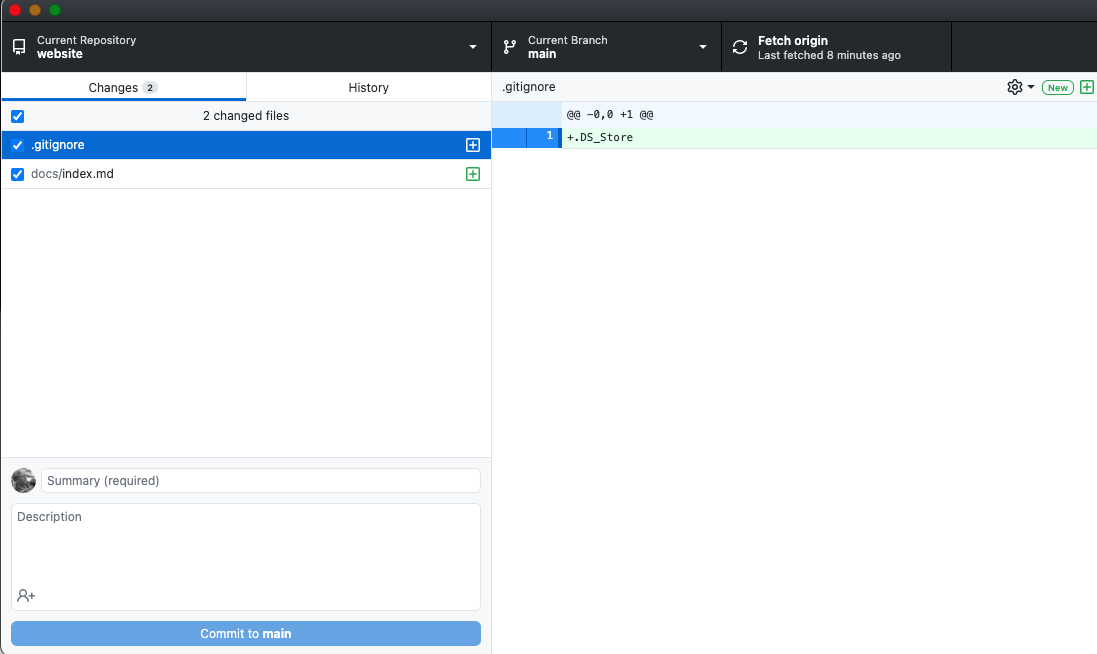
If you are using a Mac, you may also see an annoying “invisible” file called .DS_Store. We don’t really want our website mucked up with this file, so let’s add it to a .gitignore file for the repository. Using your text editor, create a file in the root directory of the repository called .gitignore with a single line like this:
.DS_Store
Now if you look at GitHub Desktop again, you’ll see the new .gitignore file you created, but the .DS_Store file is no longer visible since git is ignoring it.
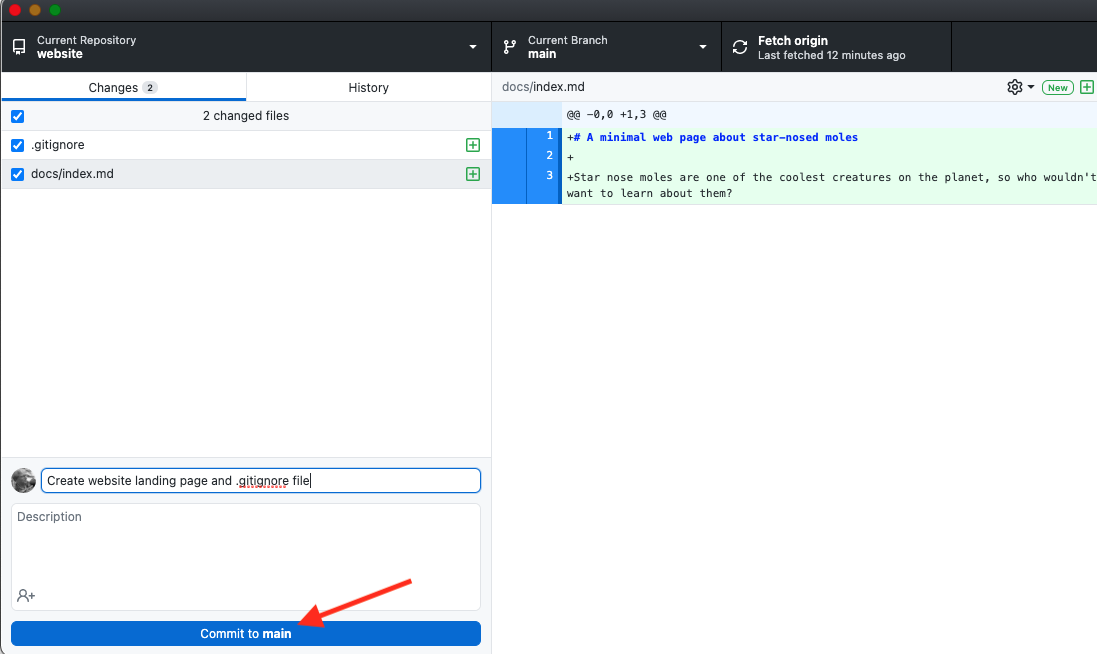
You can close the .gitignore tab in Atom since you won’t need it any more. Write a commit summary, then click Commit to main.
If you click the History tab, you’ll see your latest commit added to the history of the local repository. But the 1 by the Push origin tab shows that this commit has not yet been pushed to GitHub.
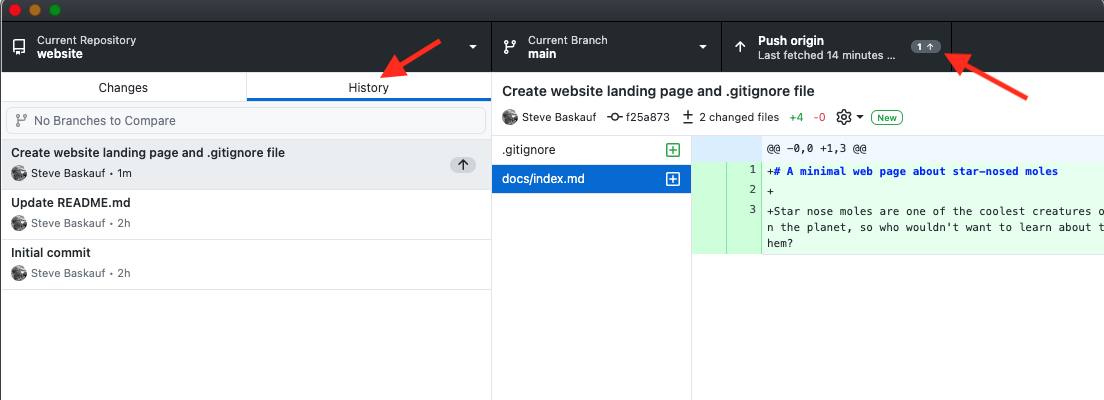
Click the Push origin tab.
In the GitHub web interface, click the Code tab, then the docs folder, then the index.md file. You should immediately be able to see the rendered landing page Markdown file (without styling).

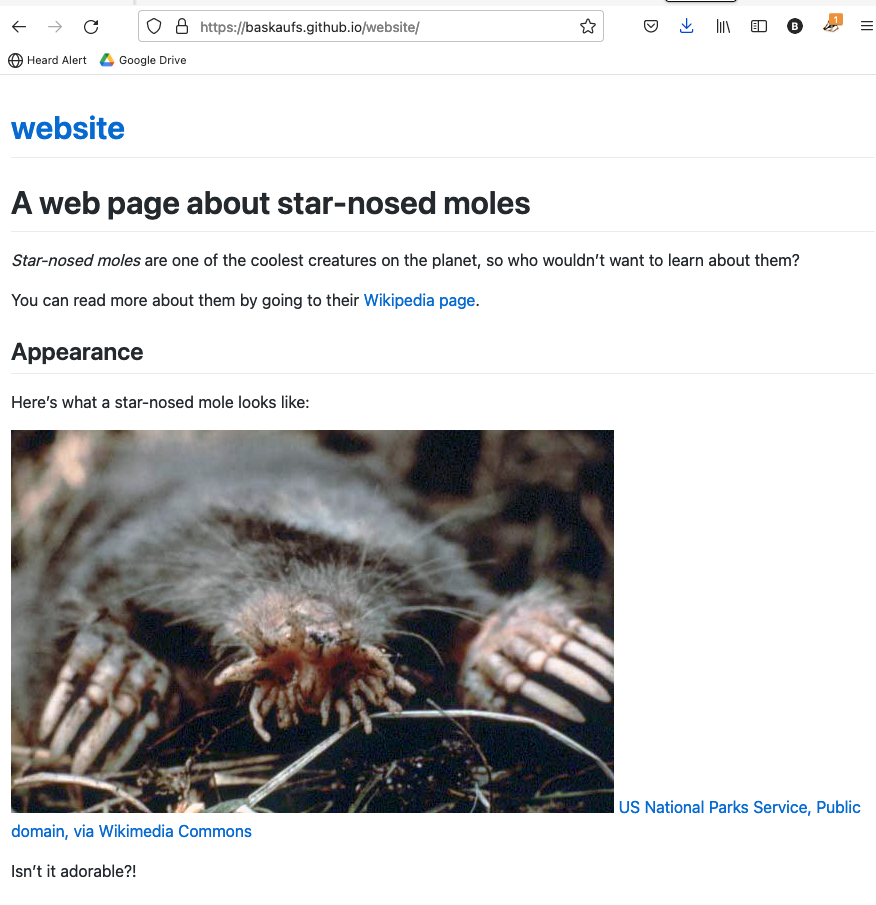
To see the actual web page as converted by Jekyll, type the base URL for the website into your browser, using this form: https://accountname.github.io/repository/. In this example, it’s https://baskaufs.github.io/website/.
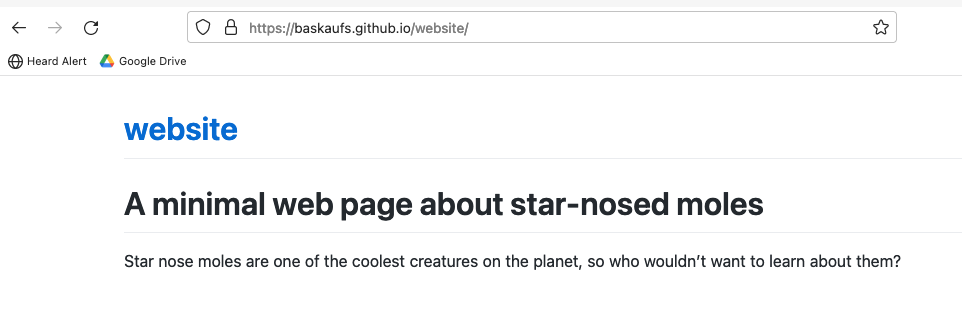
If you don’t immediately see the web page, wait a minute and try again. Jekyll does not immediately render changes to GitHub pages websites – sometimes there is a short delay.
This is a very boring, vanilla website because we didn’t select any theme. However, if we right click the page and select View page source, we can see that Jekyll did do some “magic” for us.
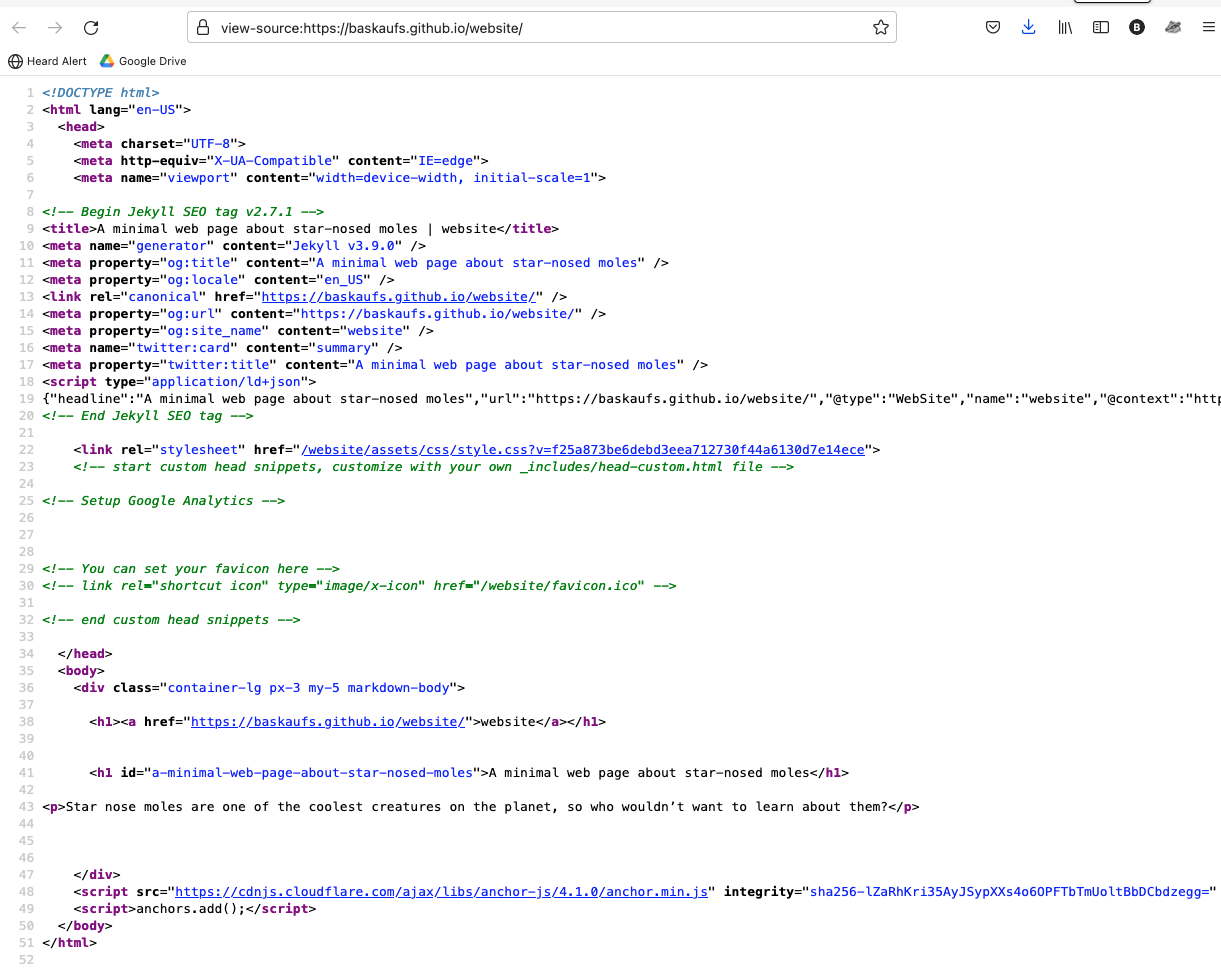
The web page has been converted from Markdown to HTML. In this case, it just created an <h1> and a <p> element from the Markdown that we wrote in the source document. But it’s easy to generate much more complex HTML from simple Markdown.
Adding content to the web page
Let’s add a couple more elements to the page to make it better. If you don’t know any Markdown, start by reviewing some basic markup. I’m going to add some formatted text and a link to Wikipedia:
# A web page about star-nosed moles

*Star nose moles* are one of the coolest creatures on the planet, so who wouldn't want to learn about them?

You can read more about them by going to their [Wikipedia page](https://en.wikipedia.org/wiki/Star-nosed_mole).
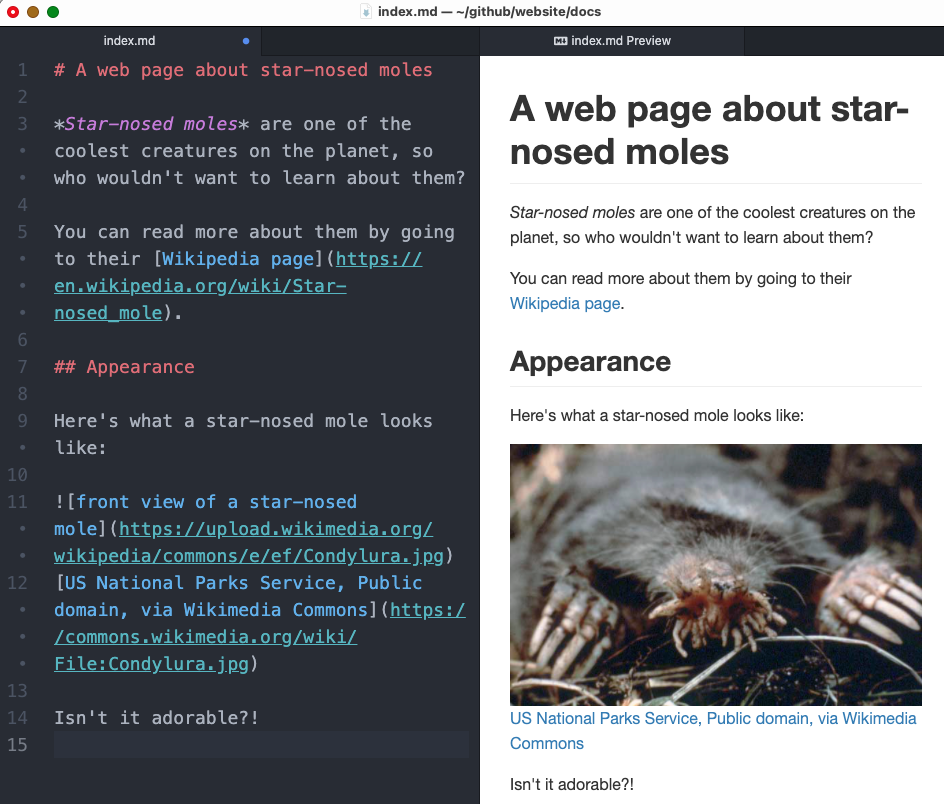
We can see how this Markdown is rendered by looking at the Markdown preview.
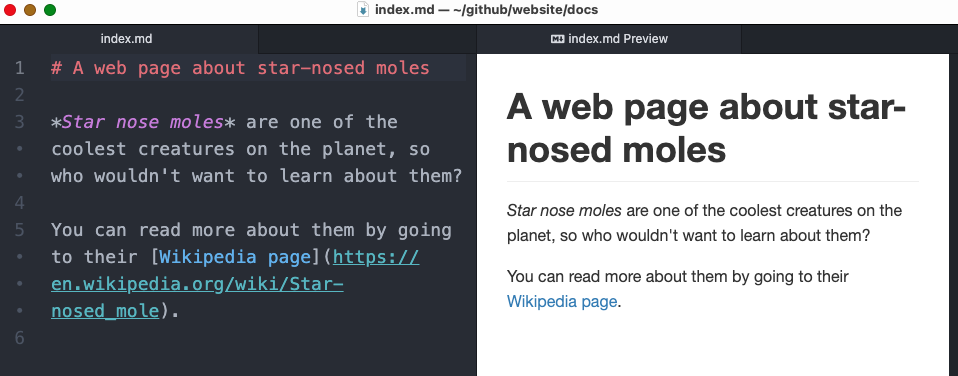
You can test that the link works by clicking on it in the preview.
Let’s add an image to make the page more interesting. Wikimedia Commons is a good place to look for images that can be freely used on your website. I searched for “star-nosed mole” and found a good picture: https://commons.wikimedia.org/wiki/File:Condylura.jpg. However, this URL is the URL to the web page about the picture, not the picture itself. To get the actual image URL, click the Download link above the picture, then click the link for the size of image you want.
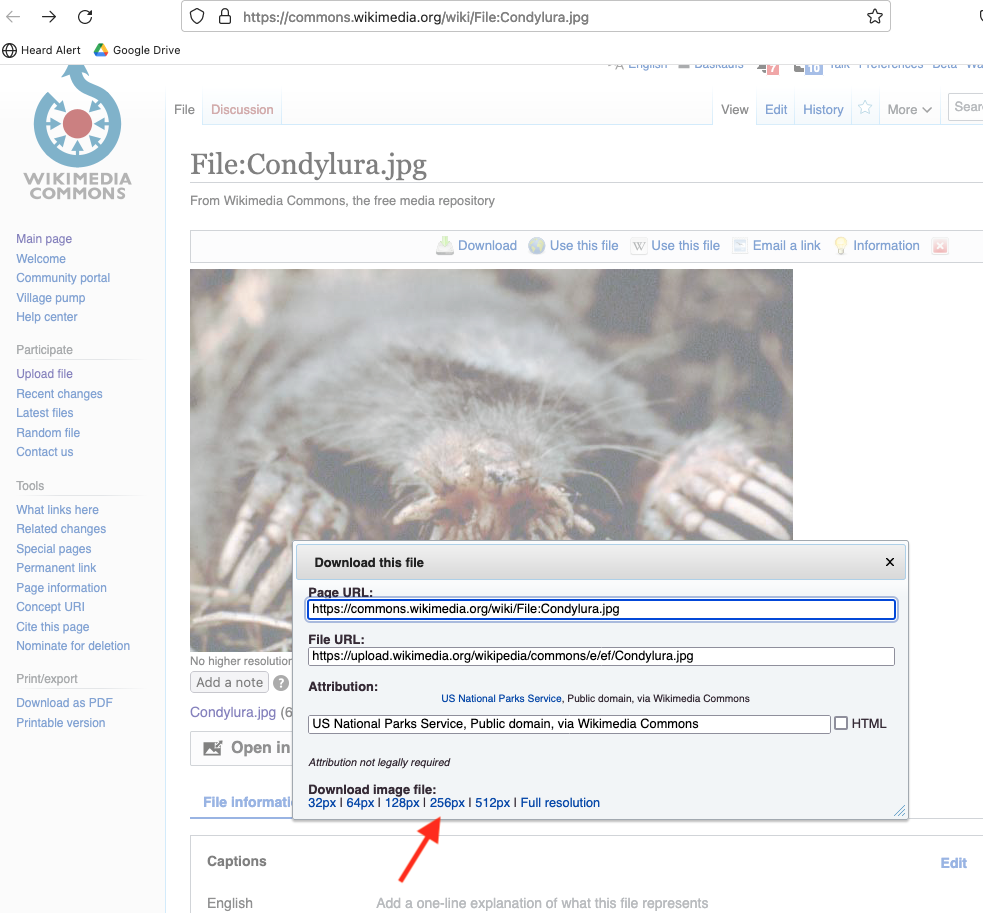
The image will open in a new tab.
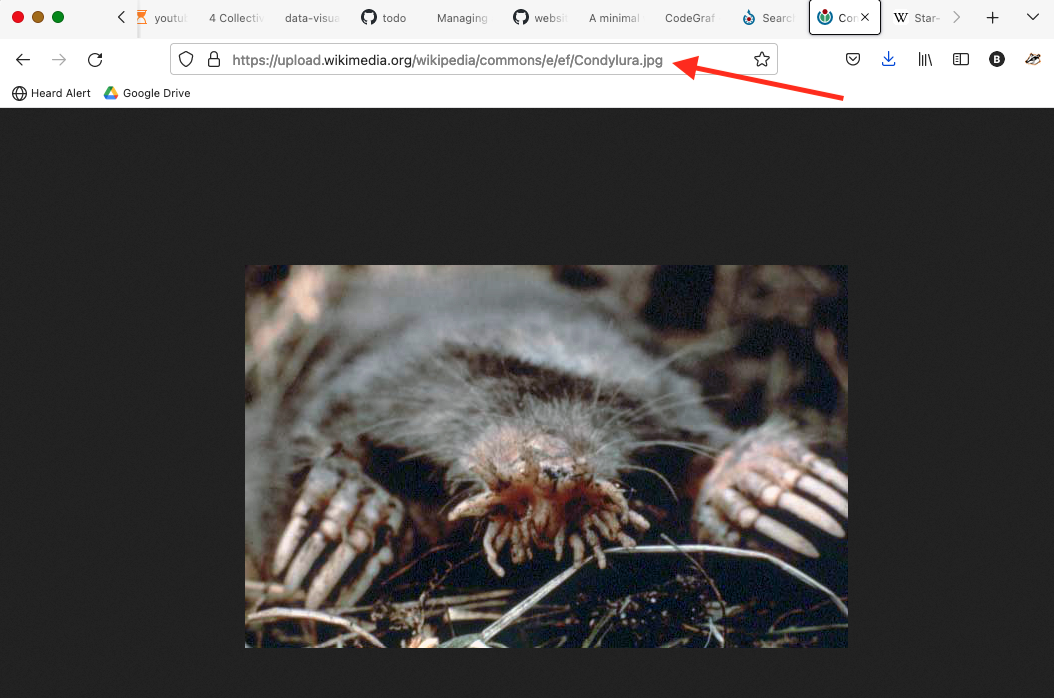
The URL in the browser bar is the one you need to use to embed the image in your page. The Markdown for adding an image is very similar in format to adding a link. The main difference is that it’s preceeded by an exclamation mark (!). The alt text goes in the square brackets and the direct link to the image goes in the parentheses.
This image isn’t under copyright, but I’ll add an attribution link anyway, using the information provided in the popup Download dialog.
Here’s what the Markdown looks like for adding the image:
## Appearance
Here's what a star-nosed mole looks like:

[US National Parks Service, Public domain, via Wikimedia Commons](https://commons.wikimedia.org/wiki/File:Condylura.jpg)
Isn't it adorable?!
The Markdown preview will give you a fairly good idea of what the page will look like and at least show you if you got the image URL right.
Save the edited Markdown, then go to GitHub desktop, add a commit message, commit, and push the changes to GitHub.
After waiting a few moments for Jekyll to re-render the page, go to the landing page tab and refresh the page. If the changes don’t show up for a long time, make sure that you actually saved the file in Atom, that the commit with the changes shows up in the commit history, and that there isn’t any little 1 in the Fetch/Push origin tab.
There is still some room for improvement, but we’ll work on that later.
Child pages
Child pages have URLs that extend via slashes (/) beyond the landing page URL.
Creating child pages
There are two methods for creating other pages below the landing page in the website hierarchy. I’ll call them “named Markdown files” and “folder/index.md”.
Your choice of method will depend primarily on your organizational style preferences and on whether you intend to have a more complex page hierarchy represented in the site URLs.
named Markdown files method
Let’s say that I want to have two child pages of the landing page called habits and folklore. Using the “named Markdown files” option, I would just create two Markdown files within the docs folder called habits.md and folklore.md.
When rendered by Jekyll, these pages would have the URLs
https://baskaufs.github.io/website/habits/
https://baskaufs.github.io/website/folklore/
As you can see, the filename in front of .md is appended to the landing page URL and followed by a slash.
folder/index.md method
The alternate method is to create a subfolder for each child page, called habits and folklore respectively, and within each of those subfolders, create a Markdown file called index.md.
If you never want to have a website structure that’s more nested than one child level below the landing page, either method is equally good.
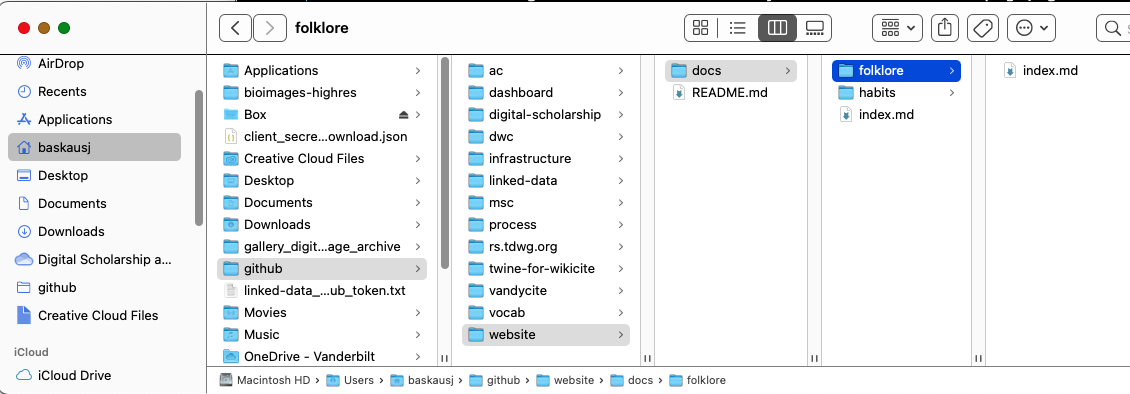
Deeply nested child pages
However, if you wanted to have some lower level pages like
https://baskaufs.github.io/website/folklore/virginia/
https://baskaufs.github.io/website/folklore/maine/
then you would need to create a folklore folder with an index.md file within it to handle the page https://baskaufs.github.io/website/folklore/, then place either named Markdown files for virginia.md and maine.md within the folklore folder, or create virginia and main subfolders of folklore and put an index.md file in each of them.
Linking between parent, child, and sibling pages
When creating links between pages on the site, it’s best to use relative links. That makes the website more portable. Here’s how to set up relative links between sibling pages in the same level of the hierarchy, child pages, and their parent pages. Note: the links are based only on the URL structure and are independent of the method used to actually create the pages.
linking to child pages
In the parentheses for the hyperlink, place the name of the child page, followed by a slash. For example, to link from the landing page to the folklore page, use
[learn about folklore](folklore/)
To link from the folklore page to the virginia page, use
[folk stories from Virginia](virginia/)
Linking to parent pages
In the parentheses for the hyperlink, use the relative path for a parent element (..) followed by a slash. For example, to link from the folklore page to the landing page, use
[back to the landing page](../)
The link from the Virginia folklore page up to the general folklore page would be similar.
Linking to sibling pages
To link from one page to another page at the same level below the same page, use the parent element path as in the previous example, followed by the name of the sibling page followed by a slash. For example, to link from the folklore page to the habits page, use
[habits of the mole](../habits/)
To link from the Virginia folklore to the Maine folklore page, use
[folklore from Maine](../maine/)
next page: Using themes and HTML markup with GitHub Pages
Revised 2021-09-30

Questions? Contact us
License: CC BY 4.0.
Credit: "Vanderbilt Libraries Digital Lab - www.library.vanderbilt.edu"