Understanding my computer - Lesson 3: Installing software
This is the Mac version of this page. Click for the Windows version of this page
go back to Lesson 2: Directories
What is an installed application?
In the olden days, a computer program would often consist of a single file containing executable code. All you had to do to run the program was to copy that file somewhere on your hard drive and run it.
The situation today is much more complicated. There is still at least one executable file associated with each application, but there are nearly always many other files associated with that one that are necessary for that application to run. So installing an application requires not only copying an executable file to your hard drive, but also copying all of the other files and making necessary changes to the computer’s configuration in order for the executable file to run properly. This whole process is called installing the application.
Where do applications live in a Mac?
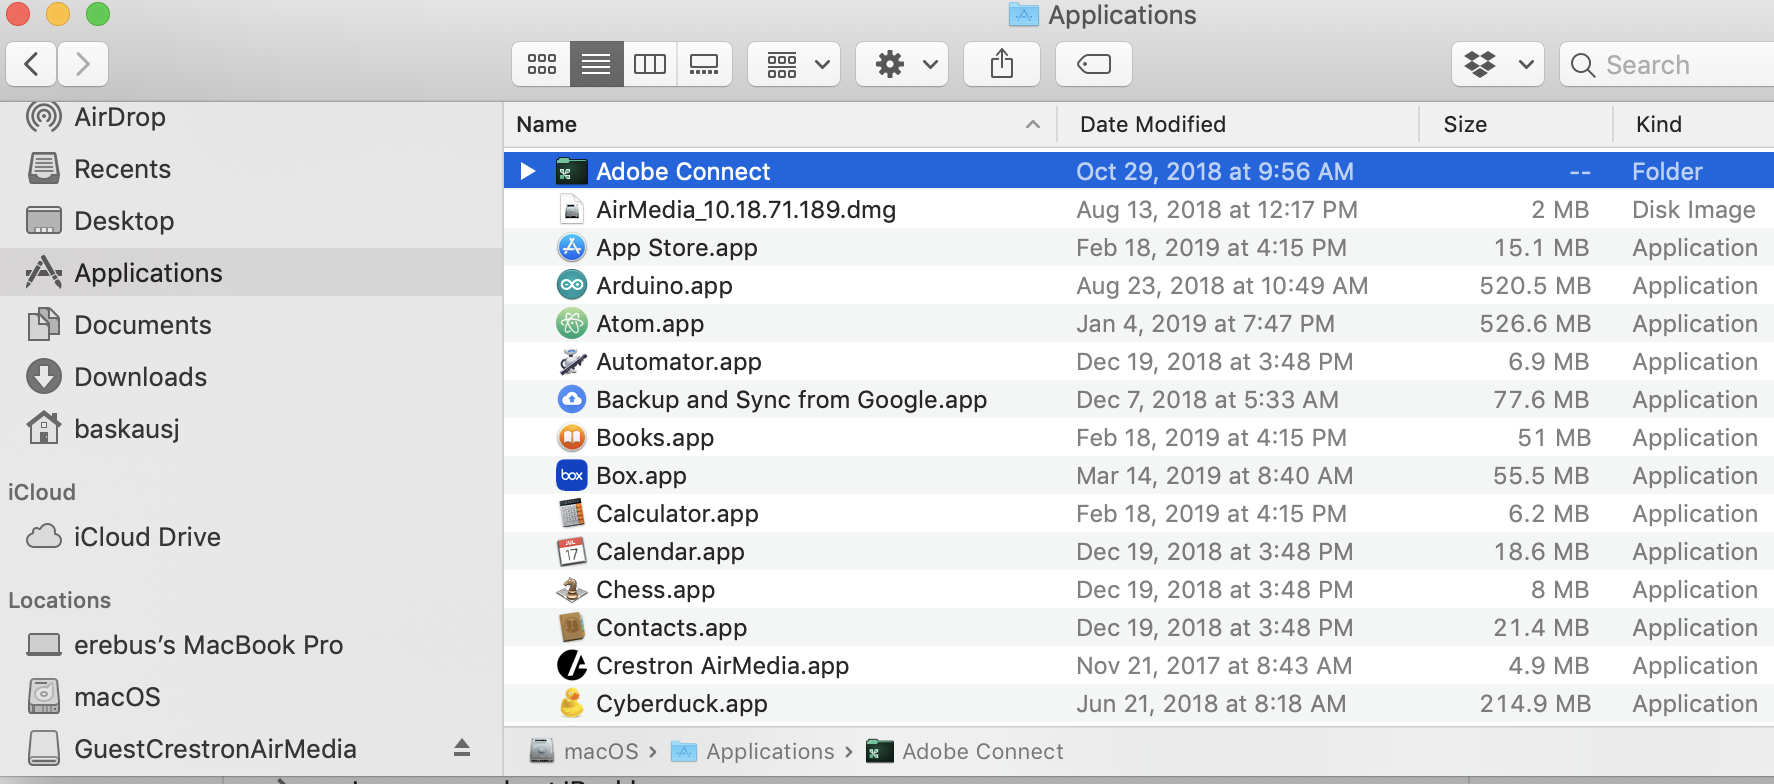
As a practical matter, nearly all applications are located in one of two directories on a Mac. One Applications folder is in the root directory of the drive (/Applications/) and another is within a user’s directory (~/Applications/). Applications that are in the first-level directory are available to all users of the computer and applications that are in the Applications directory in the user’s directory are only available to that particular user.
Most applications are installed into the directory that’s available to all users, although sometimes during the installation process you’ll be asked if you want the application to be available only to you or to all users.
If you look at an Applications directory using Finder, you will see a bunch of what appears to be normal file icons. If you have made file extensions visible, you’ll see that they have the extension .app.
Files associated with an application
The items with .app extensions are not regular files. They are actually a special type of directory called a package. In Finder, the normal behavior if you double-click on a file is to open that file using the application associated with that file type, while double-clicking on a folder opens that directory. Double-clicking on an application package does not open the directory – it launches the application. If we want to see what’s in the package directory, we need to right-click on it, then select Show Package Contents.
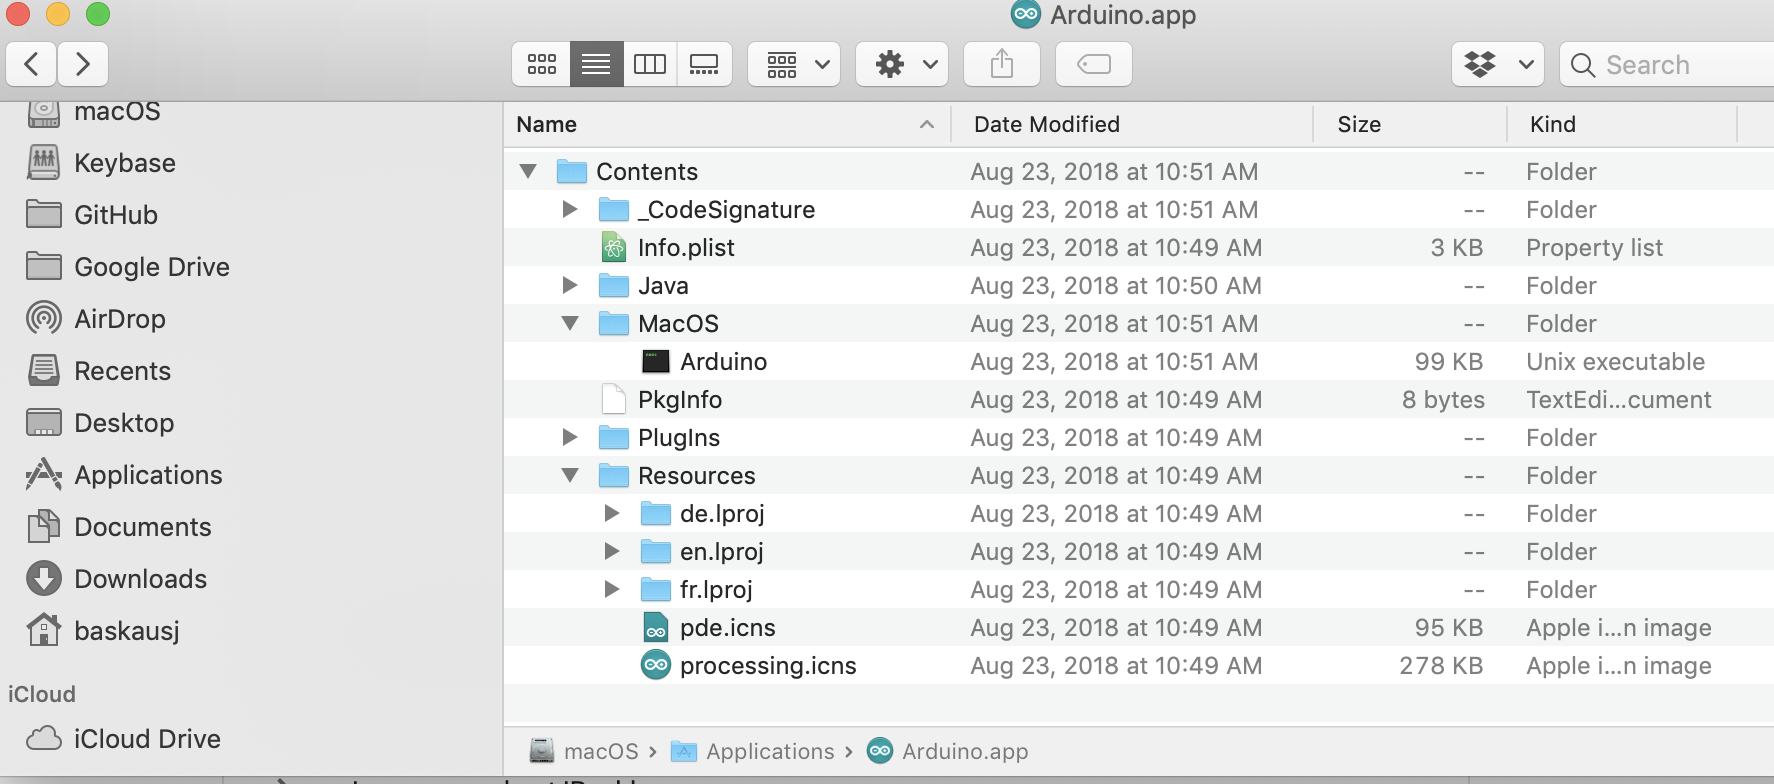
In the screenshot above, I’ve opened the package for the Arduino app so that we can see some of the files and directories inside it. Within the package is usually a single directory called Contents. Within the Contents directory are a number of files and directories. Opening Get Info for the Contents directory shows that it contains 5342 files and directories. So the idea that the package is a single file is clearly an illusion.
Usually there is one directory within Contents called MacOS, which contains the actual executable code the makes the application run. There is also often one called Resources that contains things like information about how to display application information in different languages, icons, etc. There can be other folders containing spash screen images, other associated applications, lists, licenses, etc.
It is unlikely that you will ever need to modify, move, or delete any of these files since doing so would probably “break” the application. That’s why your computer makes it difficult for you to see into the package and gives the illusion that the package is just a normal file.
Installing applications
Because the application package is more complicated than a simple file, the installation process can be more complicated than downloading a single file or simply moving a file from one directory to another. Installing an application also involves making changes associated with the operating system (OS), such as telling the OS where the application is located, making associations between file extensions and the application, and possibly setting environmental variables associated with the application.
When an application is downloaded from the Internet, it is not usually directly in the form of a package with an .app. Rather, it is in the form of a file that requires an action on the part of the user to initiate the installation. That file is usually downloaded into the Downloads directory within the user’s folder. Once the installation is finished, the file in the Downloads directory can be safely deleted without having any effect on the installed application. Sometimes at the end of the installation process, an installer will give the user an option to delete the installer, but often the user needs to delete the installer manually using Finder.
Because running any executable program runs the risk of introducing malware into the computer, you should always use caution when running them and only do the installation if you trust the source of the software. Installers that are from the App Store have been checked by Apple and should be safe to install. Apps that are not from the App Store should be from the official site of the organization producing the software and that website should support secure HTTP https:// URLs.
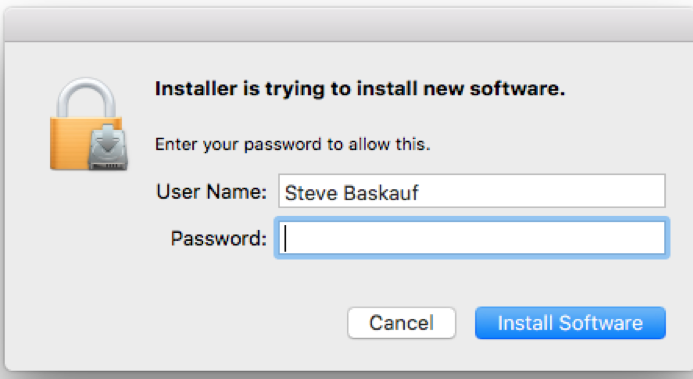
The installation process always requires some sort of security action on the part of the user, such as using Touch ID (if the computer has it) or entering the computer password (as shown above).
Types of installations
.pkg installer files
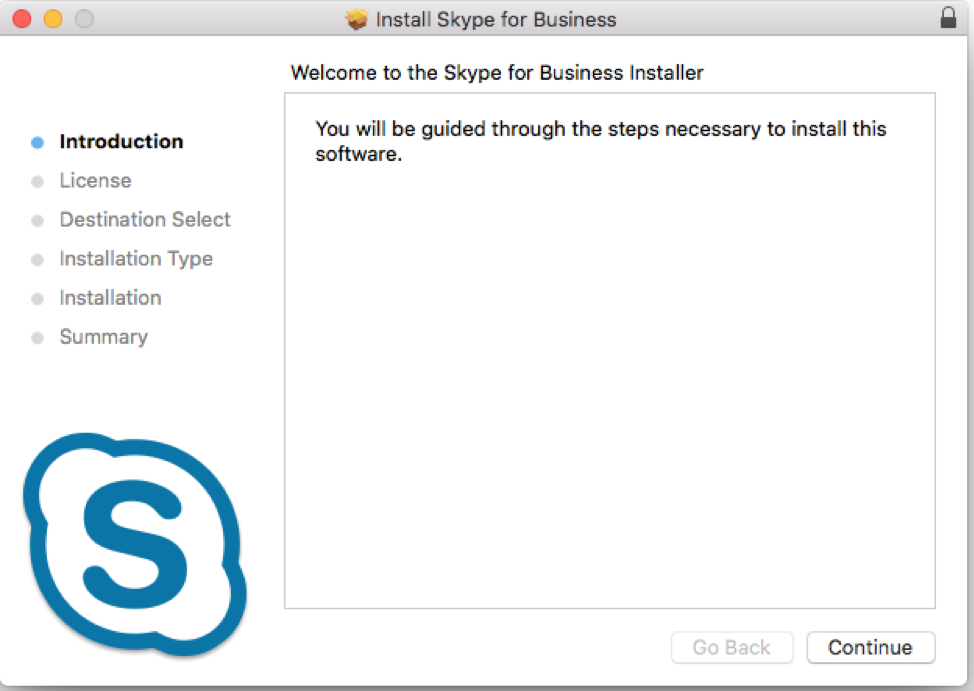
Sometimes the downloaded file is in the form of an installer file. On Macs, installer files usually have the extension .pkg (not to be confused with application packages, which usually have the extension .app). Installers are executable files that you can launch by double-clicking on their icon (which may look like a little package). When the .pkg executable is run, it usually opens a window that runs the user through a dialog that may involve some choices about the installation. The screenshot above shows the dialog for installing Skype for Business.
.dmg disk image files
Another common form for downloaded applications is as a file with a .dmg file extension. .dmg stands for “disk image” and the file behaves as if it were a removable drive. You can open the .dmg file directly by double-clicking on it in the downloads bar at the bottom of the browser, or you can use Finder to go to the Downloads folder and double-click on it there.
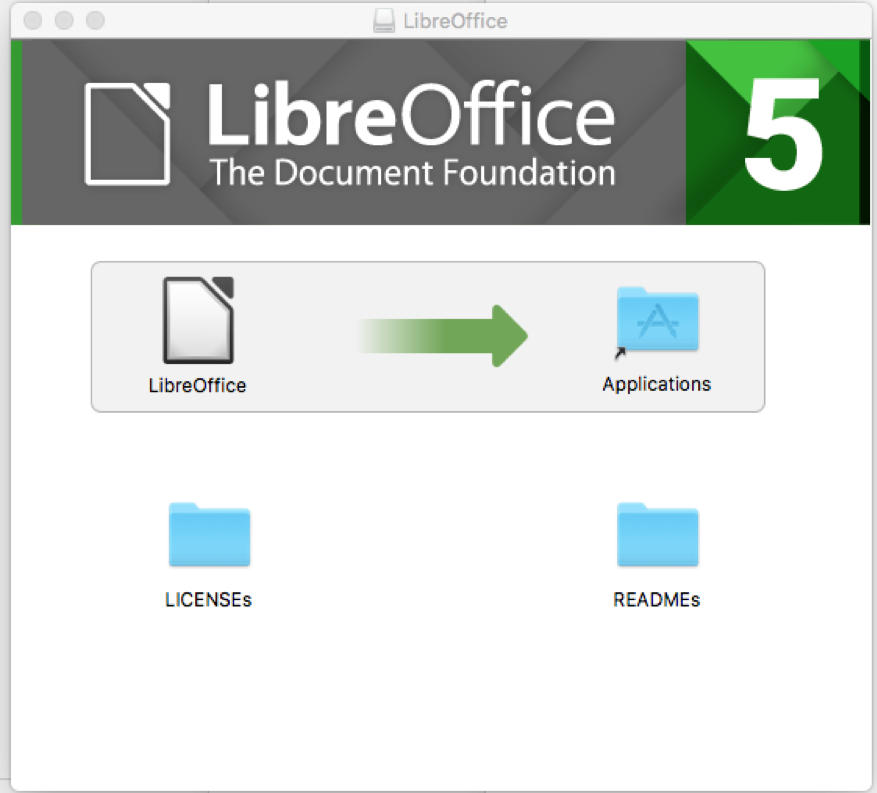
It is common when .dmg files are opened for the window to prompt you to drag the application icon into the Applications folder (as shown above). In some cases, there isn’t that kind of graphical prompting and you need use Finder to drag and drop the app package from the Downloads folder to the Applications folder.
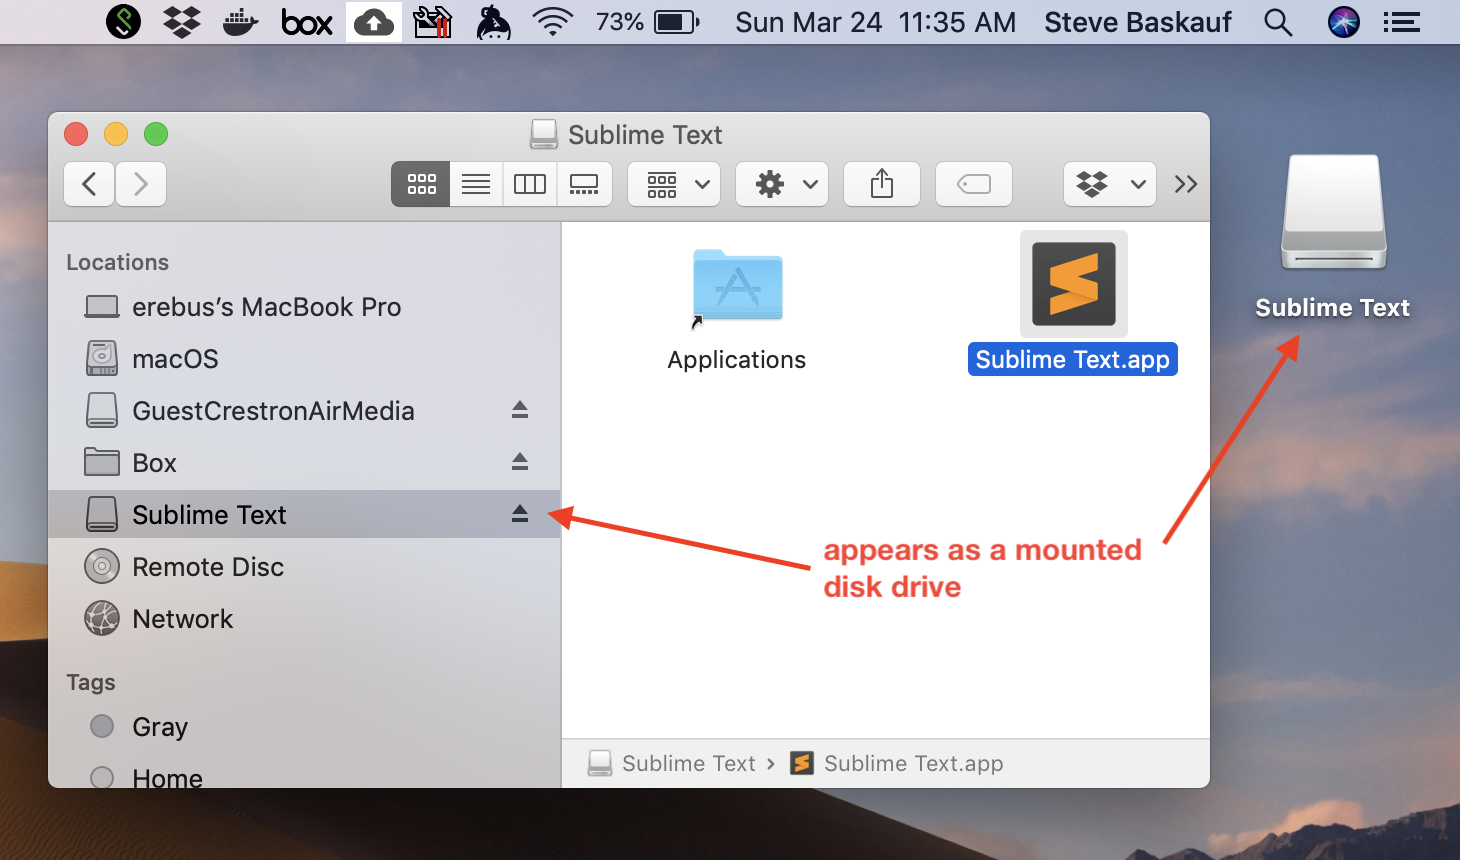
One of the consequences of using the .dmg method of installing is that when the file is opened, it behaves as a “mounted” drive. Closing the window does not dismount the drive, so it appears both on the desktop and in the finder Locations list as if it were removable media. You can make it go away by either clicking the “eject” symbol to the right of the Location name, or on the desktop by dragging the drive icon to the trash can.
.zip archive files
Sometimes when you click the Download button to download an app from the Internet, a .zip archive gets downloaded to your Downloads directory. .zip files are a way to bundle and compress other files. Macs are able to “unzip” .zip files automatically when you click on them.
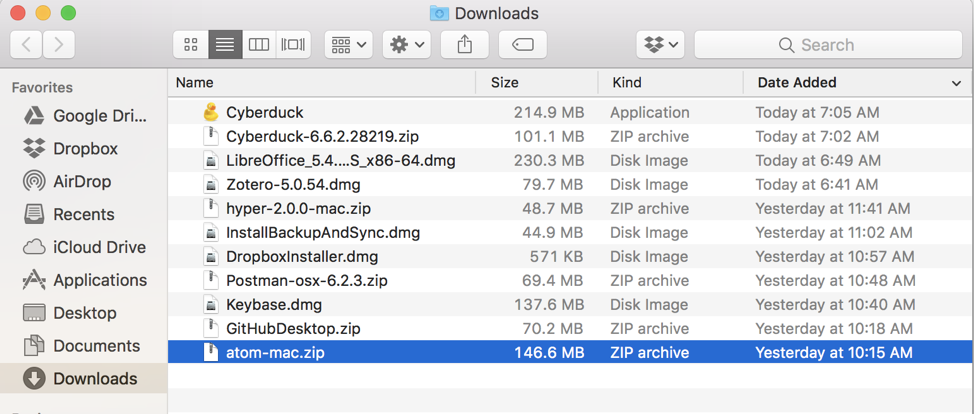
In the screenshot above, the downloaded file was Cyberduck-6.6.2.28219.zip. Clicking on it extracted the application package, which is called Cyberduck. The application can be run from anywhere, so I can double-click on it right in the Downloads directory. The first time, I’ll get the security warning:
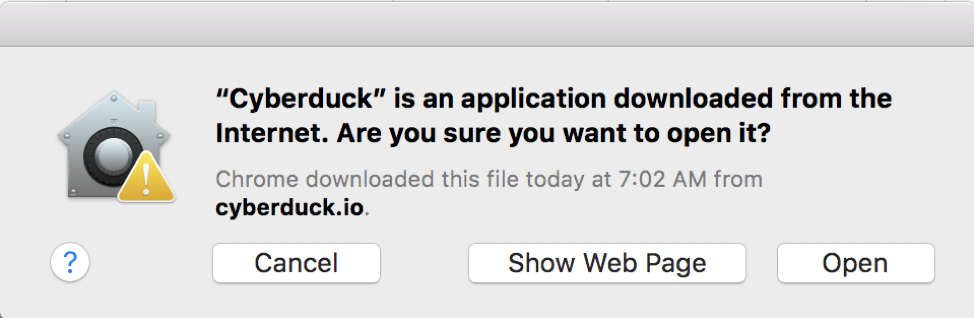
which I won’t see again if I click the Open button. The Downloads directory isn’t a particularly great place for the application to live, so it’s better if I use Finder to move it from Downloads to the Applications folder. After that, I don’t need the .zip archive any more and I can delete it from the Downloads folder.
Java applications
In some cases, the application that you are installing is not run directly by the operating system, but instead is run by a Java virtual machine (VM). A Java VM is a program that runs as a Mac application, but can itself run code that is platform-independent. Typically that code is part of a file with a .jar file extension.
This kind of application is not particularly common, but since Java scripts are platform-independent, they were favored in the past by developers who don’t want to have to develop and maintain separate applications for different operating systems. So they are still sometimes found.
The software that creates the VM is called the Java Runtime Environment (or JRE). It is software that is downloaded and installed like any other software and the .jar file extension is then associated with it so that when you double-click on a file with that extension, it will automatically run in a Java VM. Because Java is so common, someone may have already installed JRE on your computer when it was set up. If you get a new computer, programs that you are used to running may fail to run because no one has yet installed JRE on it. You can find the latest version of JRE here. Note that there are several flavors of Java available – you probably just need the generic JRE. The Java Development Kit (JDK) is for developers and the Server JRE is not needed by most typical users.
Because Java applications were widely used in other devices like printers and DVD players, Java has been a target for security threats. So if you end up running Java scripts, you should keep your Java JRE up to date.
Applications that run on a localhost server
There are an increasing number of applications that involve setting up a web server on your local computer, then interact with it using a web browser. These kind of applications are discussed in detail in lesson 6.
Package managers
A final way to install and manage packages is by using package management software (also known as a package manager). A package manager takes care of downloading all of the necessary files to run an application and also allows the application to be updated easily. (If you are a Python user you are probably already familiar with the Python package manager PIP.)
A popular package manager for Macs is Homebrew. One disadvantage of Homebrew is that it requires familiarity with the command line (see lesson 6) to install Homebrew, to use it to install and update applications, and to launch the installed applications. But for frequently modified software like some generated by open source projects, this disadvantage may be outweighed by the ability to easily update the software.
Software that runs in the background
Sometimes when you install an application, it will also install “helper” applications that run in the background all the time. The helper applications are automatically launched when the computer boots up and continue to run all the time, mostly invisible to you. The installer may or may not ask you whether you want the helpers to be installed.
There are several categories of applications that run in the background. One category is launchers. Large, frequently used software packages like Office components may take a long time to load, so parts of the software may be loaded when the computer boots so that it won’t take as long to launch the application when the user wants to use it. Another common kind of background application is an updater. It may run periodically to check whether there is a new version of the application that needs to be downloaded and installed. A final category is applications that run in the background to maintain communication with web services that are critical to the operation of a user’s system. A good example of this is the Dropbox application that monitors the Dropbox folder locally and online to make sure that any changes in either location is immediately synchronized with the other location.

Often, these background applications have an icon at the right side of the menu bar. Those icons show that the applications are running and allow you to monitor their status. In the example above, mousing over the Dropbox icon shows its status (i.e. that its synching is up to date). You may have noticed the icons appearing in the system tray as the computer boots up. That’s an indication that these applications have started to run in the background.
In the past, a proliferation of applications running in the background was one of the main reasons why computers ran slower as they got older and more applications of this sort continued to accumulate. Now most computers have enough memory that this isn’t as much of a problem. Having a lot of applications launching when the computer boots can also slow down the startup time. You might want to check to see what applications are being launched automatically when your computer boots. From the Apple menu, select System preferences....
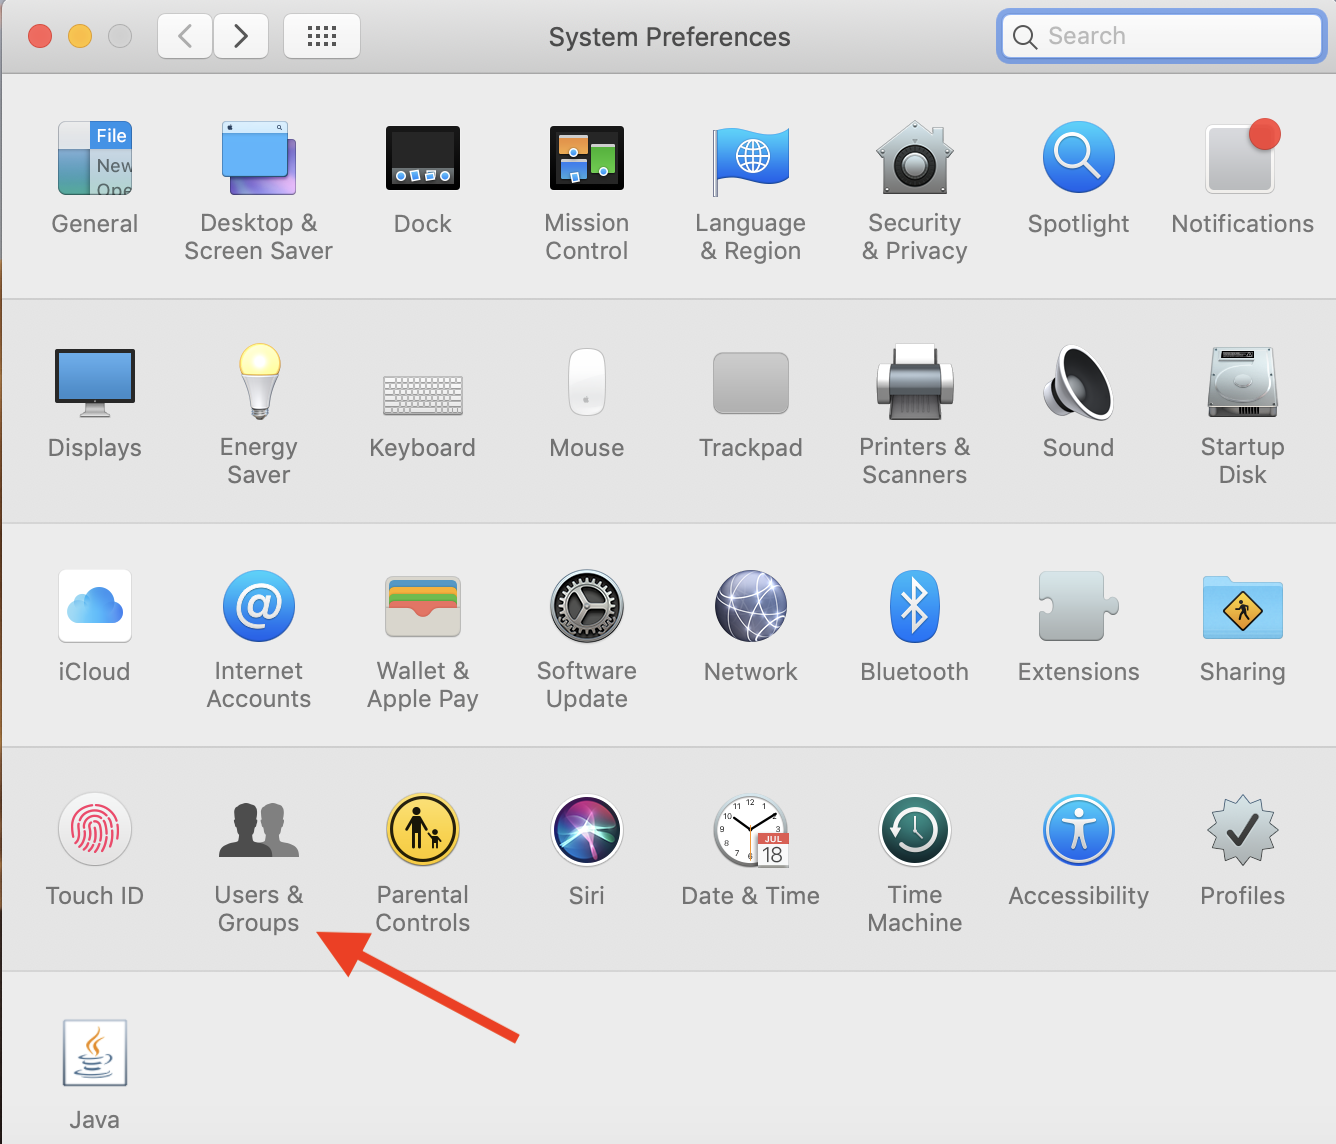
Click on Users & Groups.
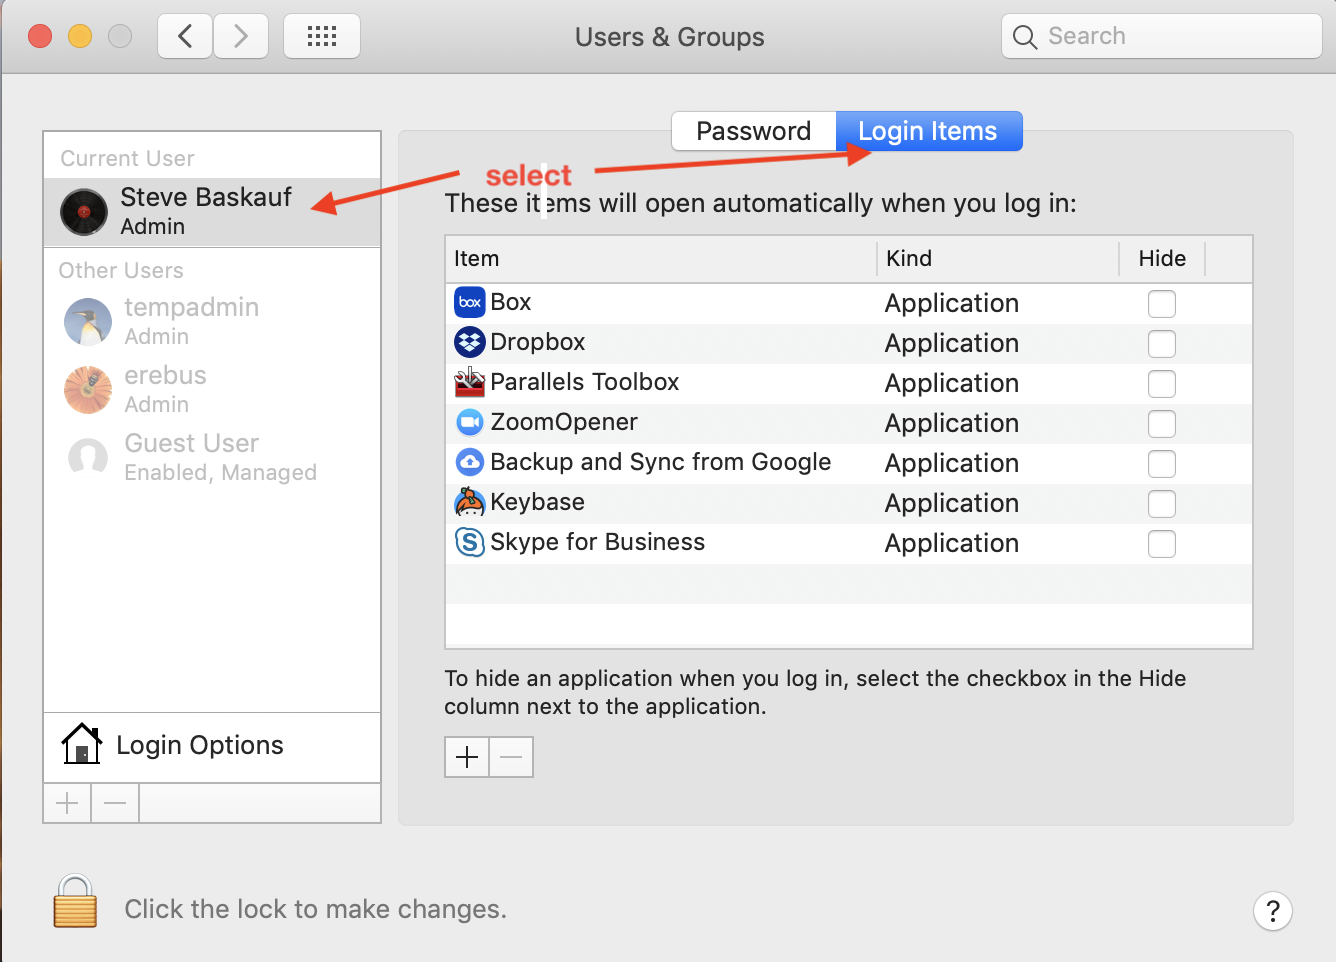
Click to select your user account, then click on the Login Items tab. If you want to prevent one of the items from running at startup, click on it to select it, then click the minus - button below the list. If you want to allow it to run but not to show up in the menu bar, check the Hide box for that application.
Warning: Be careful that you don’t turn off any critical application. For example, turning off Dropbox synchronization could be really bad if you depend on it to keep files synchronized among multiple computers, or if it serves as a first line system of backup.
Uninstalling software
Uninstalling software on a Mac is remarkably uncomplicated. All you have to do is drag the application’s .app package folder into the Trash. Performing this uninstall actually does more than just delete the package folder – it also undoes some of the system settings (such as file extension associations) that were done when the application was installed.
What is Launchpad?
Launchpad is a convenient way to find any available application that is installed on your computer. It includes applications that are in both of the Application directories (the global directory in the root of the drive and the directory in your user folder). The icons in Launchpad will run the application using a single click, which is a bit easier than finding the application in one of the Applications folders and double-clicking.
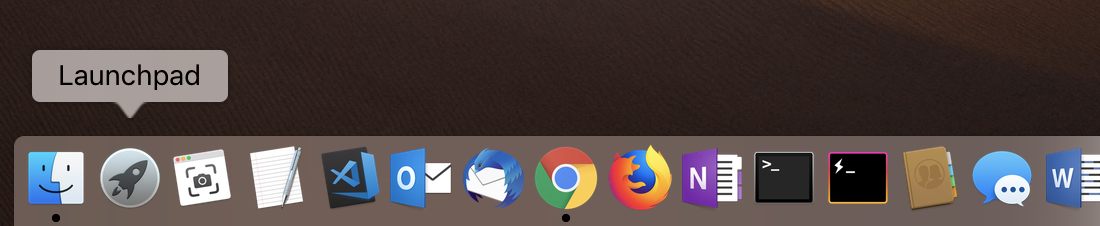
You can access Launchpad by clicking on its icon in the dock at the lower left of your screen. You can also open it by pinching a thumb and three fingers together on the trackpad. Launchpad will close when you click anywhere on the Launchpad screen, or if you spread a thumb and three fingers apart on the trackpad.
You can organize applications by dragging them around on the window. You can collect related applications by dropping one of the apps on top of another. There is no simple way to remove an application from Launchpad – when an application is uninstalled, it will automatically disappear from Launchpad.
If you want an alphabetical listing of installed applications, right click on the Launchpad icon in the dock, then click on the application you want to run.
go on to Lesson 4: Connections
Revised 2019-03-24

Questions? Contact us
License: CC BY 4.0.
Credit: "Vanderbilt Libraries Digital Lab - www.library.vanderbilt.edu"