Security on AWS
One of the key features of AWS is that it incorporates security features throughout the features it offers.
The root account
The root account is created at the time an account is established with AWS. By default, it’s associated with the email address used to create the account.
By default, the root account has full privileges for most actions possible in AWS. For that reason, it would be disastrous for it to be hacked. There are several actions that should be taken to keep the root account secure:
- Have a strong password
- Use multifactor authentication (MFA)
- Delete the access keys associated with the root account.
- Create and routinely use other Identity and Access Management (IAM) users.
When accessing a newly created account, AWS will suggest that you take these actions and provide links for doing so.
Access keys
Access keys are long, random strings assigned to users that allows them to access resources and perform functions directly through the Internet rather than through the ASW web interface. For example, with access keys, a user can issue commands using the command line interface (CLI) on a local computer to make things happen remotely on AWS. Anything that can be done by logging in to the AWS website can also be done with the access keys.
Clearly access keys are a powerful thing that can be misused if they are stolen. The good thing is that they can be revoked and regenerated at any time.
The best practice is to delete the powerful access keys of the root user and create access keys for IAM users with limited privileges that are specific to a particular project. You’ll have a chance to delete your root user keys later.
To create a user for a specific task, click on Services, then search for IAM.
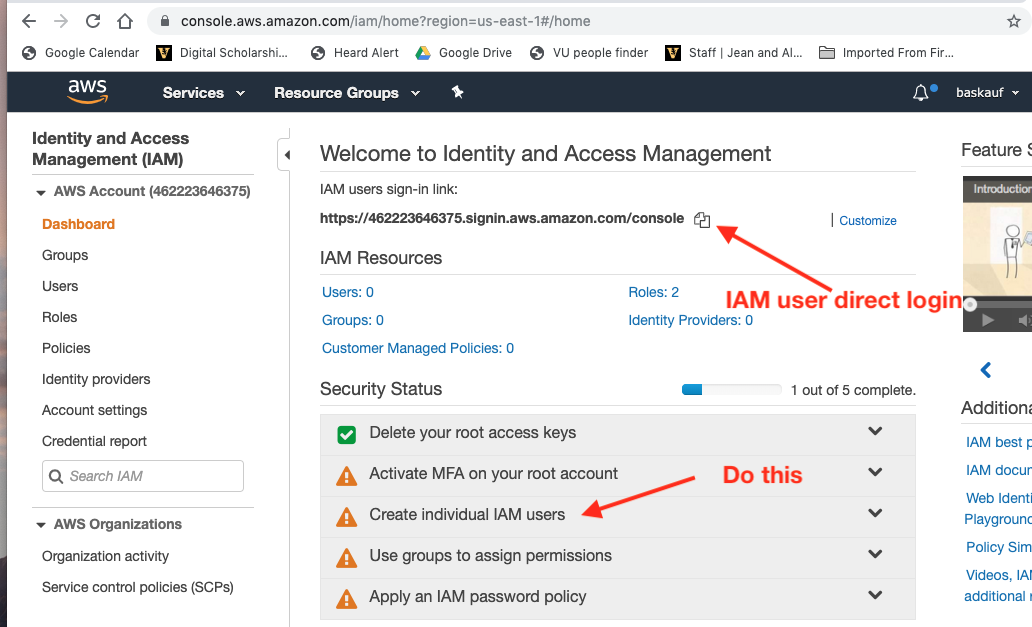
On the dashboard page, you’ll see a URL that you can bookmark to take you directly to the login page for your account. That is the page where the IAM users you create can log in directly, so you should bookmark it.
Deleting your root access keys
From the Security Status menu, you should select Delete your root access keys and follow the directions to do that.
Creating an IAM user
On this page, you’ll also see a prompt to create individual IAM users. Click on the “Create individual IAM users” link, or users in the menu on the left..
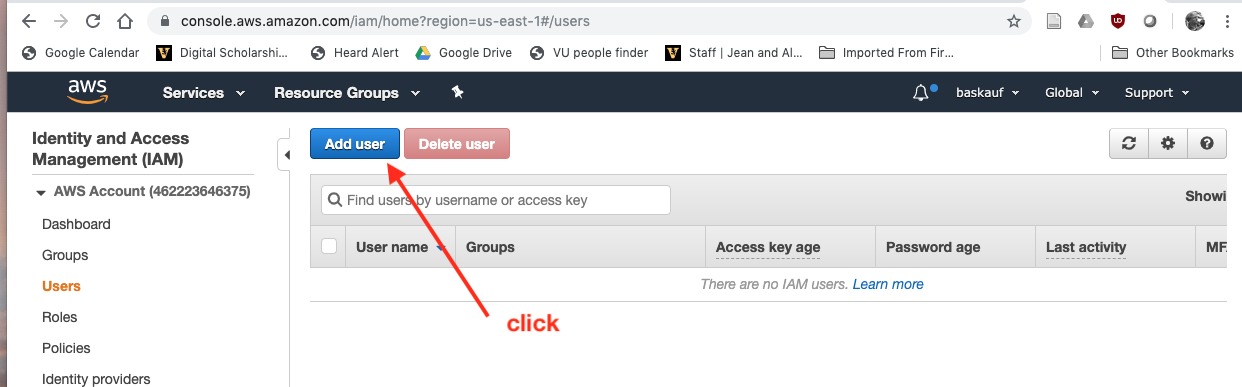
Click on the Add user button.
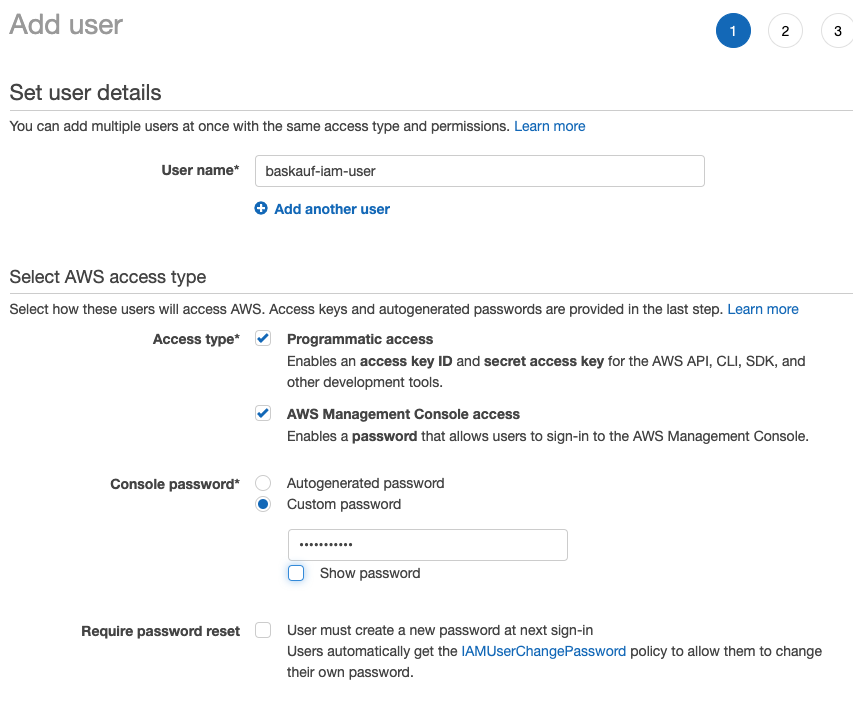
In the first step of creating the user, you can assign a name to the user. Optimally the name should reflect the tasks that user will be authorized to perform. In this example, we are creating a generic user that can do a number of common tasks, but that has fewer privileges than the root user. If the user is only going to interact directly through the Internet using API keys, check only Programmatic access. If you want the user to also be able to log in to the website, check the second box. If you are going to be the primary person to use that user account, you can just enter a custom password at this point. If you are generating the account for someone else to use, select Autogenerated password with the option requiring password reset.
In the step for adding permissions for the user, click on the Attach existing policies directly tab. Set the following permissions AmazonS3FullAccess, TranslateFullAccess, AWSLambdaFullAccess, and CloudWatchFullAccess. Because there are so many policies, the easiest thing is to paste the permission from the list above into the search box, then check its box when it is listed. Repeat for all of the permissions. You can always add permissions later if you discover that the user isn’t able to do something that it needs to do.
You can skip adding tags. On the review page, click the Create user button at the bottom.
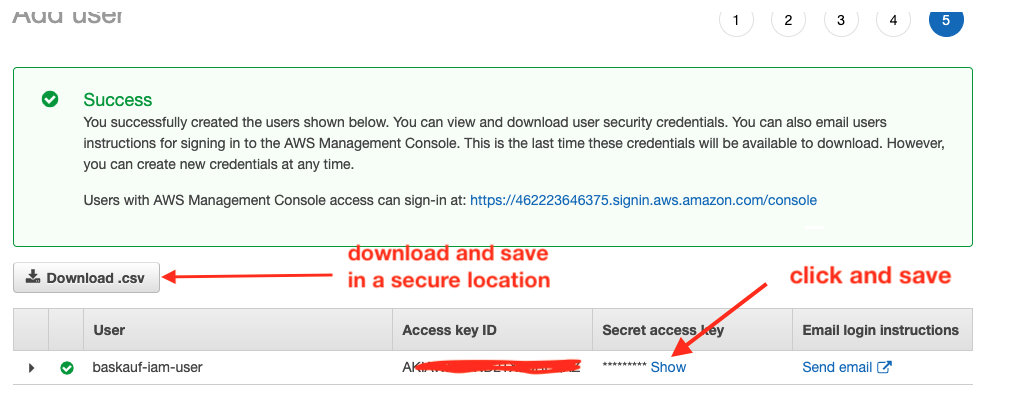
After you successfully create the user, you need to capture the user’s credentials. If you are creating the user for someone else, you can click on the Send email link. That will generate an email with the login URL and username, but NOT the password. The password should be provided to the person via a secure means such as an encrypted Keybase message (NOT by email) or on paper. If the user is going to use access keys (likely) the keys should be shown and copied while this page is visible. Once the page has been closed, it will no longer be possible to get any of the account access information (keys or password). Clicking the Download .csv button is the easiest way to store or transfer all of this information. The CSV file contains the username, password, access keys, and console loging links. Care should be taken to store this file in a secure location to prevent unauthorized access to your account.
One advantage of creating users like this for routine work is that if the IAM user account is compromised, you can just delete the user entirely and re-create it. If only the keys are compromised, you can regenerate them as shown below.
After completing the process of creating the IAM user, you will be on the user page. That’s the page where you can delete the user or click on the user name to change its properies.
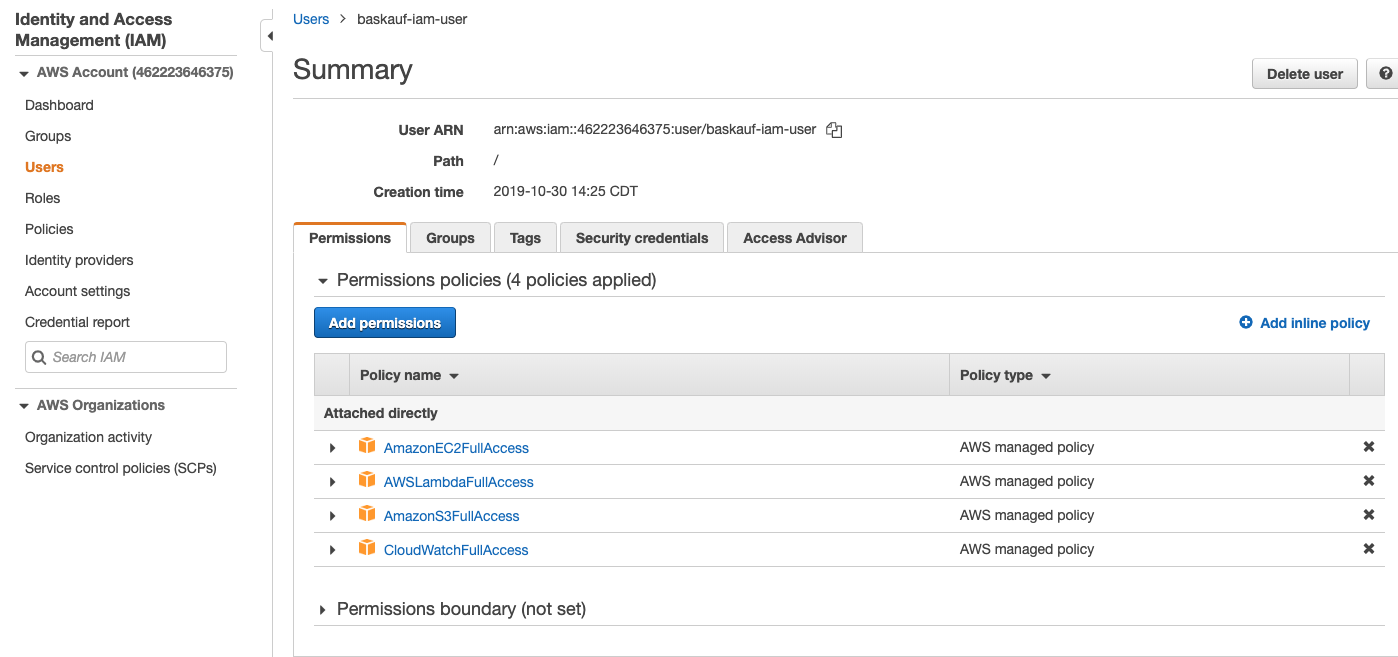
After clicking on the user name, you’ll see the permissions allowed for that user. Here’s where you can add additional permissions for the user. This page also has the user ARN, a identifier for the user that is unique within the AWS system. You can use the user ARN to restrict operations to particular users.
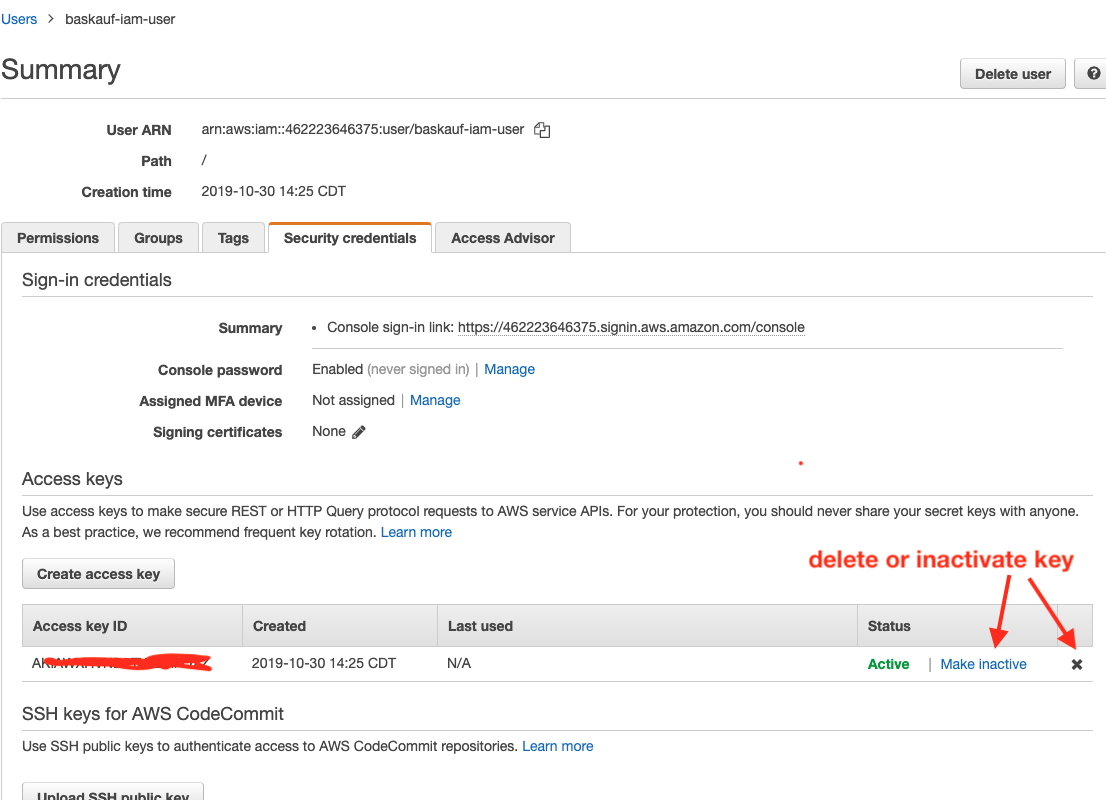
Clicking on the Security credentials tab takes you to the page wher you can create, temporarily deactivate, or delete the IAM user’s key. In cases where security is critical, you should periodically “rotate” (delete and recreate) the access keys in the event that the key has been compromised without you knowing it.
Other security measures
It’s a good idea to institute the other suggested security measures, especially multi-factor authentication (MFA). However, you will first need to instally an app like Google Authenticator first.
next lesson on creating a static website using an S3 bucket
Revised 2019-11-05

Questions? Contact us
License: CC BY 4.0.
Credit: "Vanderbilt Libraries Digital Lab - www.library.vanderbilt.edu"