Building A Bot to Interact with Wikidata or Wikibase using Pywikibot
This page contains information that was previously on the general instructions page for creating a bot. Since that page now contains instructions on interacting with the API directly without using Pywikibot, the parts specifically related to using Pywikibot have been moved to this page for reference purposes.
The issue with using Pywikibot was that it contains built-in throttling that made it write at about 1/60th the speed of writing directly to the API of an instance of Wikibase hosted on AWS. In that case, the throttling served no purpose since there were no other users of the Wikibase instance. However, if writing to the actual Wiokidata database, there might be value in a system with built-in throttling that would prevent hitting the Wikibase API at an unacceptably high rate.
Set up the Pywikibot bot
The configuration for a bot in Pywikibot is generic for all MediaWiki wikis, so it is more generic than is required for Wikibase. MediaWikis are often created with versions in different languages, but since a Wikibase instance is designed to handle all languages in the same instance, the language-specific aspects of configuration does not make sense.
The common practice for Wikibase seems to be to have a short string for the instance name and to use that same string as the “language” for that instance. In the examples, the string “ldwg” is used for both the name and language. You can change it to something else, but that isn’t necessary because the bot’s behavior will be the same regardless of the string you use.
If you do decide to change the string to something other than “ldwg” you will need to be careful to go through both the ldwg_family.py and user-config.py files and change every place where “ldwg” occurs to the other string that you have chosen. Then change the name of the ldwg_family.py file itself to your chosen string plus _family.py. The only real reason to change the name is if you plan to run bots on two instances of Wikibase (e.g. both a remote instance and a localhost instance).
Configure the bot environment
1. Download this .zip file.
2. Unzip the file and copy the wikibase folder to a place on your hard drive where you can find it. Your user folder is a good place.
3. In Finder (Mac) or File Explorer (Windows), navigate to the place where you put the wikibase folder, then open the families folder within it. Open the file called ldwg_family.py using a text editor. Notepad is fine for Windows and TextEdit is fine for Mac if you don’t have a favorite. (Don’t use Word to open the file.) Line 14 should look like this:
self.langs = { 'ldwg': '18.205.159.211:8181', }
Inside the second set of single quotes, replace the IP address at the left of :8181 with the IP address of your Wikibase instance. If you are using a local instalation of Wikibase on your own computer, the line will be:
self.langs = { 'ldwg': 'localhost:8181', }
Save the file and close it.
4. Open a console window on your computer (Command Prompt on Windows and Terminal on Mac). By default you should be in your user folder. Use the cd command to change to the directory where you put the wikibase folder, then into the wikibase directory itself. When you are in the wikibase directory, print the path of the working directory. That’s pwd on Mac and cd (with nothing after it) on Windows. Copy this path. You can leave the console window open because you’ll need to come back to it again later.
5. Navigate to the wikibase folder and open the file called user-config.py using your text editor. Line 20 should look like this:
register_families_folder('/Users/baskausj/wikibase/families/')
Inside the single quotes, replace the part in front of /families/ with the path you copied. Line 40 should look like this:
password_file = "/Users/baskausj/wikibase/password.py"
Inside the single quotes, replace the part in front of /password.py with the path you copied.
Note for Windows users only: Every slash on both lines 20 and 40 (/ or \) must be replaced with double backslashes (\\). So the path will look something like this:
register_families_folder('C:\\Users\\steve-bootcamp\\wikibase\\families\\')
6. Line 35 of the file should look like this:
family_files['ldwg'] = 'http://18.205.159.211:8181/'
In line 35, inside the single quotes after the equals sign, replace the part of the URL in front of :8181/ with the URL of your Wikibase instance. If you are using a local instalation of Wikibase on your own computer, the line will probably be:
family_files['ldwg'] = 'http://localhost:8181/'
Leave the user-config.py file open in the editor because you’ll have to make more changes later.
Create your bot
Follow the instructions here, then continue on to the next section.
Complete the configuration
1. Return to the user-config.py that you left open in the text editor. Line 47 should look like this:
usernames['ldwg']['*'] = u'Admin'
Change the username in the last set of single quotes from Admin to your username. In the example, it would be:
usernames['ldwg']['*'] = u'Baskauf'
Save the file and close it.
2. Open the file password.py. It should look like this:
("botUsername", "botPassword")
On the Bot password created page, there were two username/password options. We will use the second one. Put your username in the first set of quotes, and the last password option in the second set of quotes. In the example, that would be
("Baskauf", "bot@4q88mq0hi0t53dnpu43ggh...")
Save the file.
Loading the pywikibot package
If you have not used a bot before, your Python 3 instance will not have the necessary modules to run the bot. Return to the console window that you left open. Run the PIP package manager to install the pywikibot package using this command for Windows:
pip install pywikibot
or this command for Mac:
pip3 install pywikibot
Leave the console window open
Preparing the data to be added
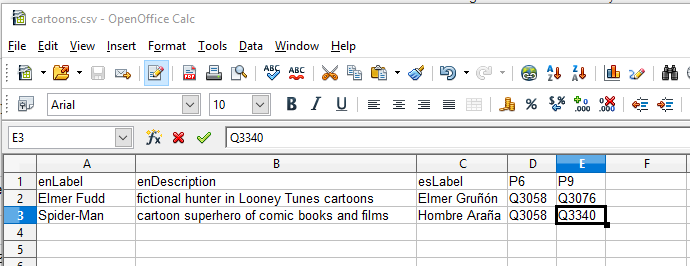
Using your spreadsheet program, open the file cartoons.csv.

In this table, each row represents an item that will be created in the Wikibase database. When it is created, it will be assigned the next available item identifier (begins with Q). Every item should have an English label (in the first column named enLabel) and an English description (in the second column named enDescription). It is also possible to have zero to many additional labels and descriptions in other languages. In this example, there is a second set of labels in Spanish in the esLabel column.
The other columns contain the values for the properties used as the column headers. To see the available properties, go to Special pages then List of properties in the Wikibase section.
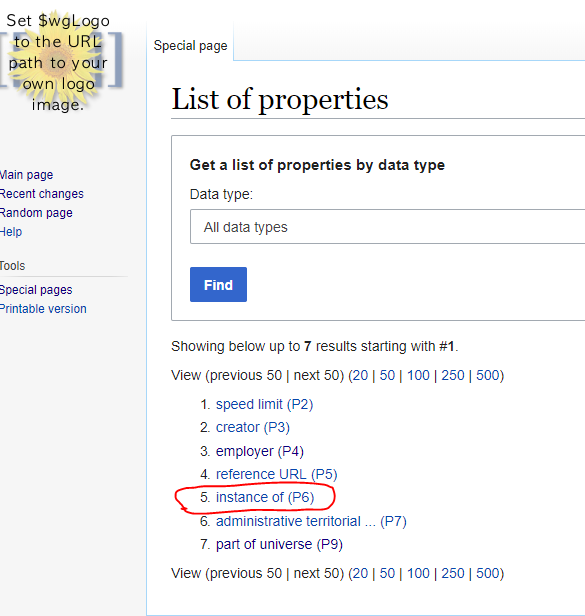
The column header for a property should consist only of the property identifier (P followed by a number) and nothing else. In the example spreadsheet, the fourth column is headed by P6 and comparison with the list of properties shows that P6 is “instance of”.
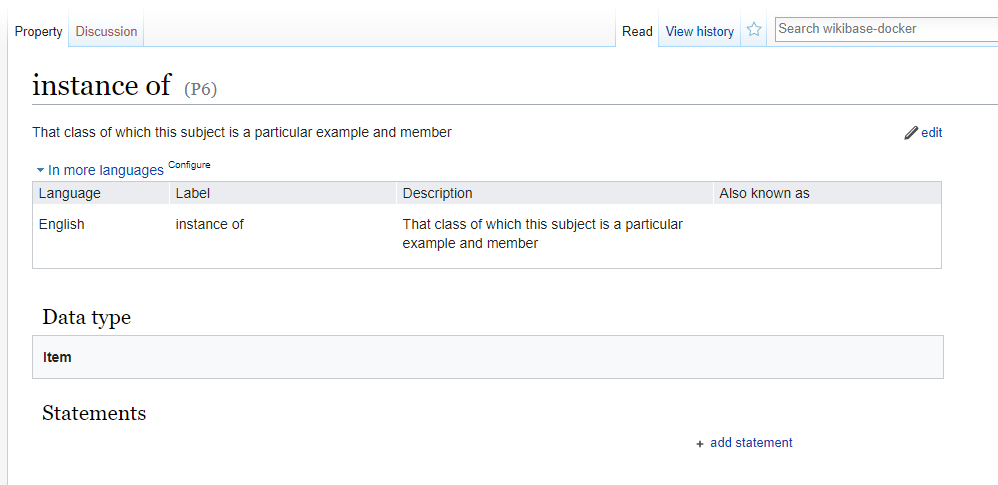
Clicking on the P6 link takes us to the page for the instance of property. An important thing to notice is that the Data type of the property is item. The value used in the table must match the Data type of the property! Since P6 requires an item, all of the values in the P6 column are item identifiers (starting with Q): Q3058.
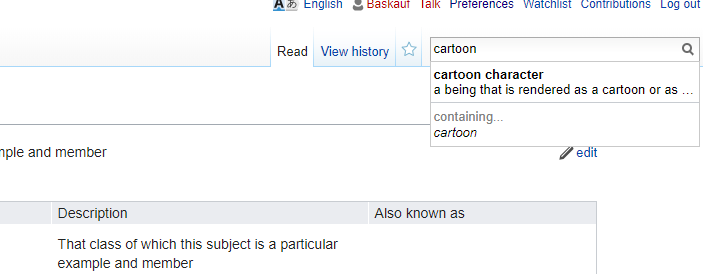
Q3058 is “cartoon character” and we can see its entry by starting to type “cartoon” in the search box at the upper right.
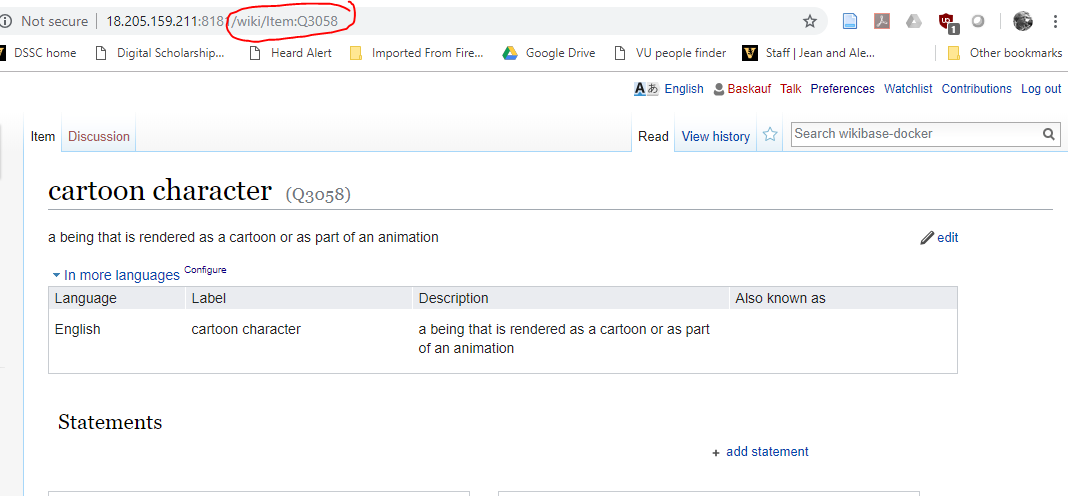
Wnen we click on the entry we want, its page will come up. You can find the page for any Q identifier by changing the end of its URL to the appropriate identifier.
Adding properties
If a property that you want to assign to the items that you are creating with your bot doesn’t exist, you will need to create the property by going to Special pages, then Create a new property in the Wikibase section.
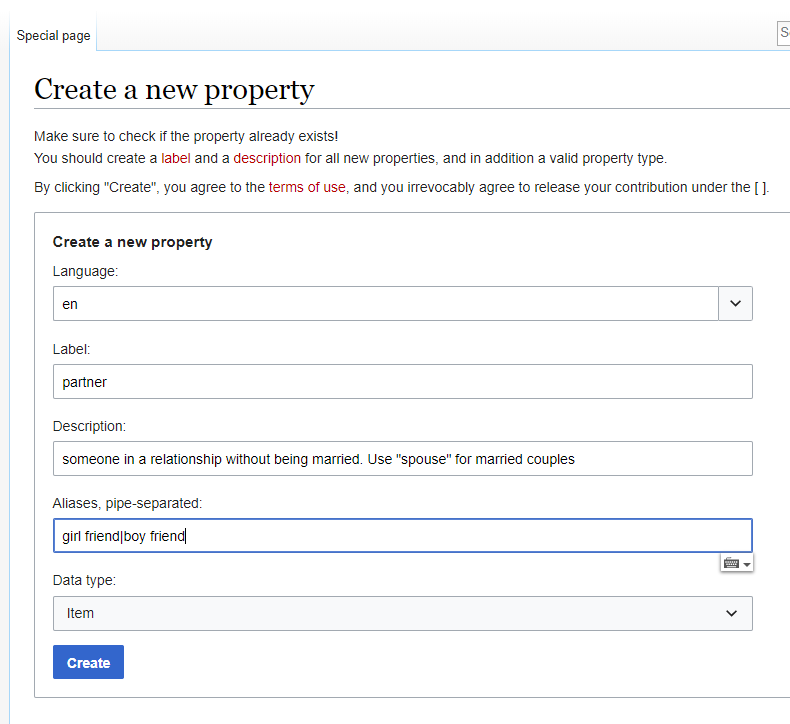
Above is an example of a property that I could use to link Mickey Mouse to Minnie Mouse.
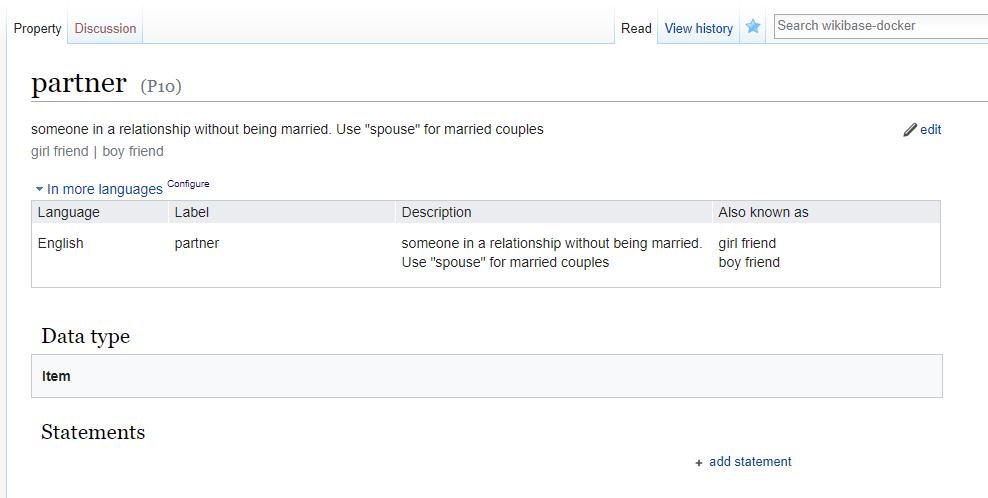
When I click Create, I see the page for the newly created property.
Adding items
The reason that you are using the bot is because you want to create a lot of items. However, you may want to manually create items to be used as the values of properties. For example, in the spreadsheet, property P9 is “part of universe” and is used to connect a cartoon character to its “universe” (Disney = Q3070, Looney Tunes = Q3076, etc.). If I want to add another universe, such as Marvel, I need to go to Special pages then Create a new item in the Wikibase section.
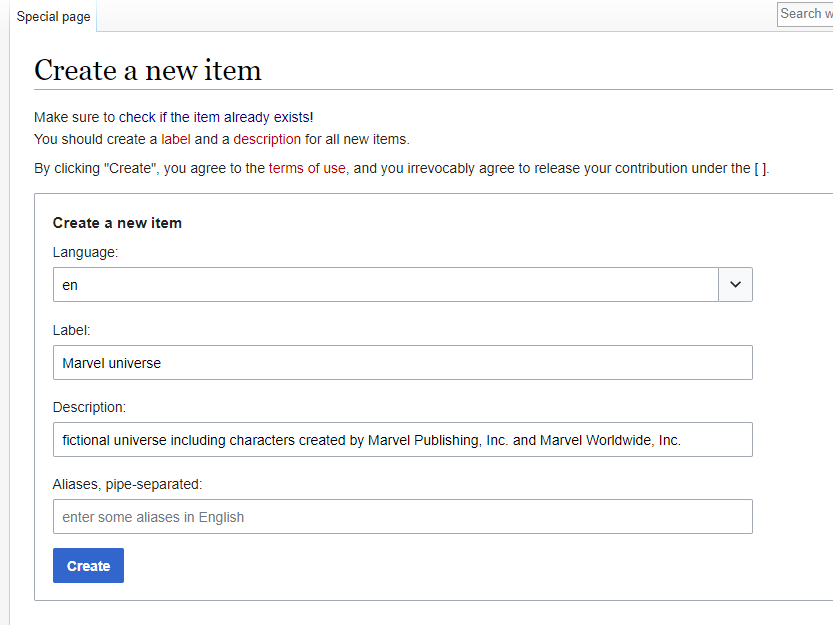
If I want to add another universe, such as Marvel, I need to go to Special pages then Create a new item in the Wikibase section.
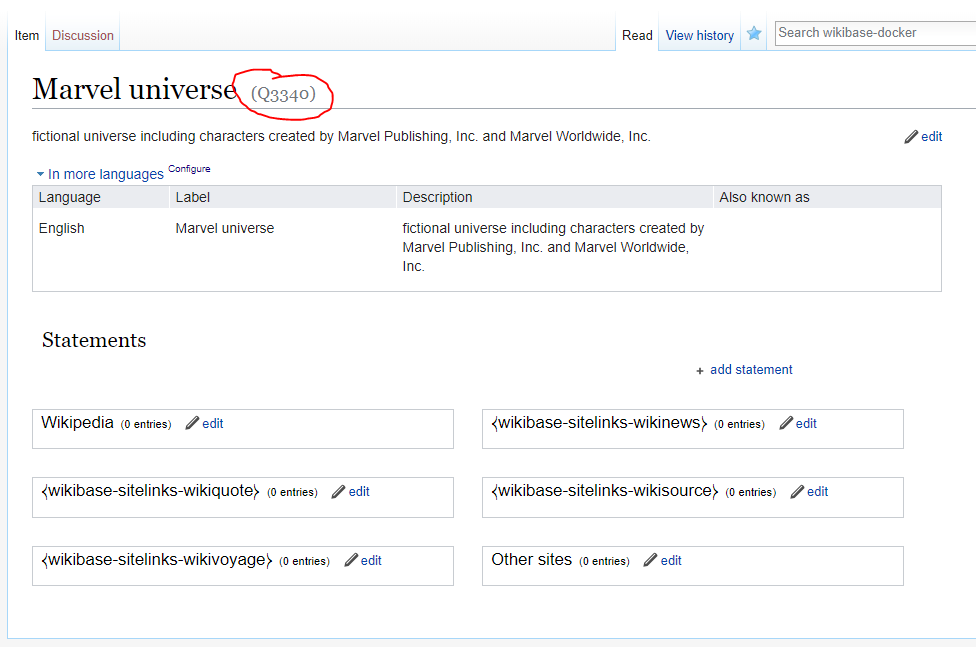
After I enter the information and click Create I’ll see the page for the new item and can get the item’s Q identifier (Q3340 in this case) to use in the column in the spreadsheet.
Note: be sure that you remember to save your spreadsheet in CSV format before moving on to the next section! If it was opened as a CSV, it should be saved in that format by default.
Editing the bot
The bot itself is actually a Python 3 script called load_csv_wikibot.py in the wikibase directory. Before you run the script, you need to edit a few lines. Open the script in your text editor.
1. The first thing to edit is the properties list on line 19. In the example script that goes with the example spreadsheet, it looks like this:
propList = ['P6', 'P9']
You should edit the list so that all of the property columns in your spreadsheet are listed with the correct property identifiers, enclosed in single quotes and separated by commas. The order does not matter.
2. The second thing to edit is the name of the CSV file in line 22. The example has:
sourceCsvFile = 'cartoons.csv'
If the file is in the same directory as the script, you only need to include the file name (with extension). If it’s somewhere else, you need to include the path, using the syntax appropriate for your operating system.
3. Line 33 assigns a dictionary to the variable some_labels. Since the example has two languages, there are two key:value pairs separated by columns. In each pair, the key is the standard ISO 639-1 two-letter language code for the language. The value should contain the column header for that label inside the single quotes in the square brackets.
some_labels = {"en": item['enLabel'], "es": item['esLabel']}
If you only have one language label, delete the second key:value pair and the comma separating the two pairs.
4. Line 38 has a similar dictionary for item descriptions:
some_descriptions = {'en': item['enDescription']}
In the example, there is only a description in one language, but you can add additional key:value pairs using the same formatting as in the labels dictionary.
5. Once you have edited the bot script to match your spreadsheet, save and close the file.
Running the bot
Return to the console window that you left open. Double-check that you are still in the wikidata directory, then issue the command to run the bot. In Windows, that’s:
python load_csv_wikibot.py
and on Mac it’s:
python3 load_csv_wikibot.py
I changed the spreadsheet to create some new cartoon characters using the new item value that I created (Q3340 = Marvel universe).
Console output
Here’s the console output that I got when I ran the bot script:
C:\Users\steve-bootcamp\wikibase>python load_csv_wikibot.py
Logging in to ldwg:ldwg as Baskauf
OrderedDict([('enLabel', 'Elmer Fudd'), ('enDescription', 'fictional hunter in Looney Tunes cartoons'), ('esLabel', 'Elmer Gruñón'), ('P6', 'Q3058'), ('P9', 'Q3076')])
Sleeping for 9.4 seconds, 2019-03-31 22:14:31
created item: Elmer Fudd
Sleeping for 9.8 seconds, 2019-03-31 22:14:40
added description: fictional hunter in Looney Tunes cartoons
Sleeping for 9.7 seconds, 2019-03-31 22:14:51
added claim for: P6
Sleeping for 9.7 seconds, 2019-03-31 22:15:01
added claim for: P9
Q3341 Elmer Fudd

OrderedDict([('enLabel', 'Spider-Man'), ('enDescription', 'cartoon superhero of comic books and films'), ('esLabel', 'Hombre Araña'), ('P6', 'Q3058'), ('P9', 'Q3340')])
Sleeping for 9.8 seconds, 2019-03-31 22:15:10
created item: Spider-Man
Sleeping for 9.8 seconds, 2019-03-31 22:15:20
added description: cartoon superhero of comic books and films
Sleeping for 9.8 seconds, 2019-03-31 22:15:30
added claim for: P6
Sleeping for 9.8 seconds, 2019-03-31 22:15:40
added claim for: P9
Q3342 Spider-Man


C:\Users\steve-bootcamp\wikibase>
Notice that there was a significant delay between the assignment of each property value (around 10 s). This is because pywikibot has a feature called throttling that limits the rate at which requests for new claims can be made. The throttling delay may lengthen if multiple users are trying to create new items and add claims at the same time.
Results
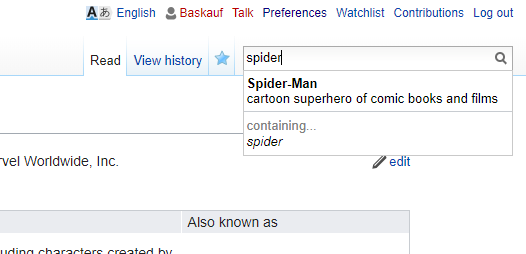
If I return to the Wikibase GUI interface and begin typing “spider” in the search box, I now see “Spider-Man” as an entry.
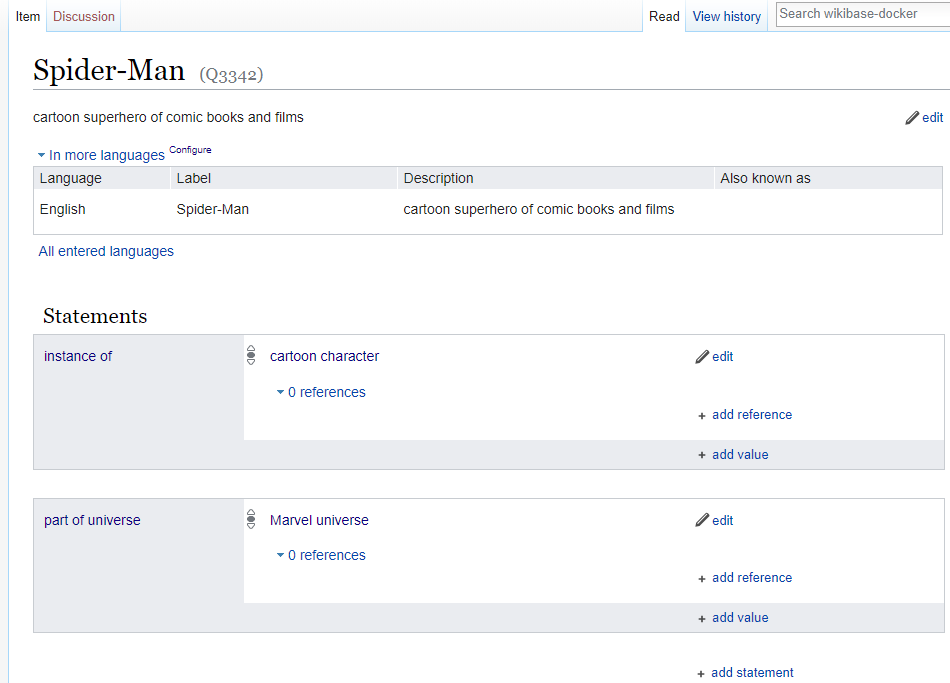
Clicking on the entry takes me to the new page.
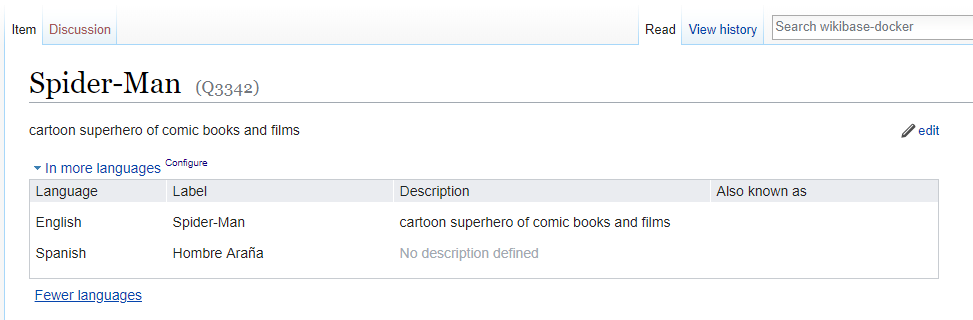
If I click on the All entered languages link I’ll see the Spanish label.
Final notes
The process for creating a bot here is the same as the process for Wikidata bots. However, there are many additional considerations to be considered before creating a bot to edit Wikidata:
- Social conventions for bot use
- Registering the bot
- Taking care that you don’t create duplicate items
- Testing to prevent creating bad claims
In this example, we did not make any attempt to support our claims with references – an important consideration in Wikidata.
For more information about programming bots to edit Wikidata/Wikibase using Pywikibot, see the Pywikibot manual.
Revised 2019-05-24

Questions? Contact us
License: CC BY 4.0.
Credit: "Vanderbilt Libraries Digital Lab - www.library.vanderbilt.edu"