Building A Bot to Interact with Wikidata or Wikibase

Preliminaries
NOTE: The bot script described on this page has not been updated. Current work (2021) has been focused on the VanderBot script that can be used to upload CSV data to any Wikibase instance (including Wikidata).
What is a bot?
The term “bot” conjures up an image of a cool robot that can do your bidding. Unfortunately, a bot is more mundane than that. A bot is simply a computer program (a.k.a. script) that can interact with Wikidata or Wikibase through the Internet using Hypertext Transfer Protocol (HTTP). The program can be written in any language that can communicate via HTTP, including Javascript and Python. In this lesson we will use Python, but the principles will be similar in other languages.
What is the difference between Wikidata and Wikibase?
Wikidata is a giant database and knowledge graph that anyone can edit. It is an underlying data source for some parts of the more well-known Wikipedia, but its data are used much more broadly than in Wikipedia alone. It is a relatively simple matter to make manual edits in Wikidata, but data can also be edited via a bot. Because it would be really easy to make a lot of unintentional errors with a poorly tested bot, Wikidata provides a test instance (sandbox) at https://test.wikidata.org/. It is perfectly acceptable to test your bot’s code there without danger of damaging anything real. We will use the test instance of Wikidata to try to make a working bot. Once you have experience getting a bot to work in the test instance, you can put it to work in the real Wikidata instance.
Wikibase is the underlying software application upon which Wikidata is built. Wikibase is essentially a blank copy of Wikidata into which you can enter your own items and properties. Wikidata and Wikibase share the same data model, so Wikibase provides a means to test tools and data structures that might eventually find their way to Wikidata.
Wikibase can be set up on your local computer and accessed using a localhost: address. It can also be installed in the cloud using a web service, then accessed through the Internet.
Because Wikibase is so empty, it would take a lot of work to enter any meaningful amount of data by hand using the MediaWiki grapical interface (GUI). Therefore, it is likely that Wikibase users will want to use software tools to automate the process. Unfortunately, Quickstatements, one of the most useful tools for populating Wikidata with data from spreadsheets, does not work in the Docker image of Wikibase that is easiest to install (as of 2019-03-31; see this for more information). For that reason Wikibase users are likely to be interested in entering data into it using a bot.
What do you need?
In order to successfully complete this exercise, you should meet the following requirements:
- The first part of the excercise uses only the Wikidata test instance, which is available to anyone. To do the second part of the exercise, you will need to have access to an instance of Wikibase, either as a localhost installation on your own computer (see these instructions to set one up), or as a remote instance running by Docker machine on a remote service like Amazon Web Services (AWS).
- Have Python 3 installed on your computer. (See these instructions if you don’t.)
- Have access to a spreadsheet program that can edit CSV files. Libre Office or Open Office is recommended, but Microsoft Excel is probably OK if you have it. (Microsoft Excel has the bad habit of sometimes messing up CSV files, but that usually doesn’t happen if the CSV is uncomplicated and contains only Latin characters and no dates.)
- Have a basic understanding of the Wikibase/Wikidata data model. At a minimum, you should understand what items and properties are.
- Have played around with the Wikidata graphical interface for editing items. Practice on the test instance or Wikidata Sandbox if you haven’t already done this.
- Know how to run a program using the command line. If you don’t, read this page for Mac or this page for Windows.
Set up the bot
Note: these instructions explain how to create a bot to interact directly with the Wikidata/Wikibase API using Python. Another alternative is to use the Pywikibot Python library. For more information about that option and the problems associated with it, see this page.
Downloading the basic bot script and credentials file
Before downloading the script, you should decide on the directory from which you plan to run the script. Since you will be running it from the command line, and since by default Terminal (Mac) and Command Prompt (Windows) open in your home directory, the simplest thing is to save the script and its assocated credentials file in your home directory. You are welcome to put them anywhere else on your hard drive as long as you know how to navigate to that location via the command line.
Open this page in a new tab in your browser. Right-click on the Raw button in the upper right of the screen and select Save Link As.... Navigate to the directory where you want to put the script and save the file there. Now go to this page and download the example credential file in the same directory where you saved the script.
Using a text editor (like TextEdit on Mac, Notepad on Windows, or your favorite text editor that is NOT Microsoft Word), open the credentials.txt file that you just downloaded. Leave the file open as you go to the next step.
Create your bot
The instructions here show how to create a bot on a Wikibase instance, but they are exactly the same for the Wikidata test instance. Since we will start by making an edit on the Wikidata test instance, log in and set up a bot there first. You can come back here and repeat the setup process for a Wikibase instance later if you do the second part of the exercise. Login credentials go across the Wikimedia universe, so if you have an account for Wikipedia, Wikimedia Commons, or the real Wikidata, you can use it to log into the Wikidata test instance as well.
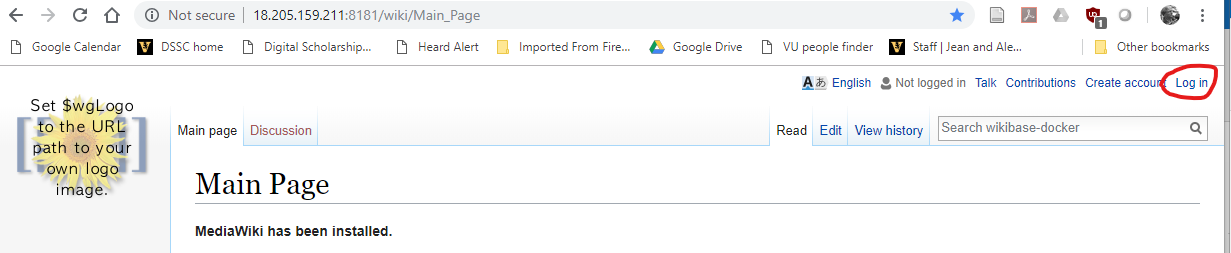
1. Go to either the Wikidata test instance or the URL of your Wikibase instance (probably ending with port 8181), depending on the part of the exercise you are working on. In the upper right, click on the login link. If you’ve set up a local copy of Wikibase on your computer, the default administrator account is admin with password adminpass. If you’ve been issued a username and password, use them. You can also create your own account by clicking on the button under Don't have an account? (unless account creation has been disabled for the Wikibase instance you are using).
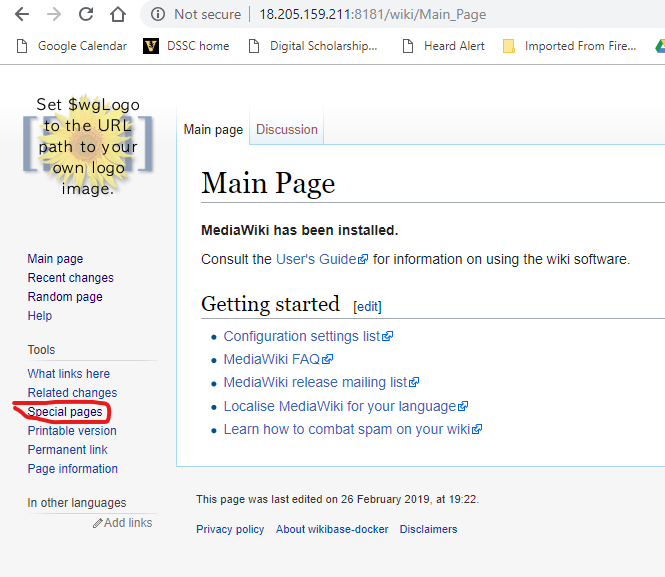
2. After you have logged in, click on the Special pages link in the left menu.

3. On the Special Pages page, click on the Bot passwords link.
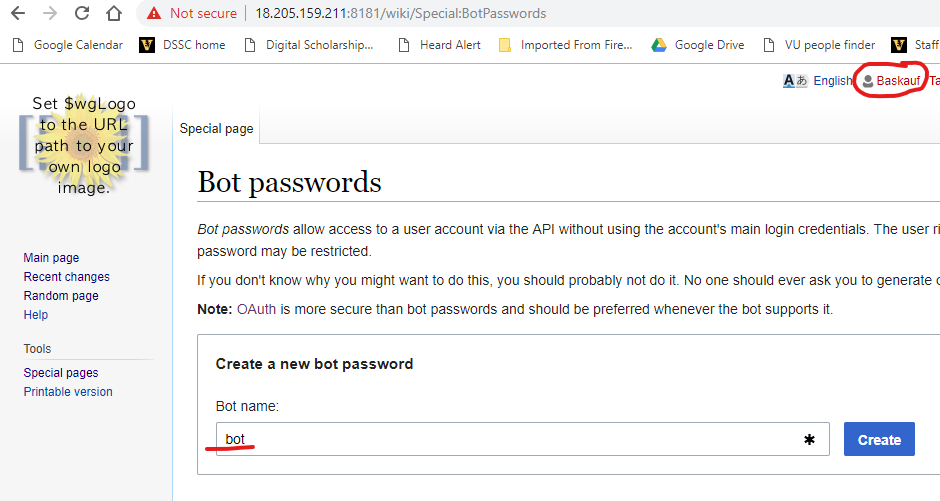
4. On the Bot passwords page, enter the name of your bot. It is customary to include the text bot somewhere in the bot’s name. You don’t need to worry about your bot’s name colliding with other bot names because it will be associated with your username.
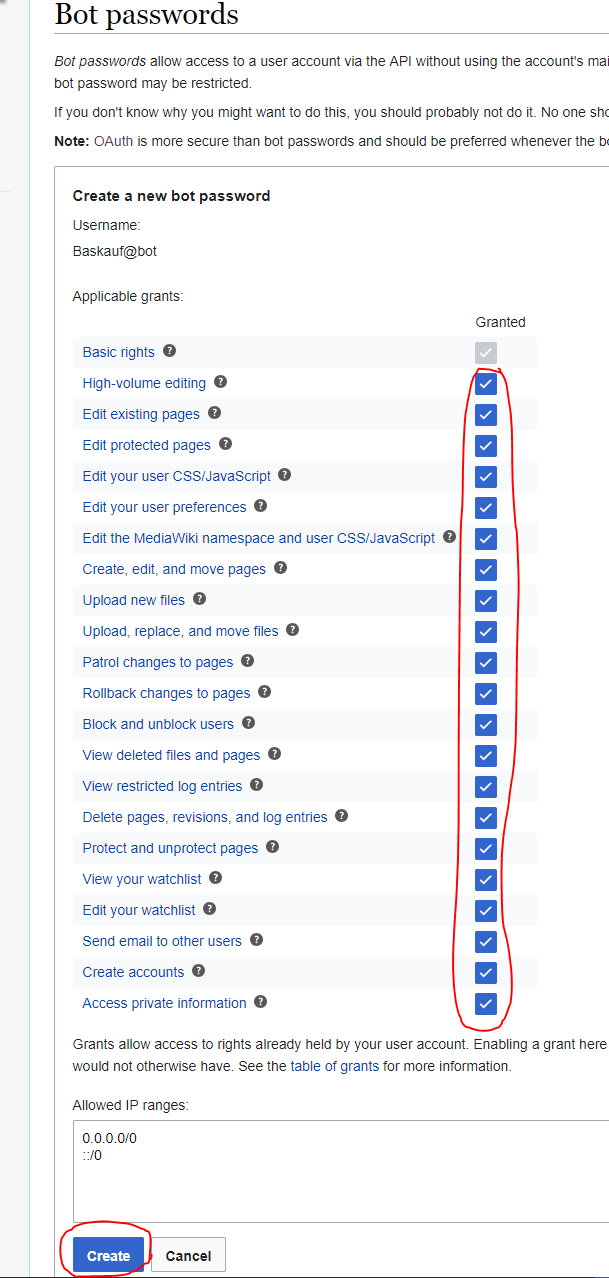
5. Check the boxes for permissions to give to your bot. For the Wikidata test instance or a practice Wikibase instance, you can check all of the boxes. For a real bot to edit something like Wikidata, you would need to read up on the options before choosing. Click on the Create button.
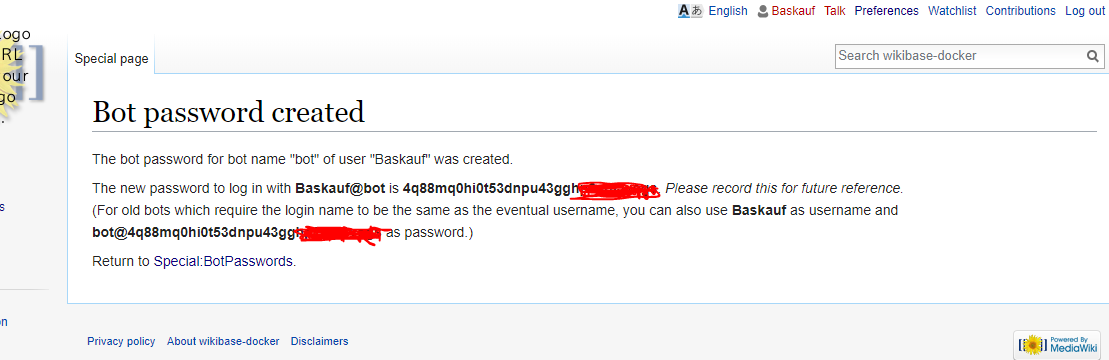
6. A password will be created for your bot. As the text indicates, there are actually two versions of the username and password. For this exercise, it doesn’t matter which one you use.
In the credentials file that you left open before, copy and paste your bot’s username in place of User@bot in the credentials file. Copy and paste your bot’s password in place of the example password in the credentials file. Make sure that you don’t have any trailing spaces after the username and password, or between the equals sign and the text you pasted in. Save this file. There is no way to recover this information once you leave the page, so it might be good to save another copy of the file under a different file name in case you accidentlly write over or delete this one.
Use the bot to write to the Wikidata test instance
Background
Any program can read data from Wikidata/Wikibase without authorization, since reading has no effect on the database itself. However, to write to Wikidata/Wikibase using a program requires authorization in order to create a record associating the change with the user making it.
How authorization works
In this script, the authorization process and the process of writing the data are handled by a Python library called requests. The requests library is the best way in Python to communicate with a server using HTTP. Although the requests library is very widely used, it is not part of the Python standard library. So if you have not used it before, you will encounter an error the first time you run the bot script - something like “No module named ‘requests’”. If you get this error, you will need to use PIP, Python’s package manager to install the requests library.
If you don’t care how bot authorization works, you can skip the rest of this section.
The authorization process involves three steps. The steps seem unnecessarily complicated when Python is used, but since authorization is a general process that can also be done via a webpage, there are extra steps in the process that are taken to prevent nasty shenanigans that are possible via a web interface. In the bot code, each of the three steps is handled by a separate function that is called by the script.
At the start of the script (line 16), we establish a requests session:
session = requests.Session()
You may have previously used requests to make HTTP GET or POST requests using a command like
r = requests.get('http://bioimages.vanderbilt.edu/baskauf/24319.rdf')
Commands like that create a new HTTP sesson with the server each time the command is given. If we instead create an explicit requests session and reuse it in subsequent commands, then our connection with the server persists across the commands - the server “remembers” previous interactions when new commands are issued.
The first function, getLoginToken() (lines 43-53) uses an HTTP GET call to signal to the API that we want to perform a secure login. The API responds by sending us a token (string of random characters) to be used in the login.
The second function, logIn() (lines 57-71) uses HTTP POST to send the login token, username, and password as data to the API. Although the API does send a response, nothing in that response is actually needed to continue the authorization process. Since the session persists, the API “knows” that the session has been authenticated.
The third function, getCsrfToken() (lines 77-88) uses HTTP GET to retrieve a “cross-site request forgery” (CSRF) token. CSRF is a kind of attack that can be carried out when web forms are used. It isn’t particularly relevant to us since we are using Python, but it’s built into Wikidata’s security system, so we need to have a CSRF token that we will send to the API with each of our requests to make an edit. If our script makes multiple edits, we can reuse the same CSRF token many times. However, each time we restart the script, the login process is repeated and we get a different CSRF token.
Once we have the CSRF token, we can use the writeStatement() function to create a statement (referred to as a claim in the Wikidata world) about an item in Wikidata or Wikibase.
Figuring out what statement we want to create
Since this lesson assumes that you already have some experience with editing Wikidata, it assumes that you already know about items and properties. Items have identifiers starting with “Q”, like Q2. In the real Wikidata, the universe has the identifier Q1. In the Wikidata test instance, the universe has the identifier Q188427. Clearly, you cannot assume that there is any relationship between the identifiers assigned to an item in the real Wikidata and the test Wikidata instance. The same is true for properties. An important property in Wikidata is P31 (instance of), which is used to indicate what kind of thing the item is. In the Wikidata test instance, instance of is the property P82.
The example bot script is set up in lines 129-131 to create the statement
Q188427 P82 Q1917
that is, “the universe is an instance of a cat”. Before you run the script, you need to go to the Wikibase test instance and check whether someone else who has run this script has already asserted that the universe is a cat. If so, you should manually delete the statement by clicking on the edit link, then selecting remove. Alternatively, you can change the script to assert something different about the universe. Whatever the case, you should make sure that the statement you plan to create does not already exist, then use a text editor to edit lines 129-131 so that the subject, property, and object (sub, prop, and obj) have the appropriate values for the statement you want to make.
Running bot
To run the script, open a console window (Terminal on Mac or Command Prompt on Windows) and navigate to the directory where you saved the bot script and credentials file. On a Mac, issue the command
python3 write-statements.py
On a PC, issue the command
python write-statements.py
You should get feedback as the script proceeds through each step of the authentication process. If you get errors, check to make sure that your credentials file is in the same directory as the script and that it contains you username and password with no extra spaces or extraneous characters.
If your attempt to write the statement was a success, the console output should show text something like this:
Write confirmation: {'pageinfo': {'lastrevid': 506758}, 'success': 1, ...
You can check to see that the change actually happened by refreshing the universe page on the test instance to see if you statement is there. Click on the View history tab at the top of the page and you should see the record of your claim creation.
Modifying the script
Most of the bot script is taken up with the authentication process. Only the writeStatement() function is actually handling the write to Wikidata. Once you have convinced yourself that the bot script actually works, you will probably want to modify it to do other things.
Bots can interact with the API through “actions”. The action we are using here is called wbcreateclaim - you can see that action in line 94 of the script where we specify the it within the dictionary that we pass into the requests session’s .post() method.
To learn about all of the actions that can be carried out with the API, go to the MediaWiki API help page. You will see a long list of actions. (Actions specific to Wikibase are also described in the Wikibase API reference.) The actions that are relevant to Wikidata all begin with “wb”. If you click on wbcreateclaim, you will be taken to the action’s documentation page. The documention page shows the parameters that need to be sent as data in the POST request. The example format is a bit cryptic, but by comparing what is listed on the page with the bot script, you should be able to figure out how to hack the bot script to do other actions.
One of the highly useful features for testing is the open in sandbox feature that can be accessed by clicking on the link following an example. (Important note: There are separate sandboxes for the test instance and the real Wikidata instance. Before you perform actions in the sandbox, double-check in the browser URL bar that the URL of the page you are on begins with “https://test.wikidata.org” and NOT “https://www.wikidata.org”. If it is set to the latter, you will be editing the real wikidata - something you probably don’t want to be doing.) The API sandbox page for wbcreateclaim allows you to execute the wbcreateclaim API action directly without using a script. Click on the action=wbcreateclaim link in the upper left of the page and edit the boxes and dropdowns to the values you want. Click on Auto-fill the token to avoid having to deal with the whole authentication mess. When everything is set the way you want, click the Make request button.
After the request has been made, the Results screen will give you two useful things. If you select JSON from the Show request data as: drop down, the Request JSON box will show you an example what needs to be put into the dictionary that you pass into the request session’s .post() method. Below that, you will see the JSON that gets returned to the bot from the API. In the case of wbcreateclaim, the JSON doesn’t tell you anything that you don’t already know, but if you perform some other actions, it may be useful. For example, if you use wbeditentity to create a new item, the response JSON will tell you the ID of the item that it creates (an important thing to know!).
By playing around with the API sandbox, you should be able to figure out how to hack the basic bot script example to perform other useful actions on the Wikidata test instance.
Making edits to the real Wikidata
There are no fundamental differences between how you make edits on the Wikibase test instance and the real Wikidata. To switch to editing the real Wikidata, all you need to do is to set up a bot account in the real Wikidata, then change the credentials file to the Wikidata API endpoint URL (https://www.wikidata.org) and your real Wikidata bot username and password.
As with all Wikimedia platforms, users are not particularly restricted from doing anything. However, if you do bad things, the community will discover those bad things and revert them. If you continue to do bad things, you may get blocked. It is considered good form to inform the community about your bot and what you are using it for. Before embarking on creating and using a bot on the real Wikidata, you should read the Wikidata:Bots page, which explains the Wikidata policy on bots and the social conventions related to bot use.
This example makes only a single edit. As soon as your bot starts making multiple edits to the real Wikidata, you must throttle it using the Maxlag parameter. See the end of the lesson for more about this.
Adding data to a Wikibase instance
In the second part of this lesson, we will work with a modification of the bot script that will allow us to interact with the API to batch-create a number of items using data from a spreadsheet. As we create each item, we will assign it one or more labels and one or more descriptions. We will then assign several properties to the newly created item.
As we noted in the beginning, this kind of task is well suited to Wikibase. For one thing, Wikibase does not come with any items included - it is up to the users to add them. Since it isn’t obvious at this point in time how Quickstatements can be used for batch creation of items with Wikibase, using a script of this kind is a good alternative. A reason why doing this kind of batch loading is more suitable for Wikibase than Wikidata is that before creating items in Wikidata, you should determine whether the items already exist. If they already exist, you should not create duplicate items and that would require a more sophisticated bot than this. Presumably in your own Wikibase instance you would know whether the items you were creating were new or not.
Preliminaries
Accessing Wikibase
If you don’t have access to an online instance of Wikibase, you can install a local instance on your own computer using these instructions. After you have access to an instance, go back to the instructions for creating a bot and generate a bot username and password there as you did for the Wikidata test instance. Then change the credentials.txt file to username and password, and change the value of endpointUrl to the URL of your Wikibase instance. If you are running it locally on your own computer, the URL will probably be http://localhost:8181.
Preparing the data to be added
Go to this page and download the file cartoons.csv into the same directory where you downloaded the first bot script.
Using your spreadsheet program, open the file.

In this table, each row represents an item that will be created in the Wikibase database. When it is created, it will be assigned the next available item identifier (begins with Q). Every item should have an English label (in the first column named enLabel) and an English description (in the second column named enDescription). It is also possible to have zero to many additional labels and descriptions in other languages. In this example, there is a second set of labels in Spanish in the esLabel column.
The other columns contain the values for the properties used as the column headers. To see the available properties, go to Special pages then List of properties in the Wikibase section.
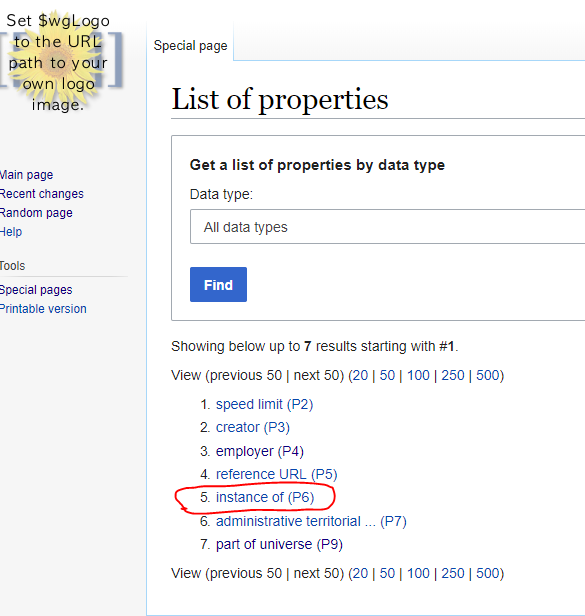
The column header for a property should consist only of the property identifier (P followed by a number) and nothing else. In the example spreadsheet, the fourth column is headed by P6 and comparison with the list of properties shows that P6 is “instance of”.
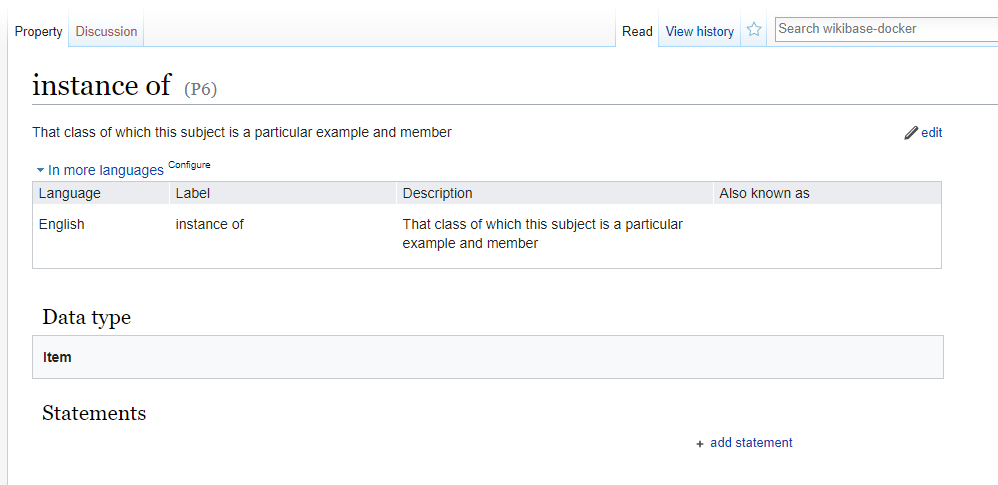
Clicking on the P6 link takes us to the page for the instance of property. An important thing to notice is that the Data type of the property is item. The value used in the table must match the Data type of the property! Since P6 requires an item, all of the values in the P6 column are item identifiers (starting with Q): Q3058. As the script is currently written, only items can be give as values of properties. However, the script could be easily modified to allow string values or other types of values. More on this in the comments at the end.
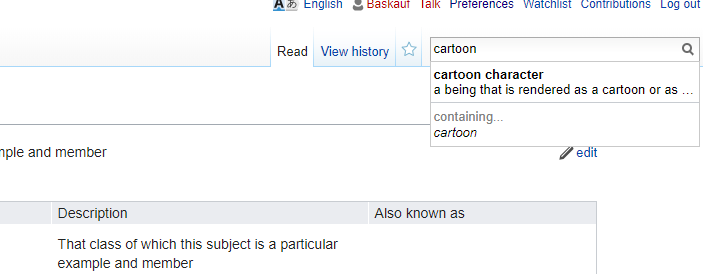
Q3058 is “cartoon character” and we can see its entry by starting to type “cartoon” in the search box at the upper right.
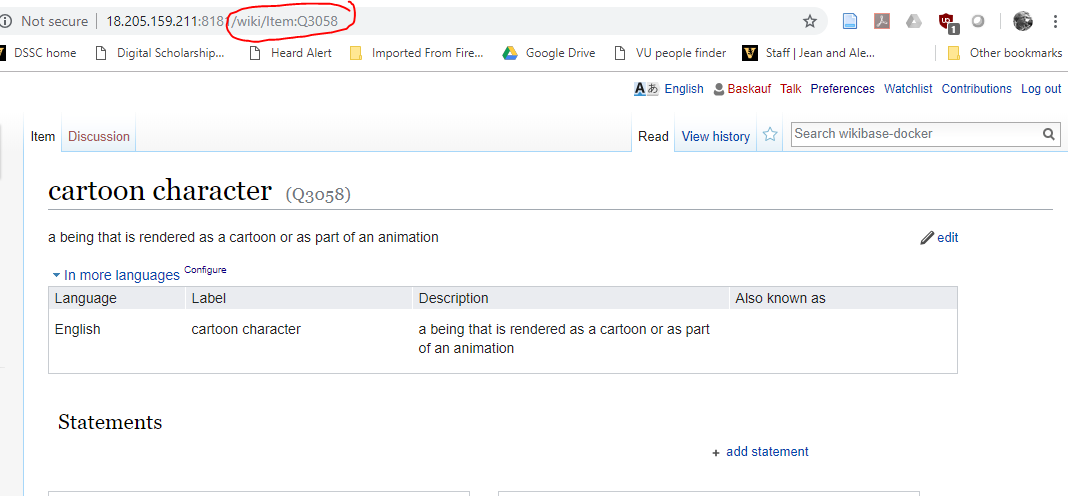
Wnen we click on the entry we want, its page will come up. You can find the page for any Q identifier by changing the end of its URL to the appropriate identifier.
Adding properties
If a property that you want to assign to the items that you are creating with your bot doesn’t exist, you will need to create the property by going to Special pages, then Create a new property in the Wikibase section.
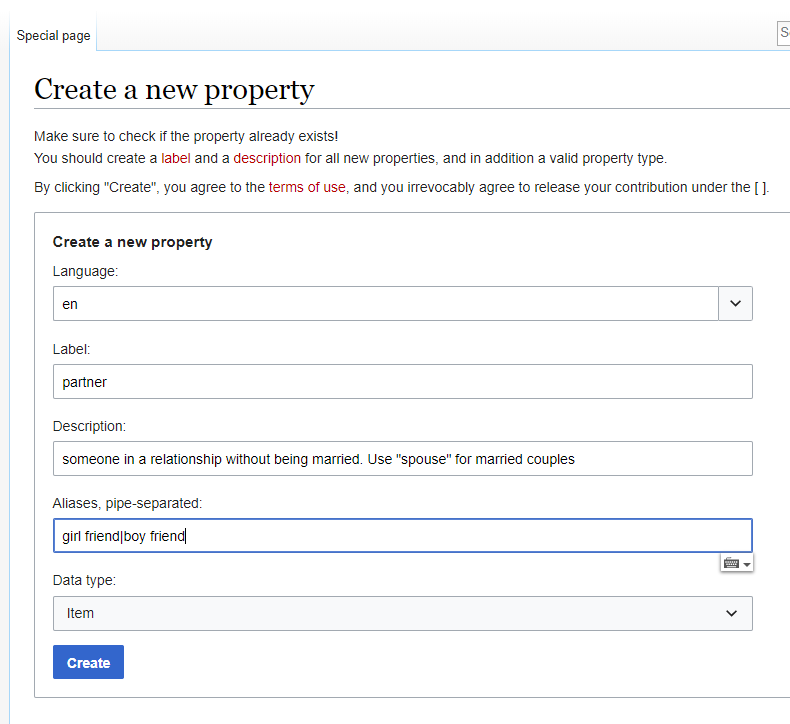
Above is an example of a property that I could use to link Mickey Mouse to Minnie Mouse.
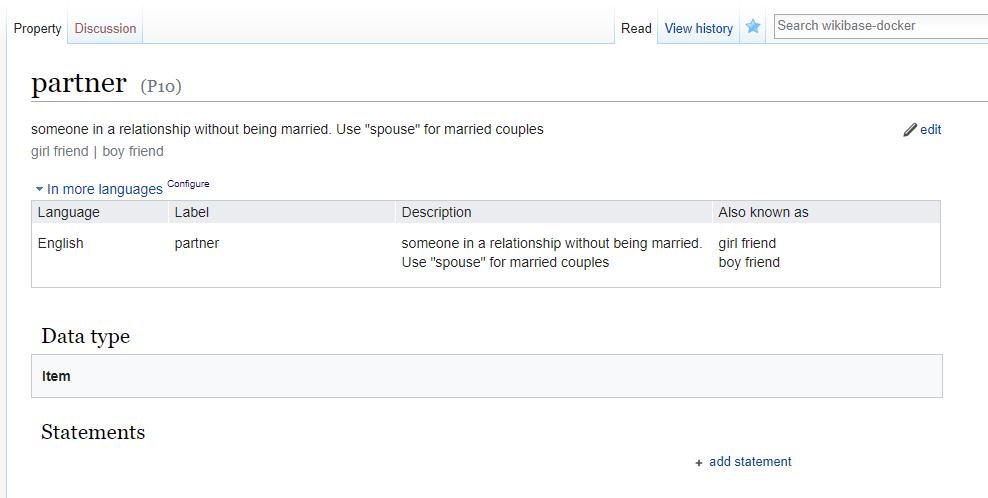
When I click Create, I see the page for the newly created property.
Adding items
The reason that you are using the bot is because you want to create a lot of items. However, you may want to manually create items to be used as the values of properties. For example, in the spreadsheet, property P9 is “part of universe” and is used to connect a cartoon character to its “universe” (Disney = Q3070, Looney Tunes = Q3076, etc.). If I want to add another universe, such as Marvel, I need to go to Special pages then Create a new item in the Wikibase section.
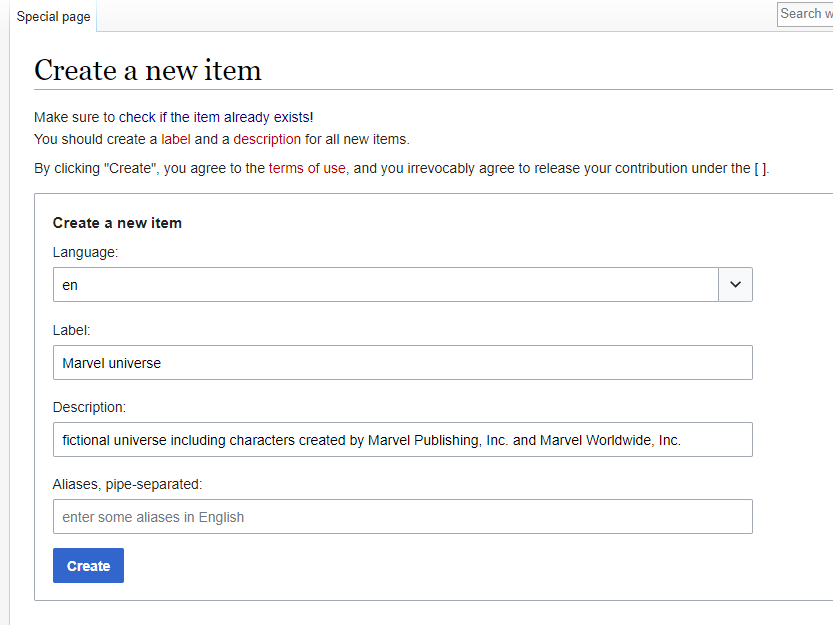
If I want to add another universe, such as Marvel, I need to go to Special pages then Create a new item in the Wikibase section.
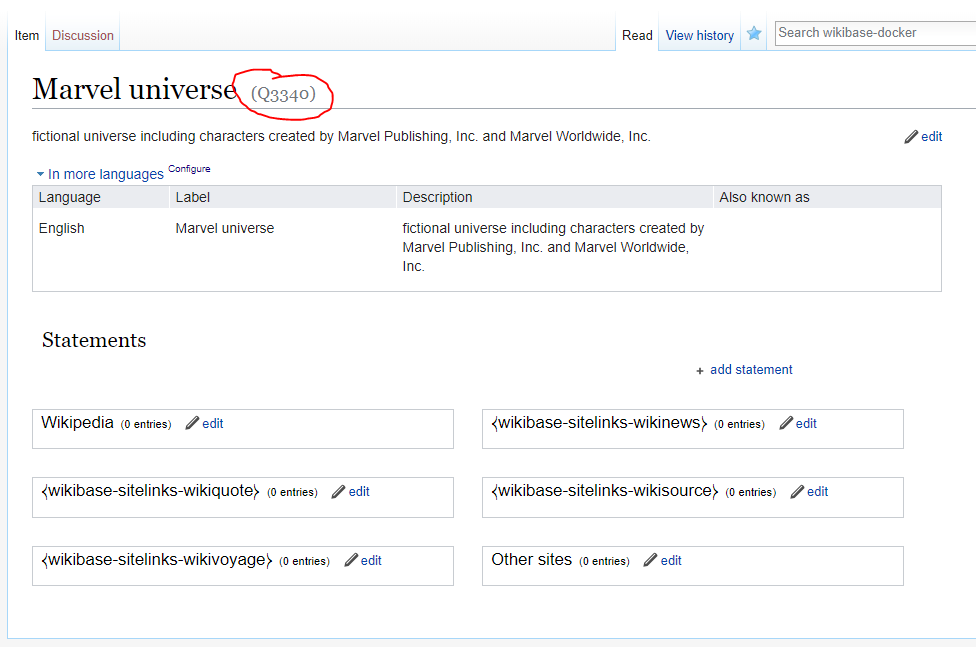
After I enter the information and click Create I’ll see the page for the new item and can get the item’s Q identifier (Q3340 in this case) to use in the column in the spreadsheet.
Note: be sure that you remember to save your spreadsheet in CSV format before moving on to the next section! If it was opened as a CSV, it should be saved in that format by default.
Editing the bot
First you need to download the bot script from this page as you did the first bot script. Save it in the same directory as the other files.
Before you run the script, you need to edit a few lines of the script. Open the script in your text editor and find the main script at about line 158.
1. The first thing to edit is the properties list on line 166. In the script that you downloaded has a properties list that corresponds to the property columns in the example spreadsheet:
propList = ['P6', 'P9']
You should edit the list so that all of the property columns in your spreadsheet are listed with the correct property identifiers, enclosed in single quotes and separated by commas. The order does not matter.
2. The second thing to edit is the name of the CSV file in line 169:
sourceCsvFile = 'cartoons.csv'
The script as downloaded has the name of the CSV file you downloaded. If you are using that file, you don’t need to change anything.
If the file is in the same directory as the script, you only need to include the file name (with extension). If it’s somewhere else, you need to include the path, using the syntax appropriate for your operating system.
3. Lines 173 to 176 associate labels in various languages with the columns in the spreadsheet that contain them. Since the example has two columns with labels in different languages, there are two dictionaries in the labelList list. The value of string for a particular language should contain the column header for that label inside the single quotes in the square brackets of item[], like this:
{'language': 'en', 'string': item['enLabel']}
If you only have one language label, delete the second dictionary and the comma separating the two dictionaries.
4. Lines 177 to 179 has a similar list (descriptionList) for item descriptions:
{'language': 'en', 'string': item['enDescription']}
In the example CSV table, there is only a description in one language, but you can add additional dictionaries for descriptions in other languages using the same structure as in the labels dictionary. Just make sure that the number and language of dictionaries in the labelList and descriptionList lists correspond to the number and languages of columns in your spreadsheet.
5. Once you have edited the bot script to match your spreadsheet, save and close the load_csv.py file.
Running the bot
In your console window, navigate to the directory where the bot script was saved, then issue the command to run the bot. In Windows, that’s:
python load_csv.py
and on Mac it’s:
python3 load_csv.py
Console output
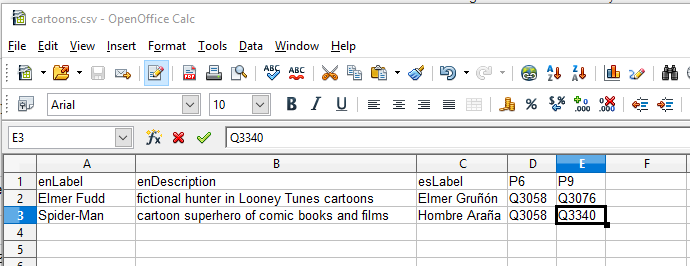
I changed the spreadsheet to create some new cartoon characters and to use the new item value that I created (Q3340 = Marvel universe).
Here’s the console output that I got when I ran the bot script:
erebuss-MacBook-Pro-3:~ baskausj$ python load_csv.py

created item: Elmer Fudd
assigned ID: Q3341
added claim for: P6
added claim for: P9

created item: Spider-Man
assigned ID: Q3342
added claim for: P6
added claim for: P9

erebuss-MacBook-Pro-3:~ baskausj$
Results
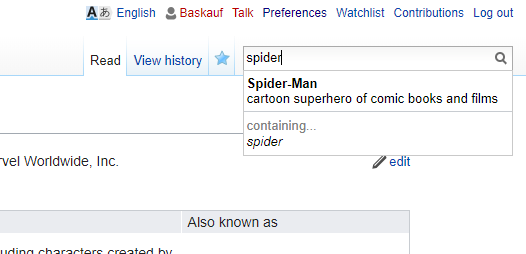
If I return to the Wikibase GUI interface and begin typing “spider” in the search box, I now see “Spider-Man” as an entry.
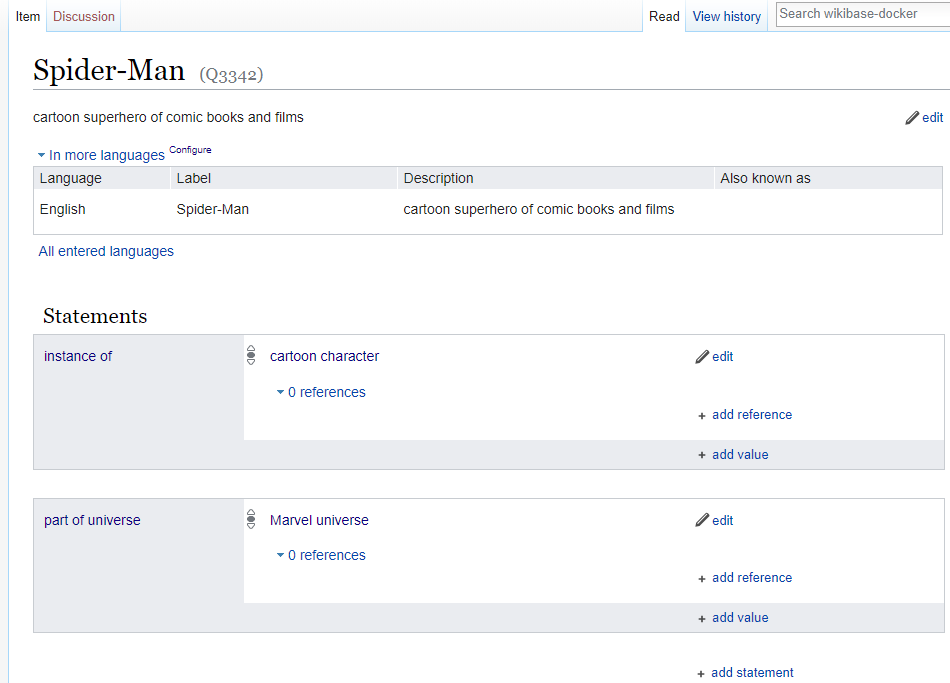
Clicking on the entry takes me to the new page.
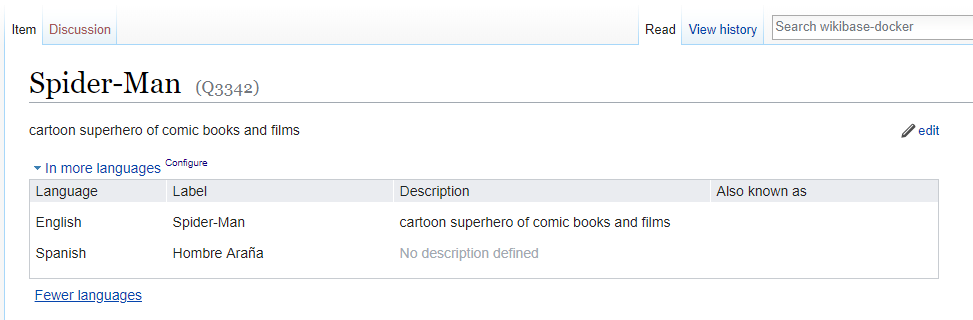
If I click on the All entered languages link I’ll see the Spanish label.
Some notes on the load_csv.py script
Several parts of this second script were modified from the first script we used. This script has a function called authenticate(), which combines all three of the authentication steps into a single function. The writeStatement() function is the same as in the previous script. It is called after the creation of the new items to create the claims about the items.
The key new feature of this script is the createEntity() function. Lines 141 to 149 are very similar to lines in the writeStatement() function. The main difference is that the data that are passed to the API as a string (the value of the data key) are much more complicated that what is passed as the value of the value key in the writeStatement() function. That’s because the label and description information has to be constructed into a somewhat complicated JSON string. The function allows an indefinite number of labels and descriptions, which complicates the code a bit. In line 156, the Q identifier for the newly-created item is pulled from the response JSON so that it can be returned and later used to specify the subject of the statements that are created later in lines 186 to 193.
As noted earlier, the scripts only allow creating claims whose properties have values that are items. Properties can have other types of values. The simplest of those is string values. The examples at the bottom of the wbcreateclaim API help page shows that we only need to change line 95 from
'value':'{"entity-type":"item","numeric-id":' + strippedQNumber+ '}'
to
'value':'"' + stringValue + '"'
in order to provide a string value for a property. (However, one should first examine the property to ensure that a string is actually a valid value for it.)
This example script has only very minimal error-handling. A production bot would need much more extensive error-handling routines and would need to be tested carefully to make sure that it handles any kind of error that could create havoc.
We should also note that, we did not make any attempt to support our claims with references – an important consideration in Wikidata. However, delving into that level of complexity requires that you first study the Wikibase data model, which is beyond the scope of this lesson.
A final important consideration when writing to the real Wikidata is throttling. It is a rude and bad practice to hit any public API at such a high rate of speed that it disrupts the function of the API and impedes other users of the API. This example script does NOT include any kind of delay between write operations. Before using any modification of the script to write to the real Wikidata, you should read the API Etiquette page and must learn how to use the Maxlag parameter.
Acknowledgements
Thanks to Asaf Bartov and Andrew Lih whose presentations and answers to my questions at the 2019 LD4P conference cleared up the confusion that was keeping me from getting this to work. sjb
Revised 2021-07-22

Questions? Contact us
License: CC BY 4.0.
Credit: "Vanderbilt Libraries Digital Lab - www.library.vanderbilt.edu"