previous page: Ways to use GitHub
Introduction to GitHub
On this page, we’ll talk about opening a GitHub account, creating a repo, and committing edits.
Opening a GitHub account
You can open a free GitHub account by going to https://github.com/. The process is relatively simple if you follow the signup instructions. With a GitHub account, you can create an unlimited number of public repositories. You can also create private repositories, but they are limited to three collaborators.
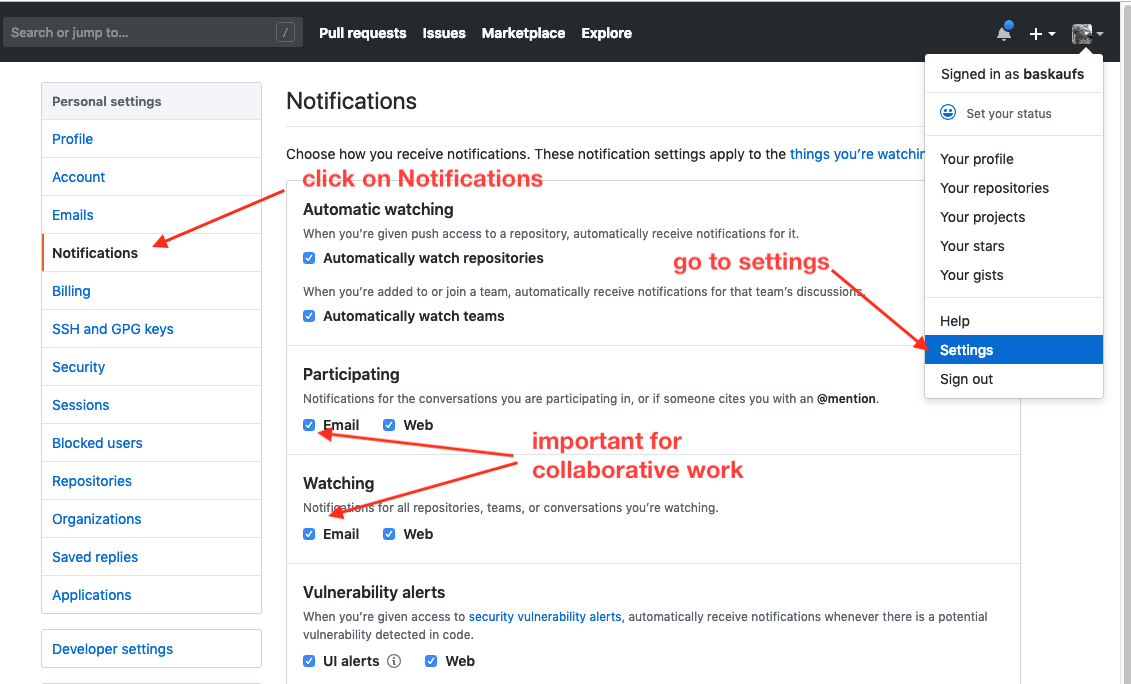
There are a number of things you can explore in the settings, such as your profile picture, email address, etc. One setting of which you should be aware is the notifications. Two common ways to communicate with collaborators in GitHub are through @mentions and watching repos. If you want to receive email notifications through these two means, you should enable it here. If you are getting an annoying number of emails, this is also where you can turn it off.
Creating a Repository
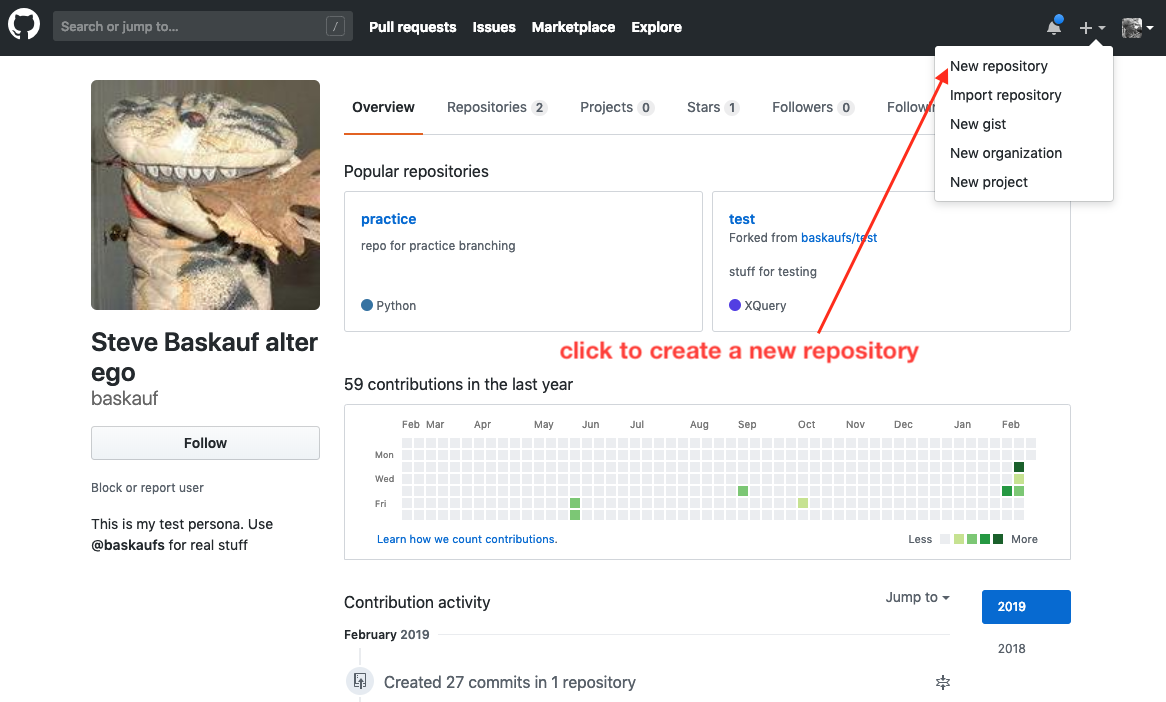
Once you have an account you can create a new repository through the “+ menu in the upper right of the screen. “
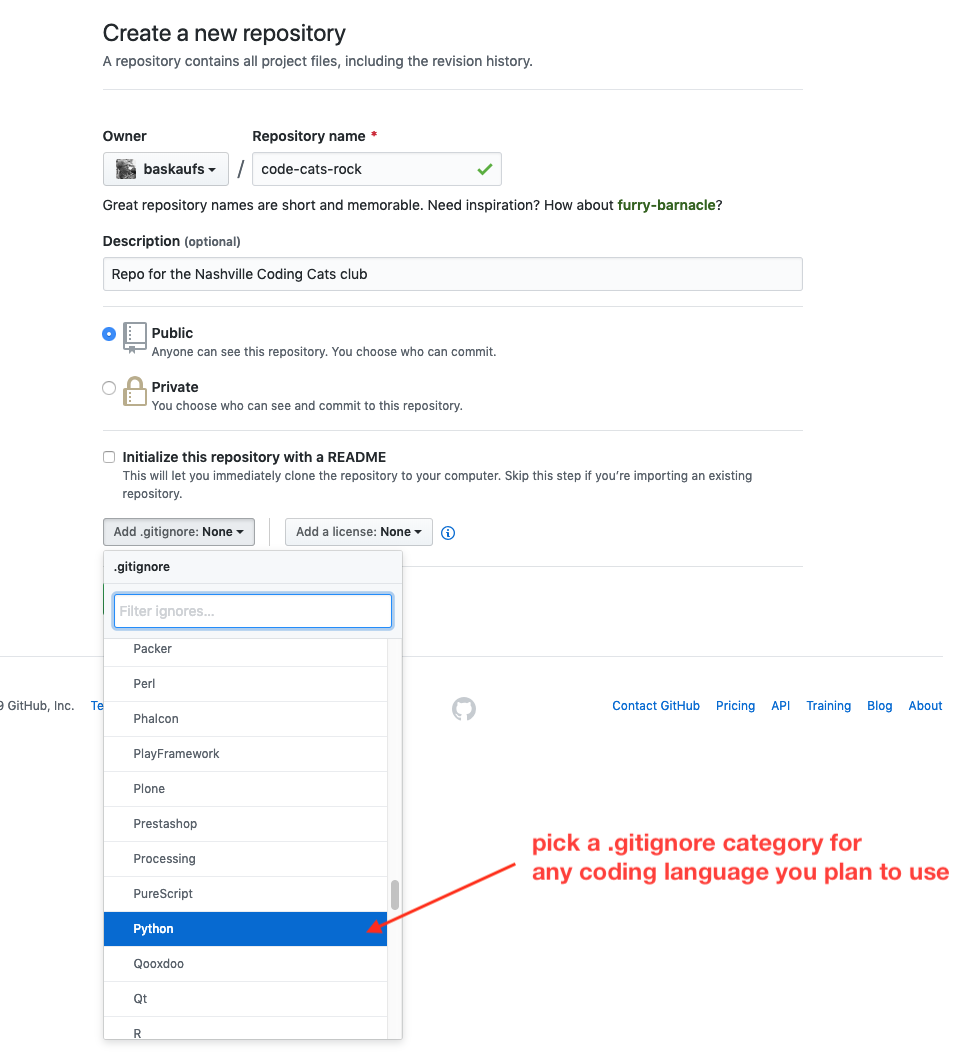
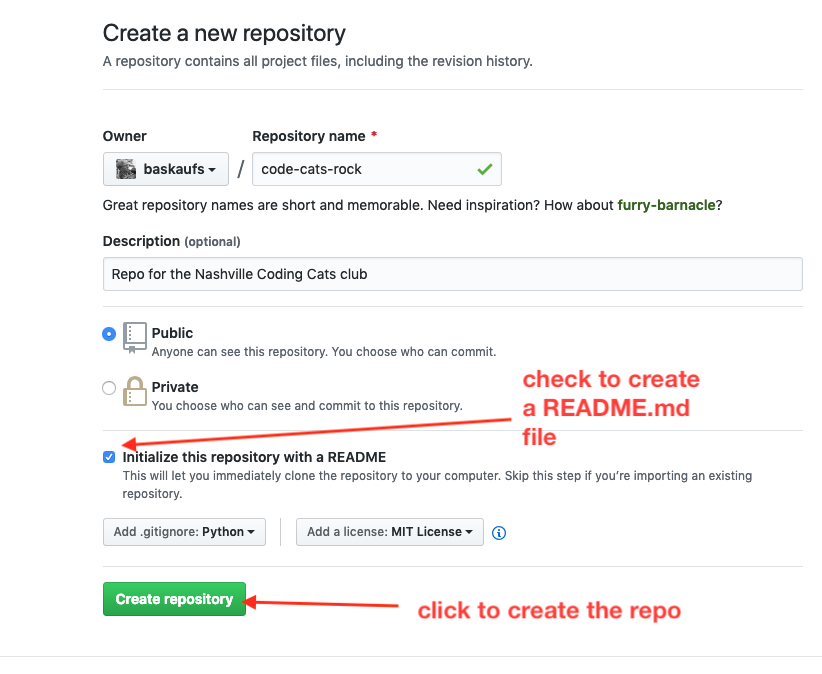
In the create repository dialog, you have several choices. The most important is whether you want the repo to be public or not. There are also three special files that can live in the root directory of the repository. One is the .gitignore file. A .gitignore file is not required, but if you are using a coding platform that generates a lot of annoying extraneous files that you don’t want to archive in GitHub, you can select a template .gitignore file for that platform that will ignore typical annoying files.
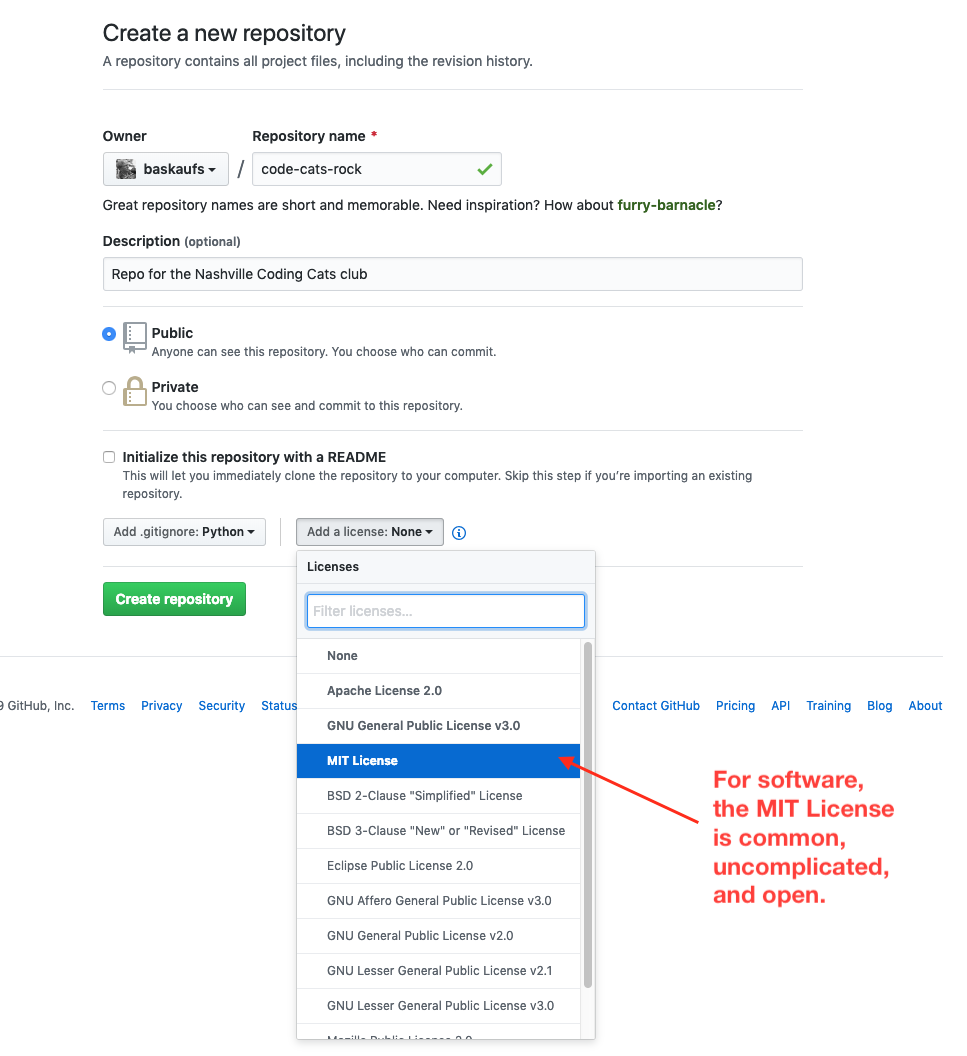
If your repository is public, you should add a license file that is appropriate for the kind of content you will create in the repository. If you are creating code and you want it to be open, many people use the MIT License. You can pick it or any other license from the dropdown list. If you are creating textual content that you want to be usable by anyone, but with attribution, a Creative Commons Attribution (CC BY) license is commonly used. It is not on the dropdown list, but the license file can be copied from here.
If you are a Mac user, after you have created the repository, you may want to add this line to the .gitignore file:
.DS_Store
It’s an annoying hidden file that automatically is created in Mac folders and will be an annoyance to any non-Mac users who use your material.

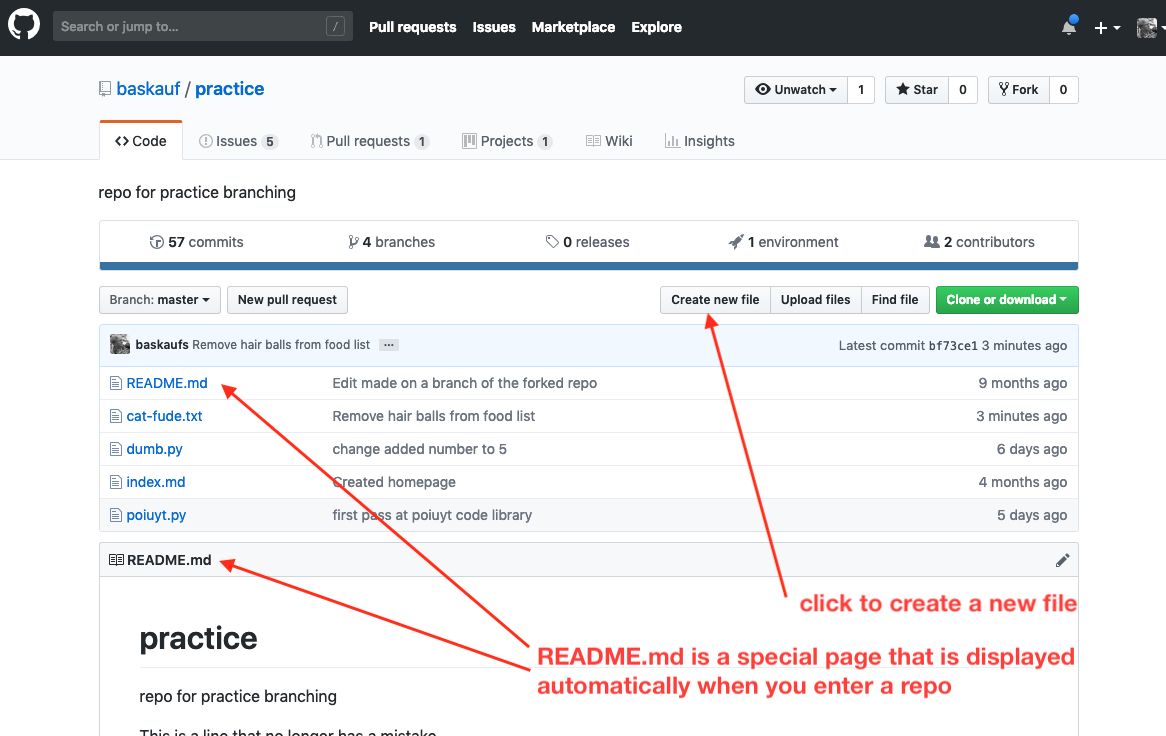
The third special file is called README.md. When a repository or directory within a repository has a README.md file, it will automatically display when the repository or directory is opened on the GitHub website. So it’s an important way to let potential users know the purpose of the files in that directory. When you’ve set up everything, click on the Create repository button.
After you have created the repository (or clicked on a repository name in the repository list for your account), you’ll see the list of files in the repository. If you created a README.md page, it will also be displayed at the bottom of the page. To create a new file using the online file editor, click the Create new file button. You’ll be at the same screen if you click on a file name, then click on the pencil icon at the upper right.
Commits
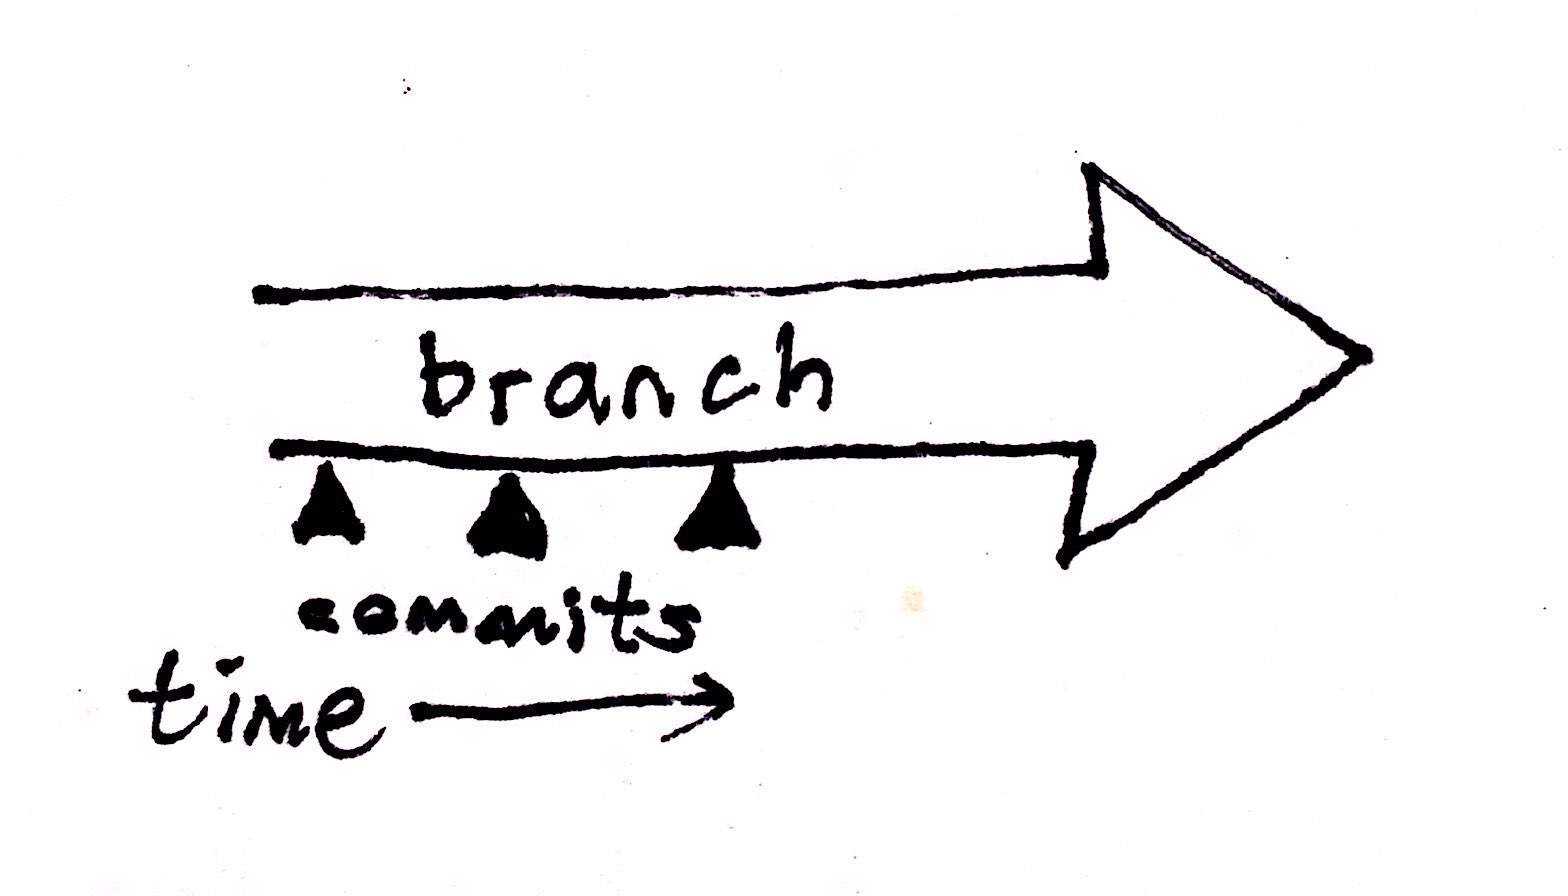
In Git, a branch is a set of documents that change over time. A commit happens at a point in the life of the repository where a set of changes to files in a branch are archived. You can imagine the situation as in the diagram above. You can think of a commit as a “frozen” record of the set of documents at a particular moment in time. The series of commits over time form the complete record of the lives of the files in a branch.
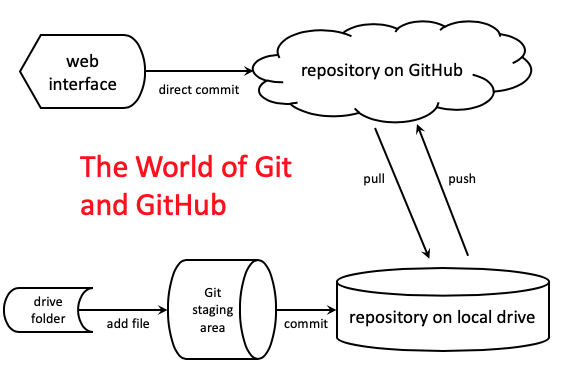
When editing a file on a local computer, creating commit is a two stage process: flagging a file to be “watched” by adding it to the staging area, then actually comitting the file to the local repository. We will see how to do that in the next lesson. However, using the web editing interface you can make direct commits to a branch in the online repository without any staging area being involved.
When you’re editing a document in the online editor, you use the Edit file tab. If you click on the Preview changes tab, you can see how your file has changed since the previous commit. Text that’s been removed is shown in red and new text is shown in green. Each time you make a commit, you are required to enter a commit summary. Optionally, you can also add more detailed comments.
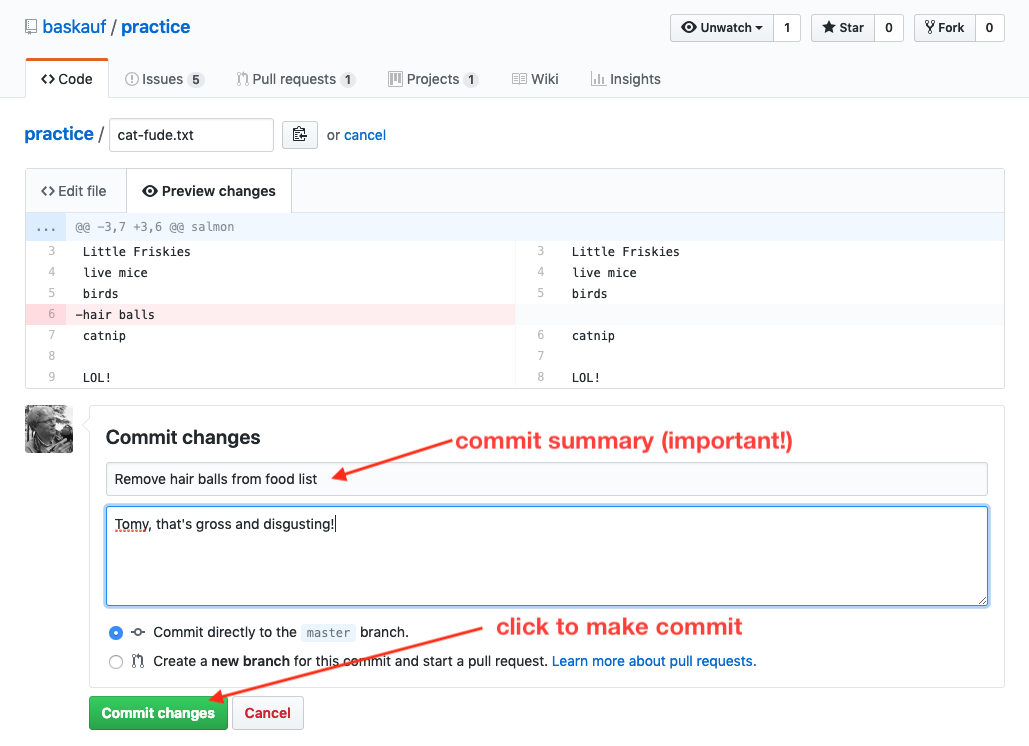
Although typing a commit summary is annoying, it is important because it makes it possible to get an overview of how the branch has changed over time. That’s crucial for two reasons. In the unhappy situation where you need to revert back to an earlier commit, it will be the easiest way to find where that commit is. The commit history also allows other collaborators to understand the series of changes you made in a branch when examining a pull request and deciding whether your branch is ready to merge with the master.
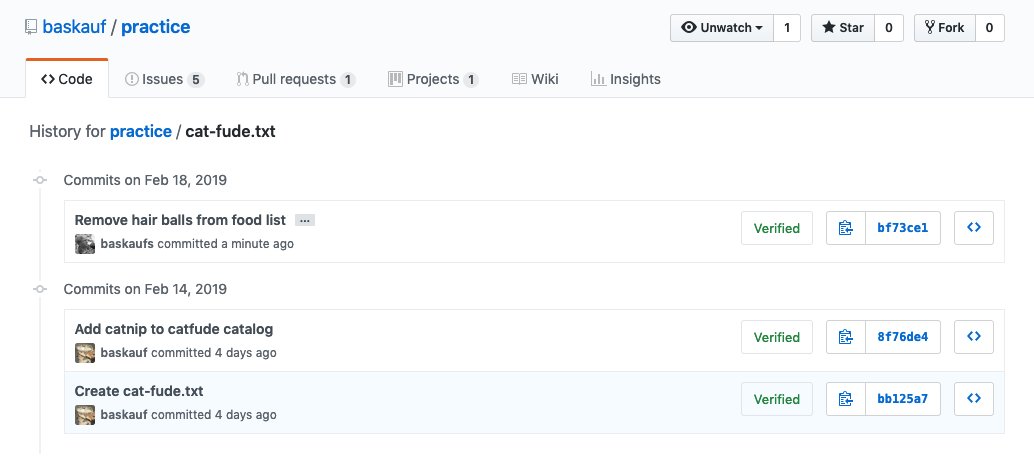
Once you’ve made the commit, you’ll see a summary of the file contents. If you click on the History button, you can see the history of commits.
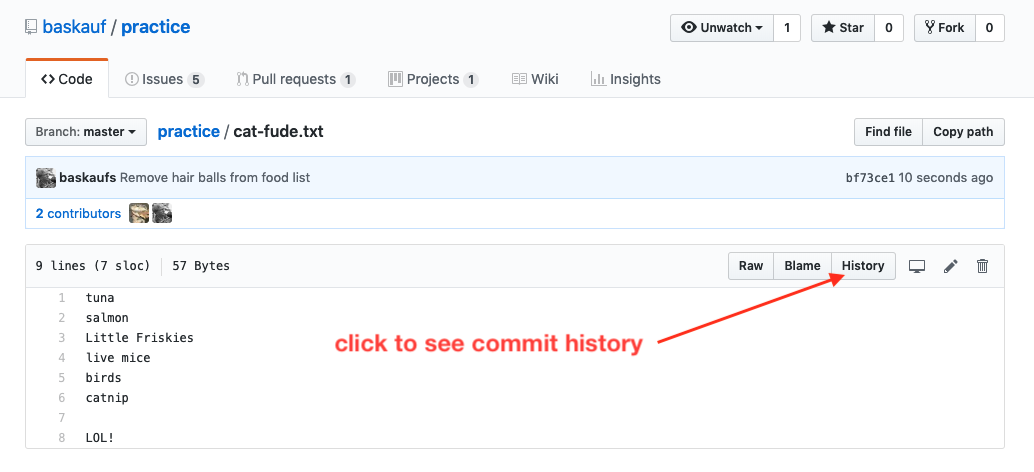
The commit history shows all of the commit summaries for commits that have affected this particular file in the past. The button to the right of the commit summary allows you to see a “diff” that compares how every file in that commit had changed since the previous commit.
next page: Cloning and the GitHub desktop client
Revised 2019-10-07

Questions? Contact us
License: CC BY 4.0.
Credit: "Vanderbilt Libraries Digital Lab - www.library.vanderbilt.edu"