Previous lesson: collaborative project management
GitHub for beginners: Creating a free website using GitHub Pages
In this lesson, we’ll learn how to create a simple website using the Pages feature of GitHub. We will see how you can select a built-in theme to add simple styling to the page, or adopt a remote theme that can be customized to build a sophisticated website. Finally, we’ll see how you can exert some control over the site URL, especially if you have purchased a custom domain name from a DNS provider.
Learning objectives At the end of this lesson, the learner will be able to:
- explain how Markdown files pushed to GitHub are rendered into HTML web pages.
- set up a GitHub Pages website for a repository through the repo settings.
- create a homepage for the website by creating the
index.mdfile using Markdown. - apply stying to the website by choosing one of the built in themes on the settings page.
- change overall site configuration settings by editing the
_config.ymlfile. - create and link a static web page to the home page.
- apply a remote theme to a GitHub Pages website by editing the
remote_themeproperty in_config.yml. - change additional settings by editing a YAML file in the data folder.
- fork a remote theme to your account and enable it throught the
remote_themeproperty in its_config.ymlfile. - determine how to configure a forked remote theme by looking at the source repository’s landing page.
- create a website whose URL does not include a subpath for the repository, by naming the repo using the
accountname.github.iopattern.
Total video time: 45 m 46 s
Links
Introduction (0m35s)
.
Concepts (2m23s)
.
The following diagram shows the components of the GitHub pages system and how they interact with each other.
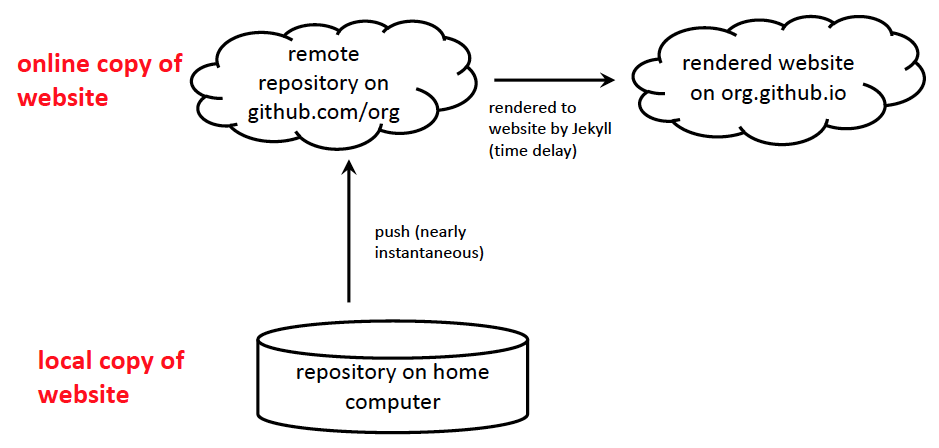
Each of these pieces is illustrated in the screenshots that follow.
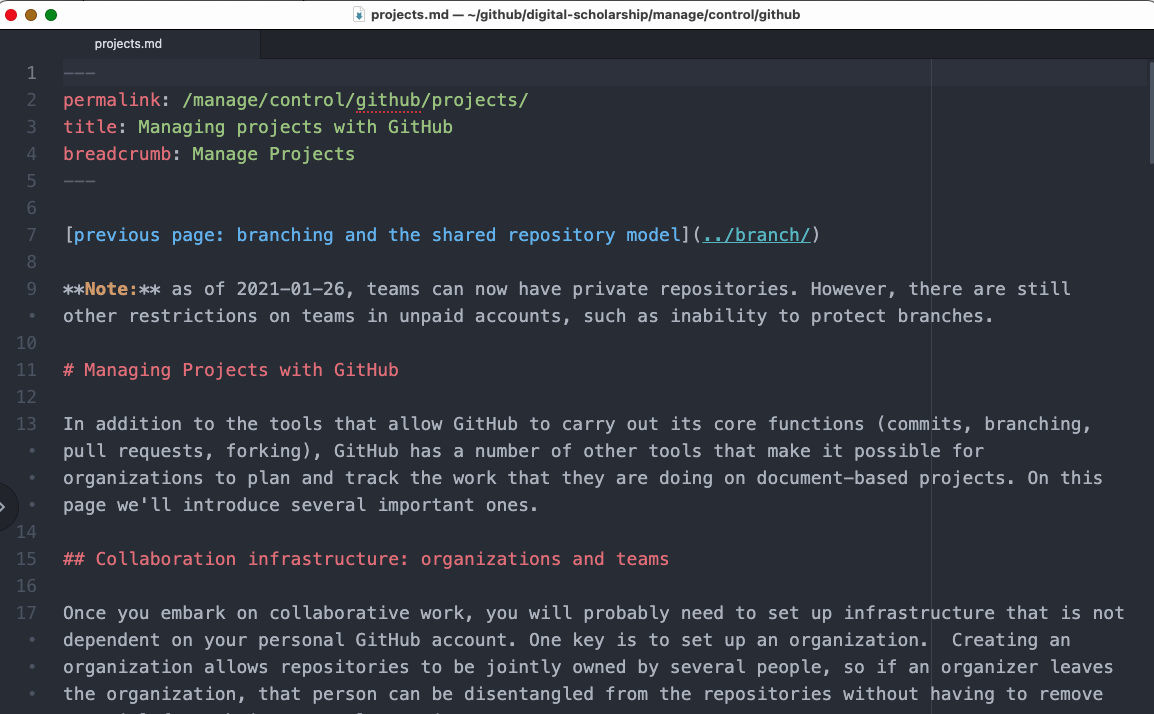
Markdown text file (editing in local repository)
This is how you’ll generate the content by creating a text file using Markdown syntax.
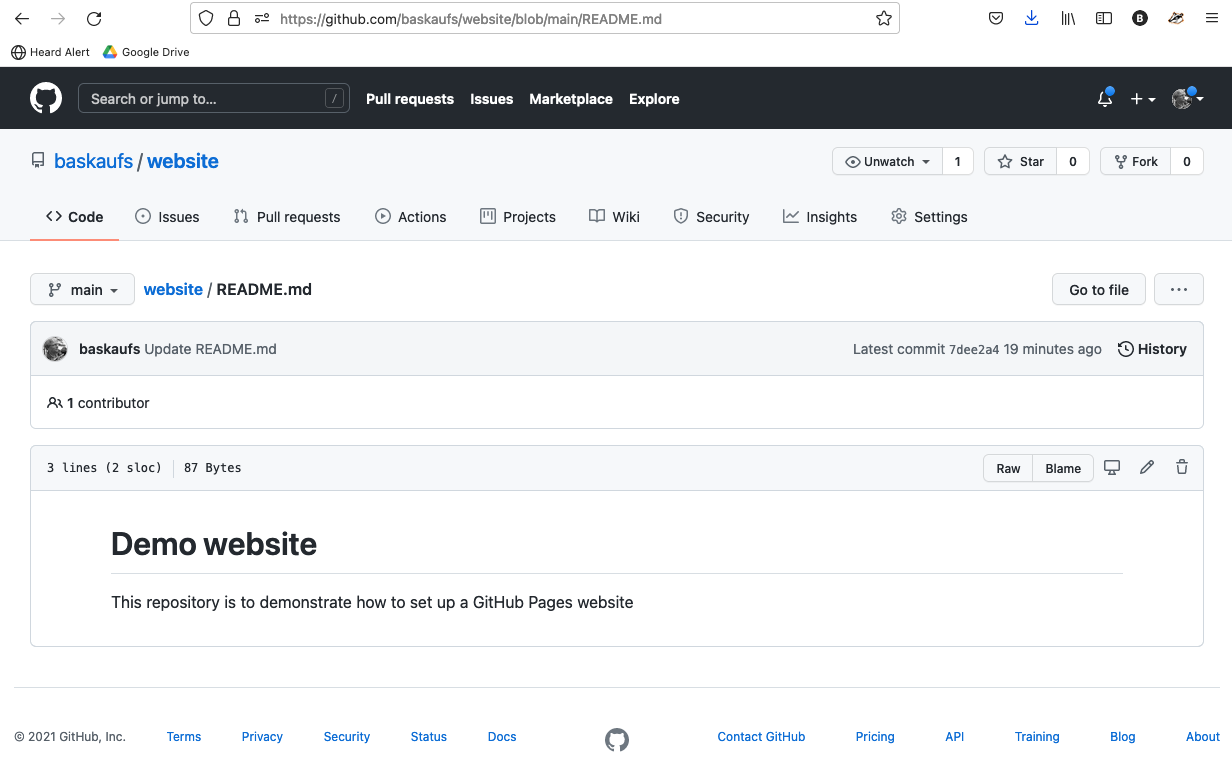
Text file rendered on GitHub (online repository)
URL pattern https://github.com/accountname/repository/blob/branch/path
Example URL https://github.com/HeardLibrary/digital-scholarship/blob/gh-pages/manage/control/github/projects.md
If you look at the text file after it’s been pushed to GitHub, the Markdown will be rendered, but without any styling.
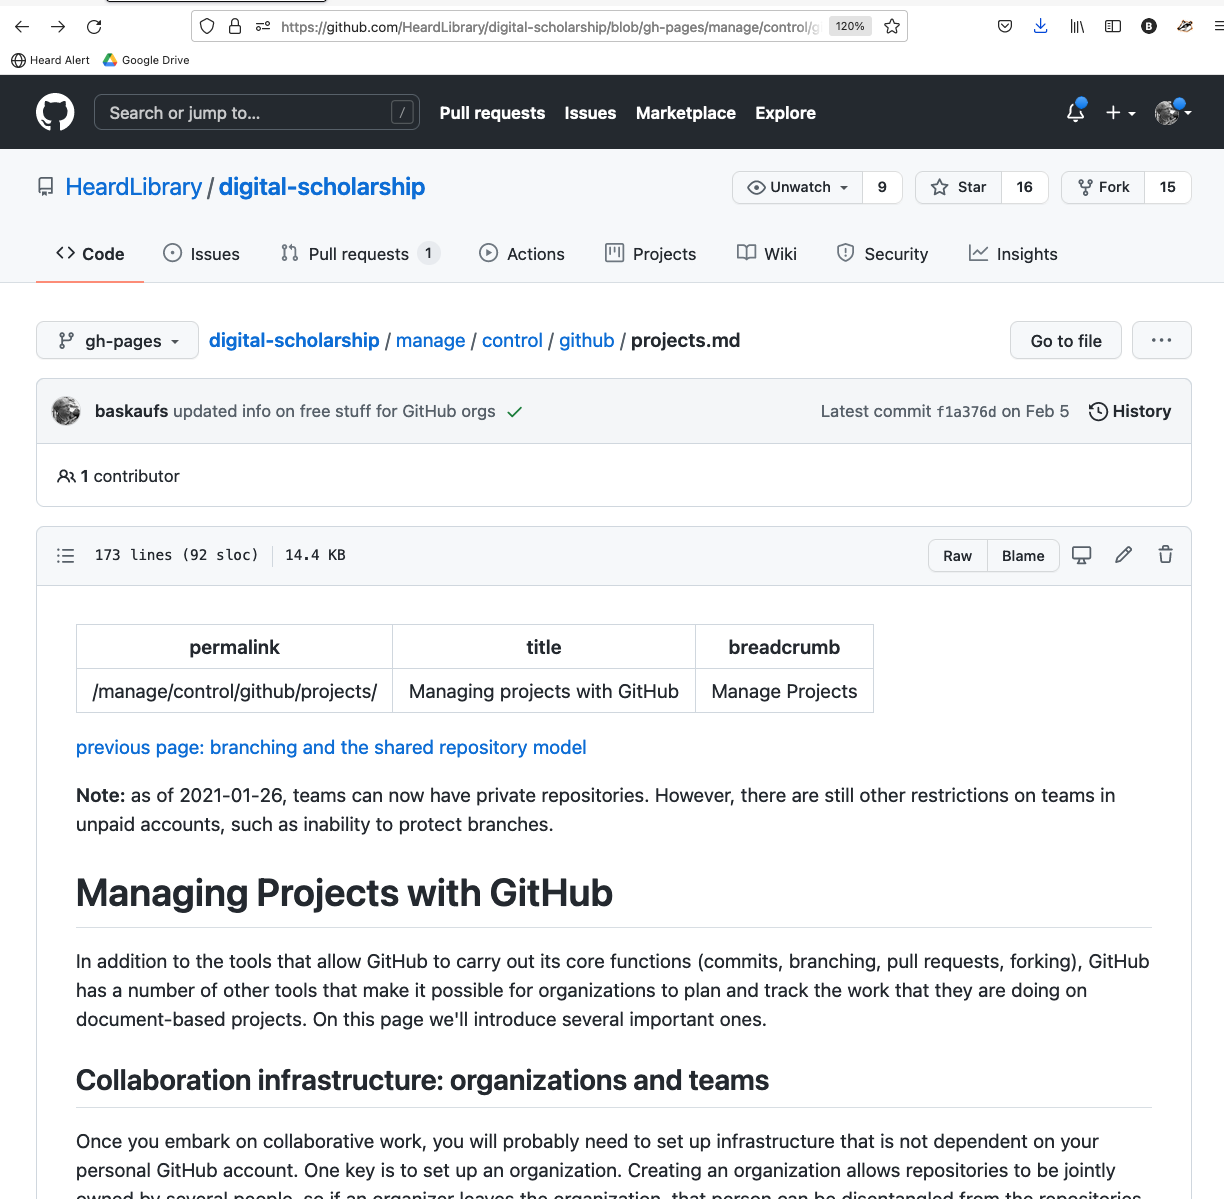
To see the actualy Markdown that you uploaded, click the Raw button.
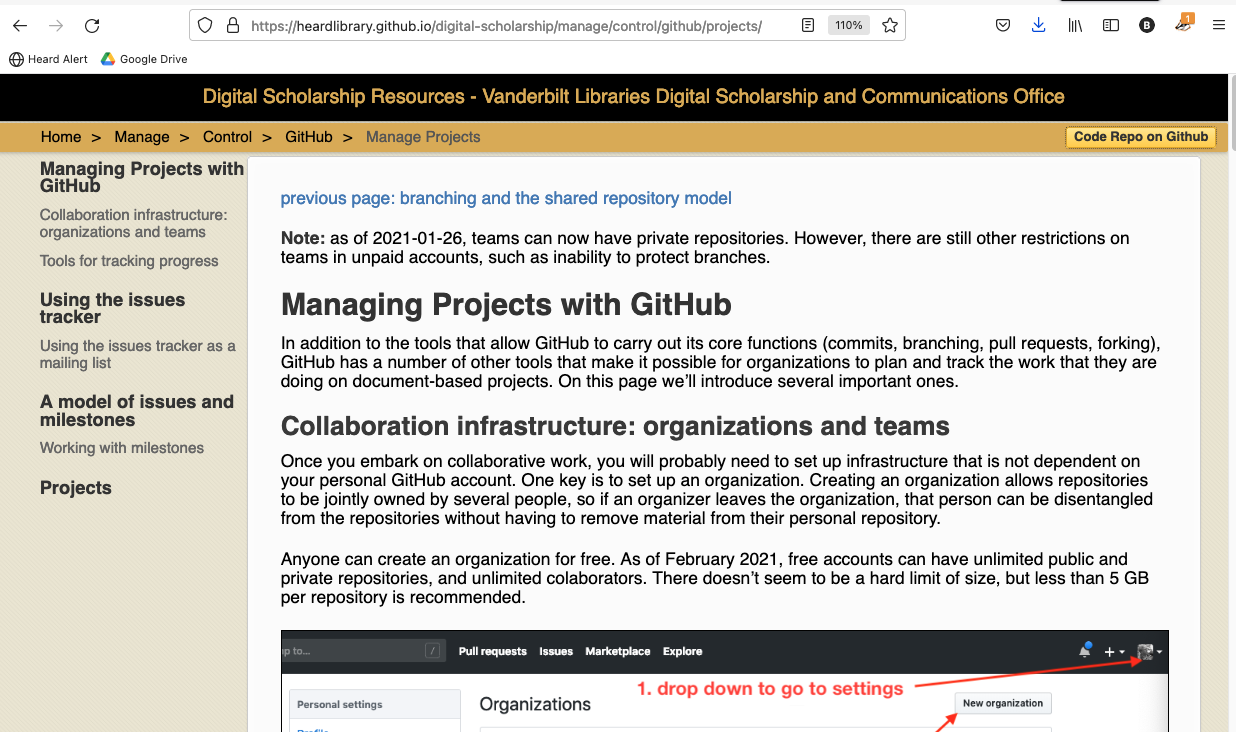
Web page generated by Jekyll from text file (rendered website)
URL pattern https://accountname.github.io/repository/path
Example URL https://heardlibrary.github.io/digital-scholarship/manage/control/github/projects/
After Jekyll renders the website, it will have whatever styling has been applied through a website template or other CSS styling that is added manually.
Setting up the website (2m13s)
.
Each repository can have a GitHub Pages website associated with it. We use the settings to determine the directory where that website lives. In this example, we will use the repository name website.
Create a new repository called website and initialize it with a README.md file. Don’t worry too much about what’s in the README since most people will never see it.
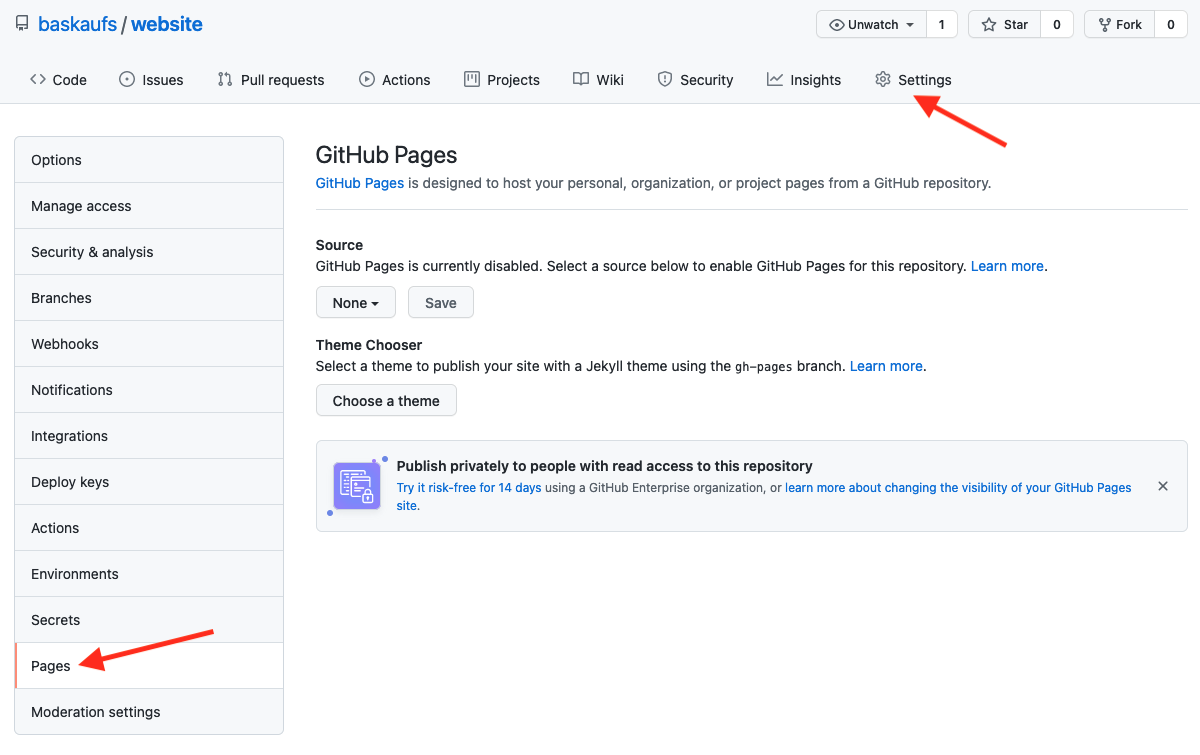
Click on the Settings tab, then click on Pages in the left navigation menu.
Setting up the source of the website
Historically, there have been two typical ways to configure a GitHub Pages website: using the docs directory within the main branch, or using the root directory of a branch called gh-pages. You can use either method, but we recommend using the docs directory for a couple reasons.
One is that it does not require understanding anything about branches and how to switch between them. The other is that it allows you to simultaneously edit the website (within the docs directory) and other files in different directories of the default main branch. If you use the gh-pages branch for the website, you need to commit any changes to files before you switch between the main and gh-pages branches – you can’t work on files within and outside of the website at the same time. If your repository is only going to be used for a website, then it doesn’t matter, but in some cases you might have data files, build scripts, etc. living in other parts of the repository outside of the ‘docs’ directory and the inability to edit them at the same time as the website can be annoying.
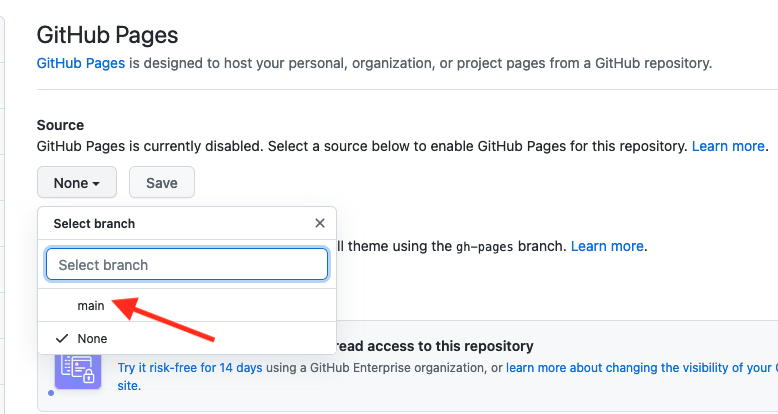
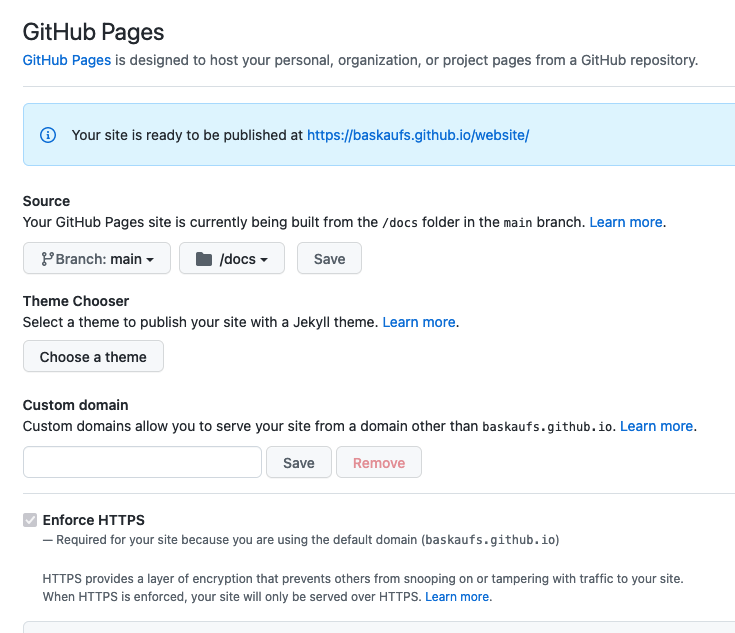
To use the docs directory of the main branch, do the following steps:
Drop down the Select branch (defaulting to None) dropdown and select main.
Drop down the Select folder (defaulting to /(root)) dropdown and select docs.
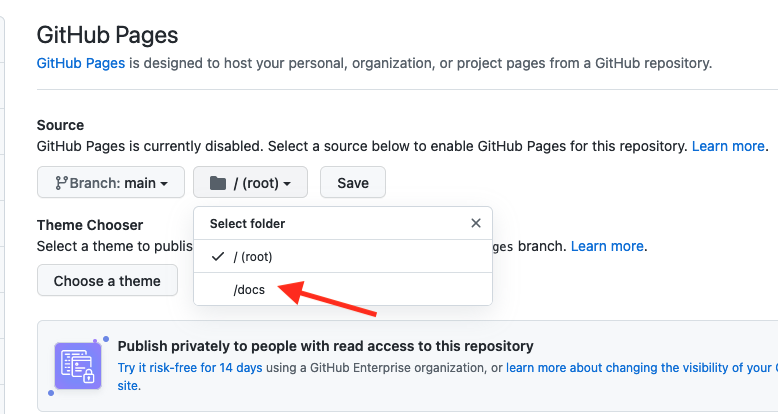
Then click the Save button. If successful, you should see a message saying that your website is ready to be published. For now, we will skip setting up the Theme Chooser and Custom domain. HTTPS is automatically enforced, so the URL will begin with https://.
Creating the homepage (3m26s)
.
We are now ready to create the homepage for the website. In theory, you could do all of the editing using the online editor, but that would be annoying and not make use of the tools available with a good code editor. Making your edits locally and pushing them up to GitHub also lets you control when the changes become visible. You can edit the website using a number of commits and when it’s the way you want, you can push them all to GitHub at once.
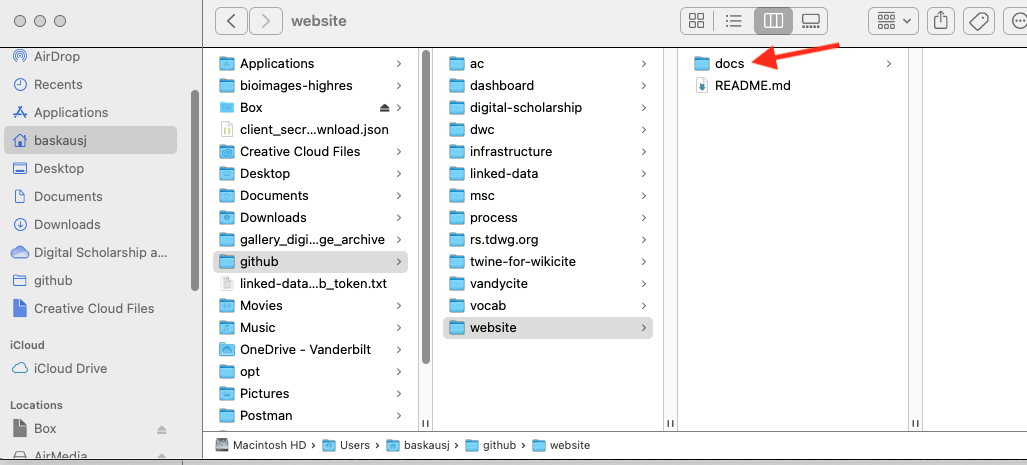
Once you’ve cloned the repo, go to the repository folder and create a subfolder called docs.
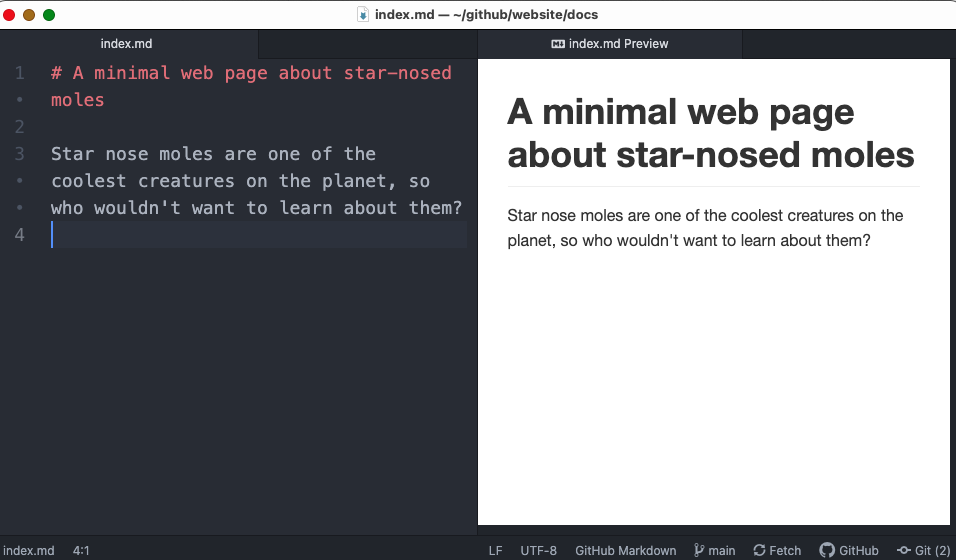
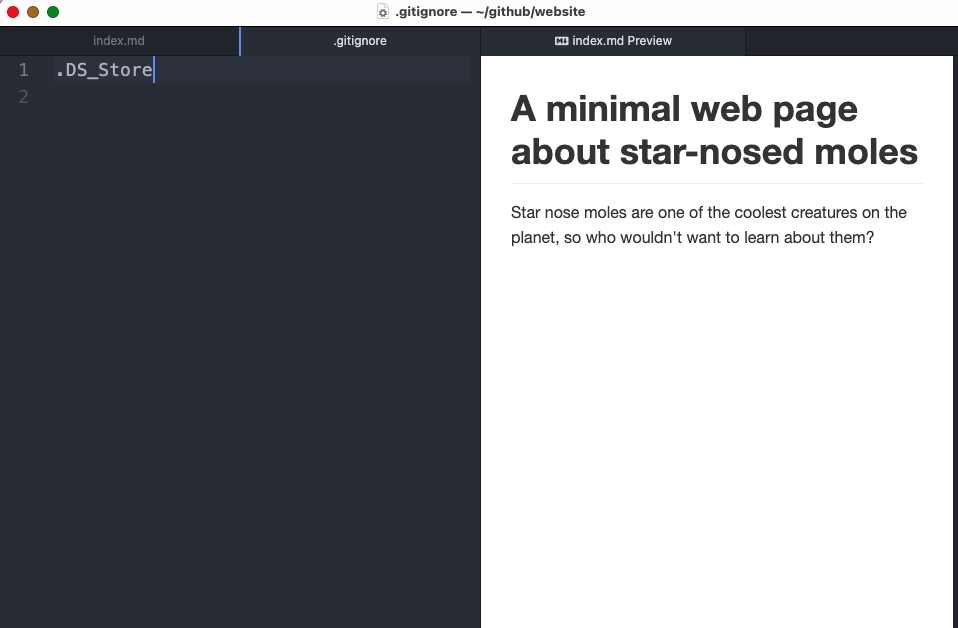
Now open your code editor. We will use Atom since it’s easy to use and has a Markdown preview. (To get rid of the Project pane at the left, go to the View menu and toggle Toggle Tree View.) Create a new file with a first level header line (# at the left margin), a blank line, and another line with text. Save the file as index.md in the docs folder you created. To see what the Markdown will look like when it’s rendered, select Markdown preview and Toggle preview from the Packages menu.
If you look at the GitHub Desktop interface, you’ll see the new page you created.
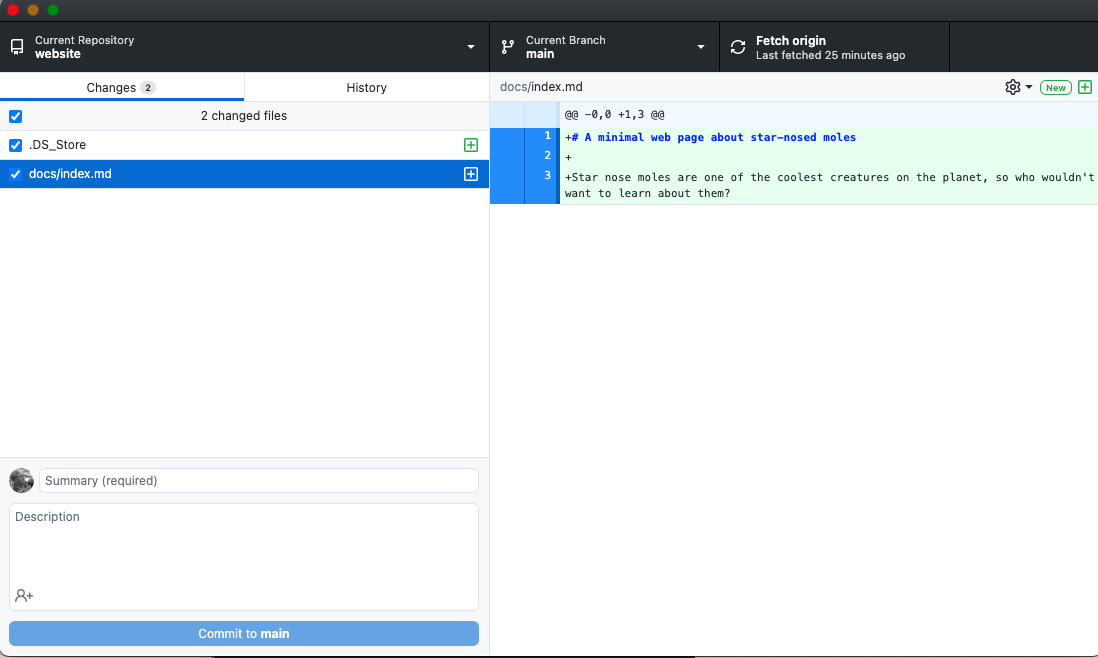
If you are using a Mac, you may also see an annoying “invisible” file called .DS_Store. We don’t really want our website mucked up with this file, so let’s add it to a .gitignore file for the repository. Using your text editor, create a file in the root directory of the repository called .gitignore with a single line like this:
.DS_Store
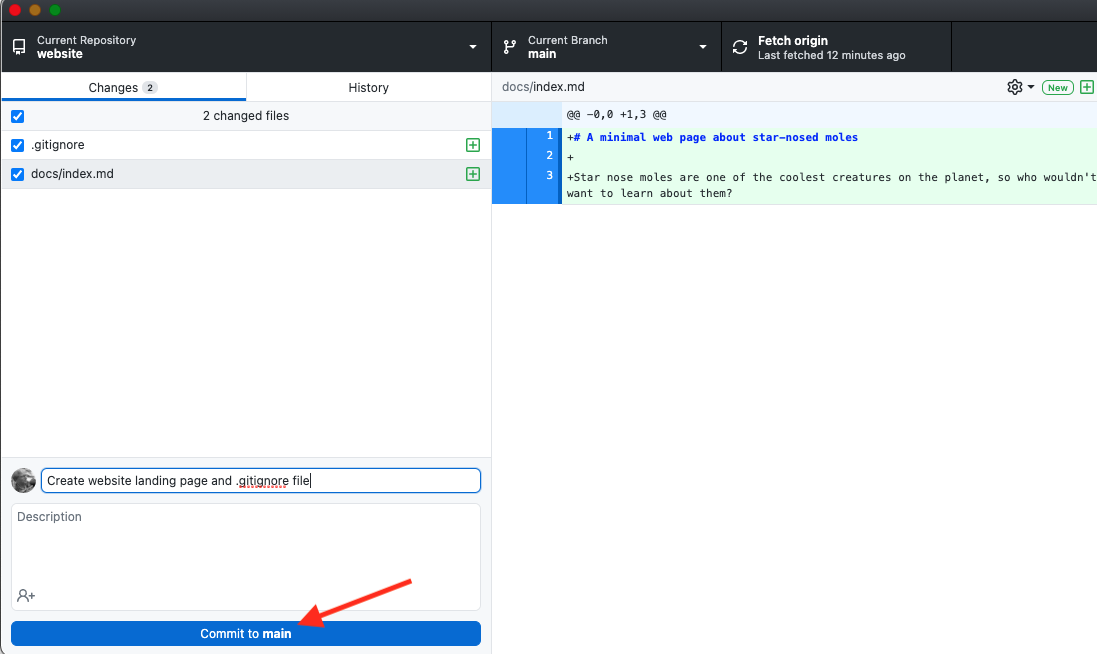
Now if you look at GitHub Desktop again, you’ll see the new .gitignore file you created, but the .DS_Store file is no longer visible since git is ignoring it.
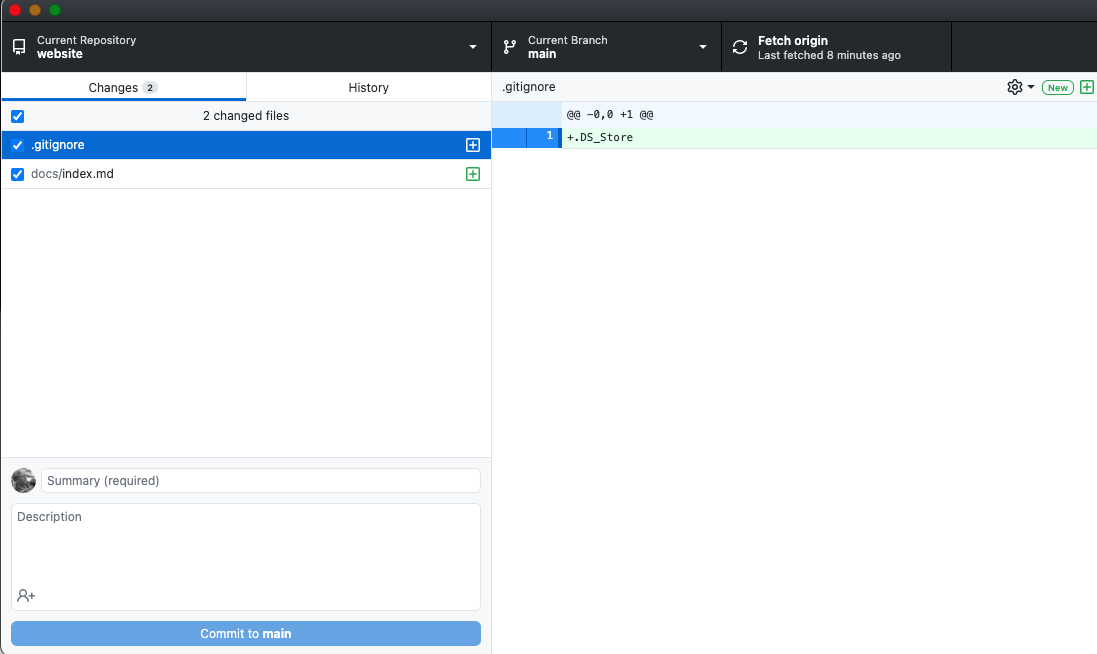
You can close the .gitignore tab in Atom since you won’t need it any more. Write a commit summary, then click Commit to main.
If you click the History tab, you’ll see your latest commit added to the history of the local repository. But the 1 by the Push origin tab shows that this commit has not yet been pushed to GitHub.
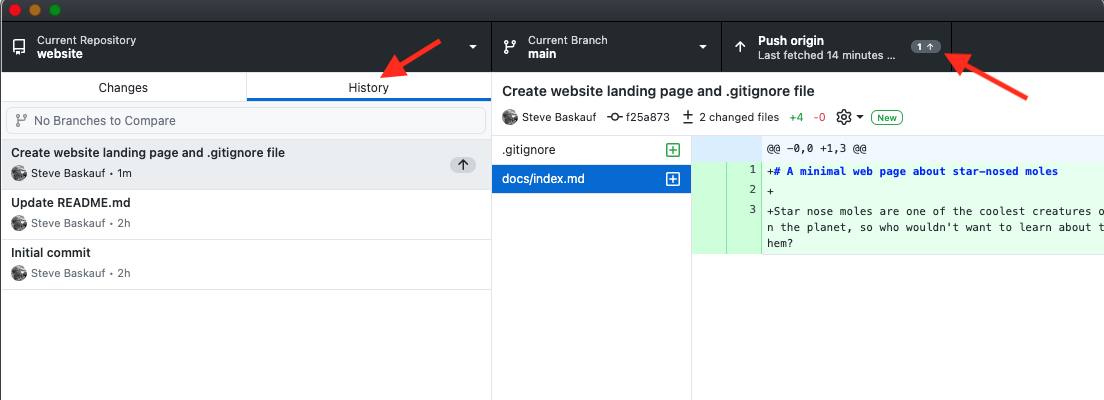
Click the Push origin tab.
In the GitHub web interface, click the Code tab, then the docs folder, then the index.md file. You should immediately be able to see the rendered landing page Markdown file (without styling).

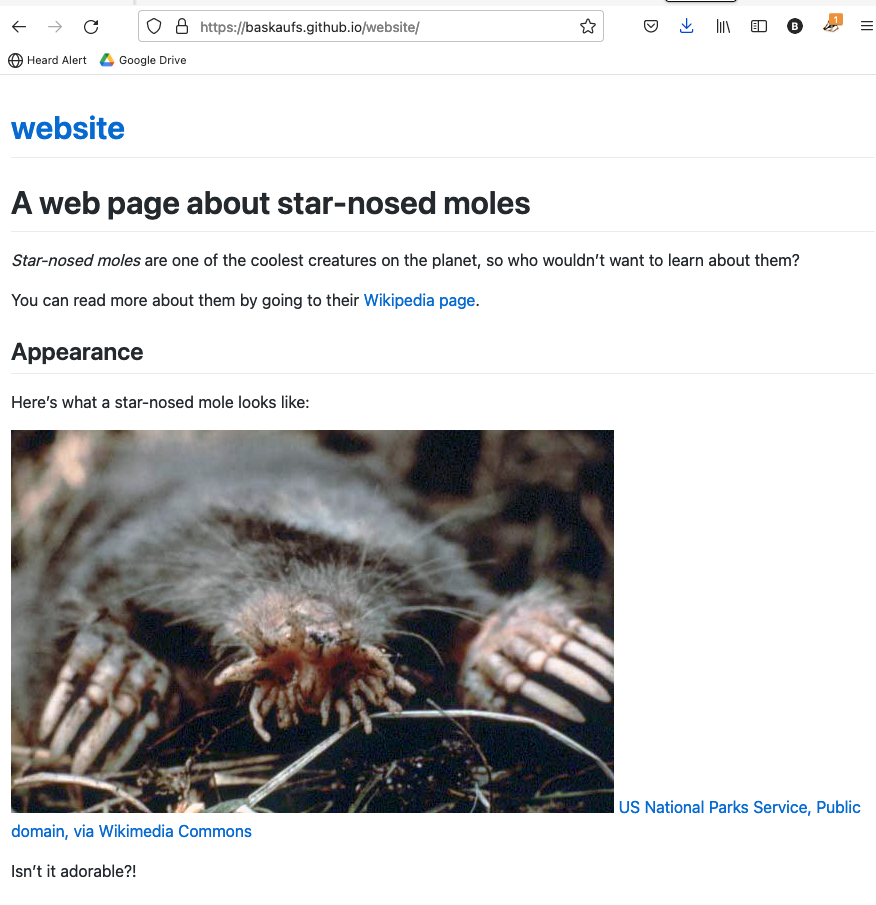
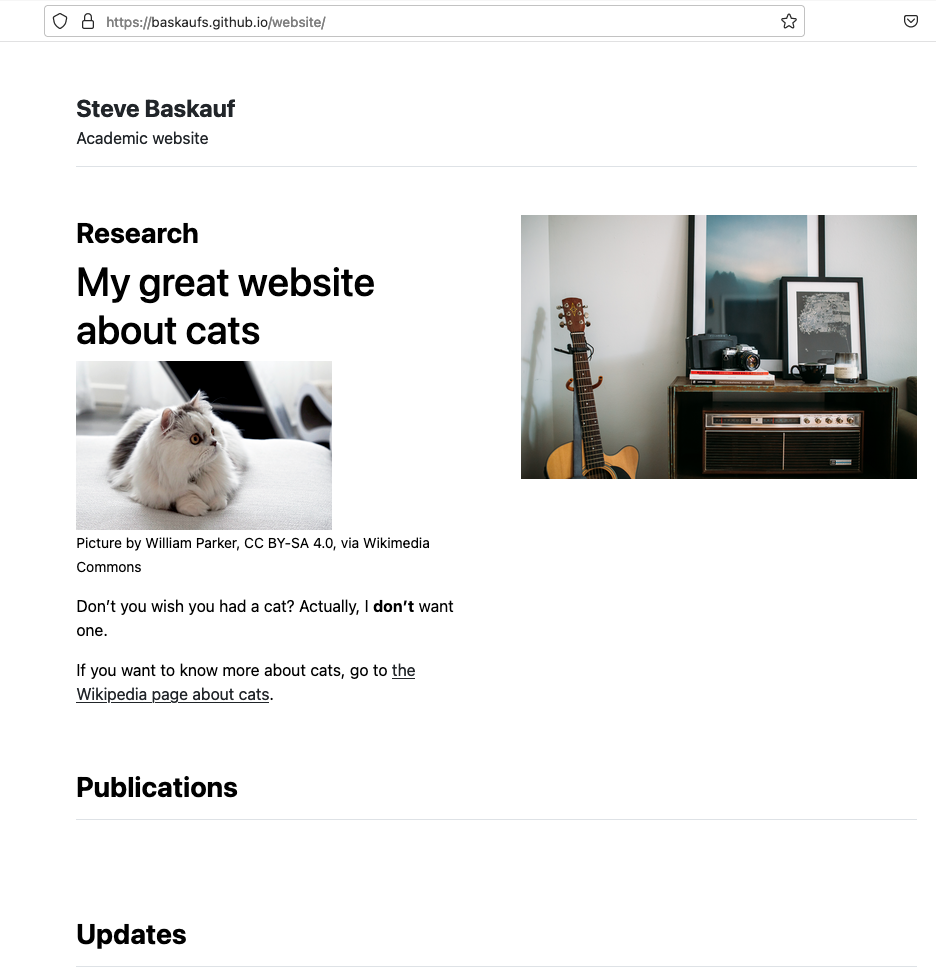
To see the actual web page as converted by Jekyll, type the base URL for the website into your browser, using this form: https://accountname.github.io/repository/. In this example, it’s https://baskaufs.github.io/website/.
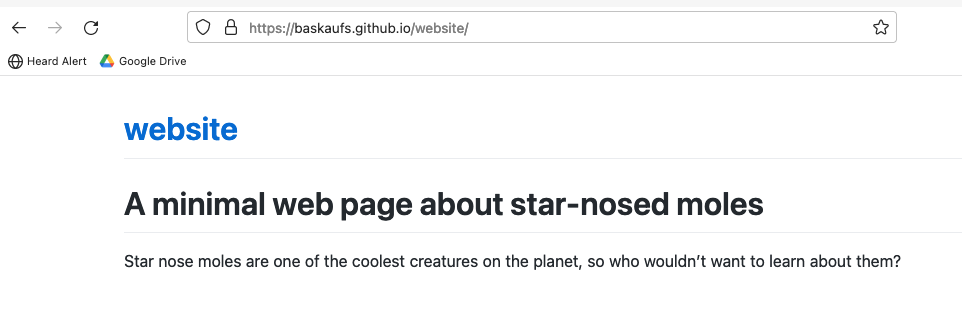
If you don’t immediately see the web page, wait a minute and try again. Jekyll does not immediately render changes to GitHub pages websites – sometimes there is a short delay.
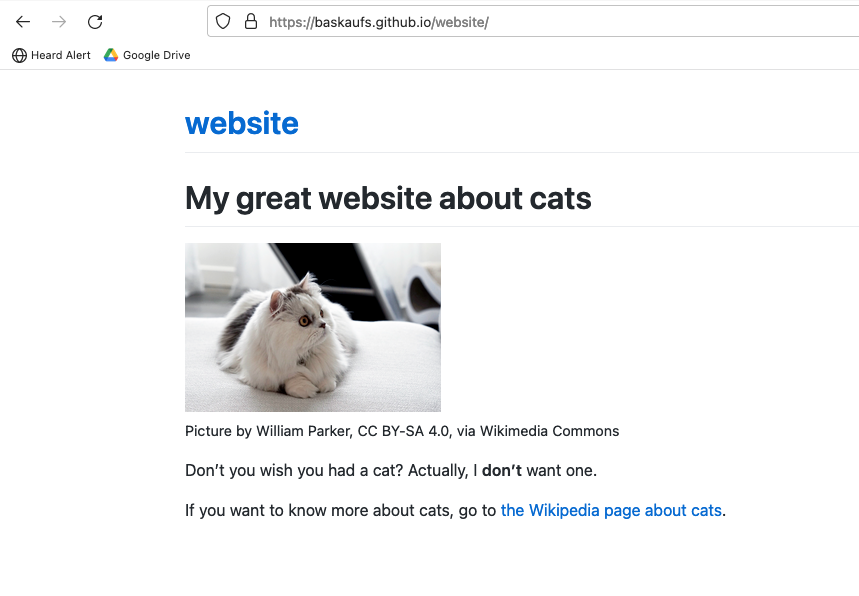
This is a very boring, vanilla website because we didn’t select any theme. However, if we right click the page and select View page source, we can see that Jekyll did do some “magic” for us.
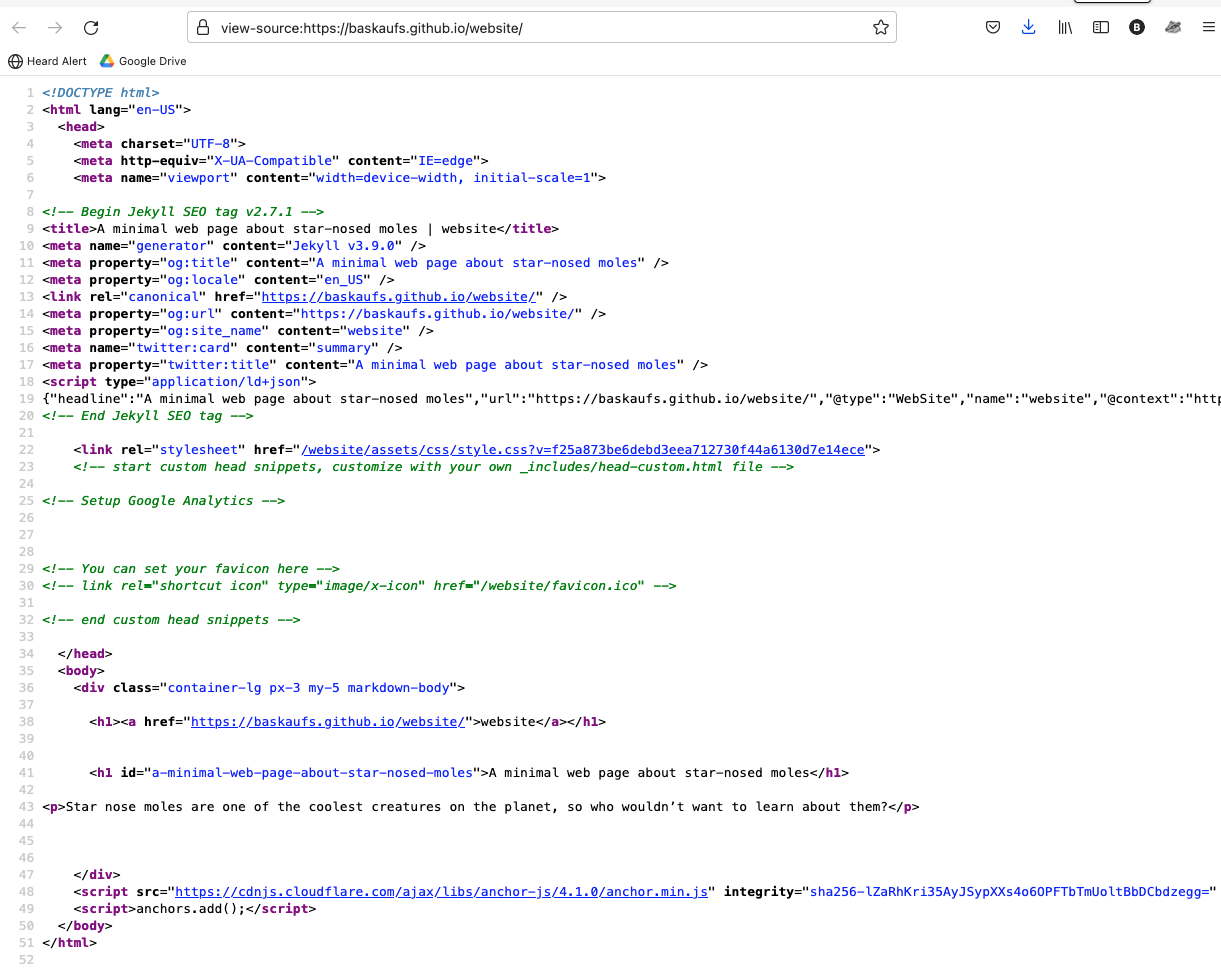
The web page has been converted from Markdown to HTML. In this case, it just created an <h1> and a <p> element from the Markdown that we wrote in the source document. But it’s easy to generate much more complex HTML from simple Markdown.
Adding content to the web page
Let’s add a couple more elements to the page to make it better. If you don’t know any Markdown, start by reviewing some basic markup. I’m going to add some formatted text and a link to Wikipedia:
# A web page about star-nosed moles

*Star nose moles* are one of the coolest creatures on the planet, so who wouldn't want to learn about them?

You can read more about them by going to their [Wikipedia page](https://en.wikipedia.org/wiki/Star-nosed_mole).
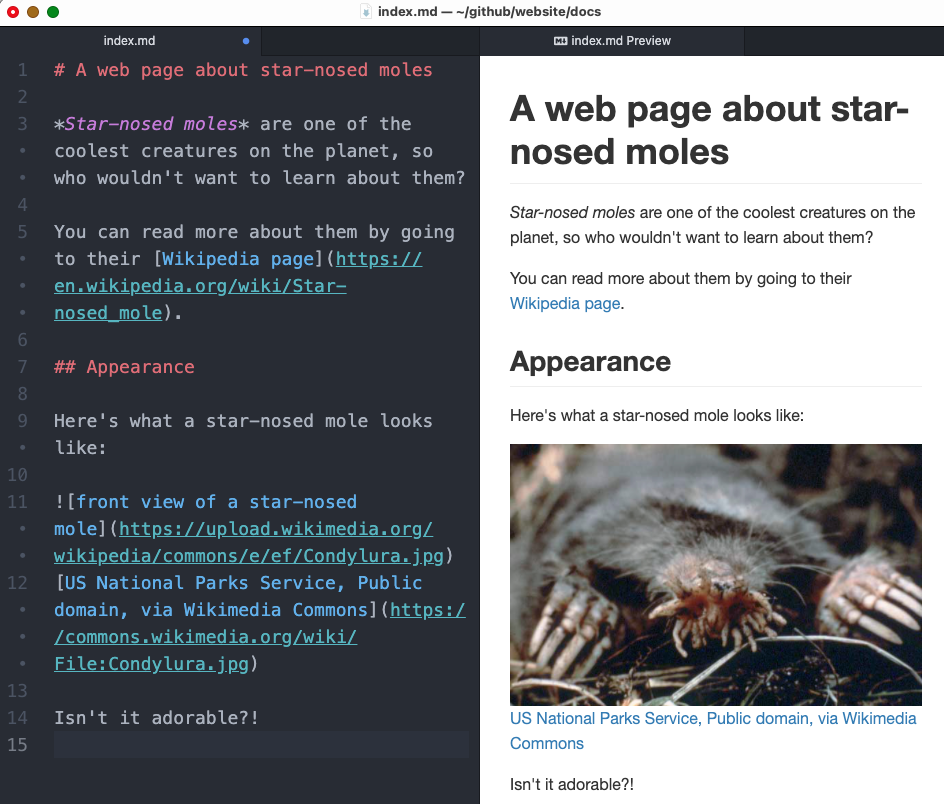
We can see how this Markdown is rendered by looking at the Markdown preview.
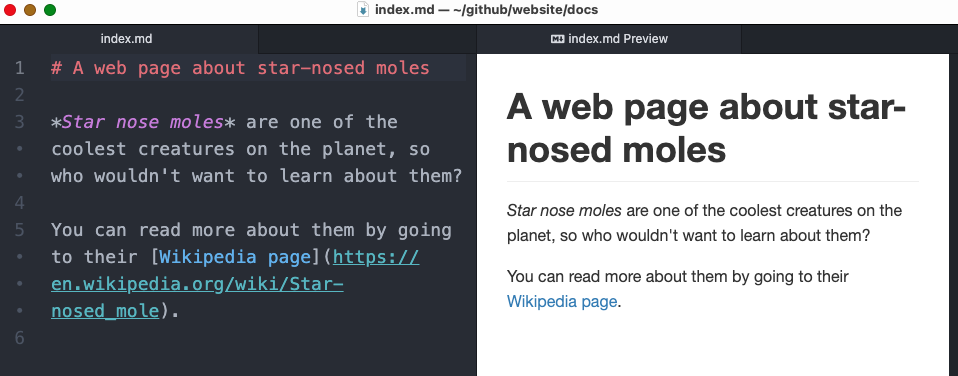
You can test that the link works by clicking on it in the preview.
Let’s add an image to make the page more interesting. Wikimedia Commons is a good place to look for images that can be freely used on your website. I searched for “star-nosed mole” and found a good picture: https://commons.wikimedia.org/wiki/File:Condylura.jpg. However, this URL is the URL to the web page about the picture, not the picture itself. To get the actual image URL, click the Download link above the picture, then click the link for the size of image you want.
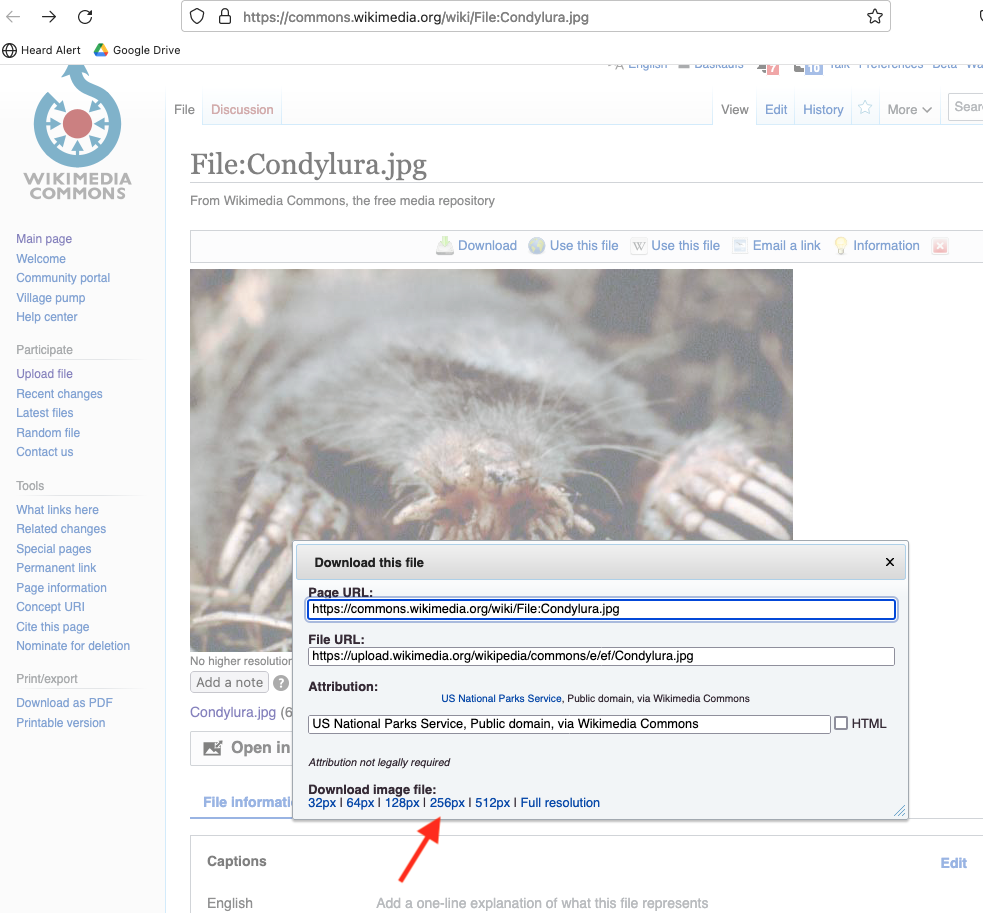
The image will open in a new tab.
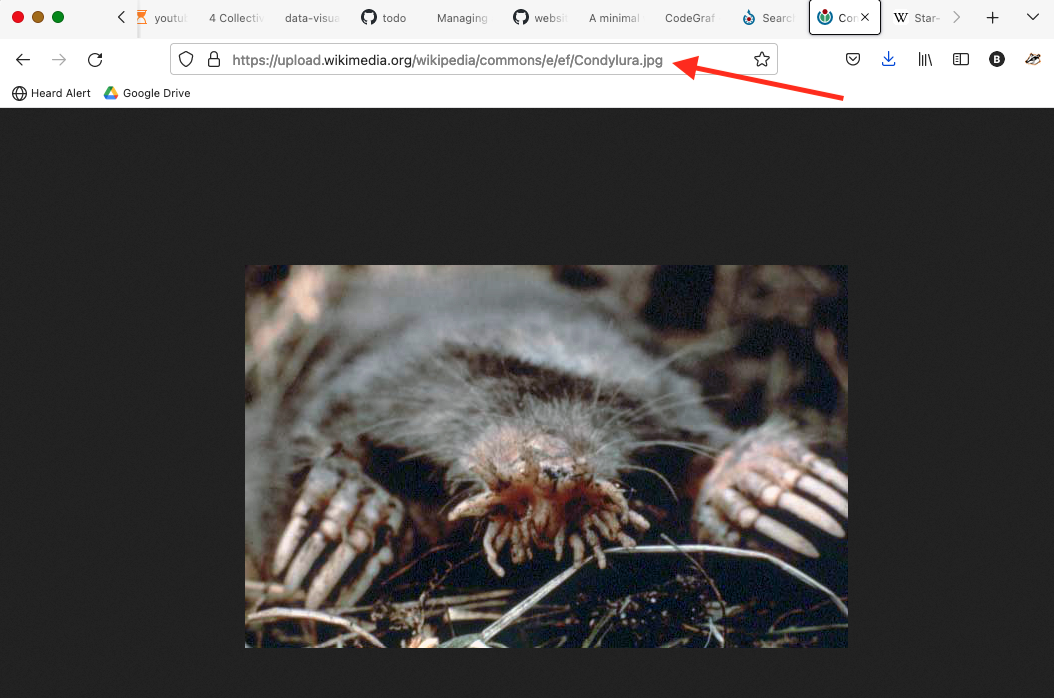
The URL in the browser bar is the one you need to use to embed the image in your page. The Markdown for adding an image is very similar in format to adding a link. The main difference is that it’s preceeded by an exclamation mark (!). The alt text goes in the square brackets and the direct link to the image goes in the parentheses.
This image isn’t under copyright, but I’ll add an attribution link anyway, using the information provided in the popup Download dialog.
Here’s what the Markdown looks like for adding the image:
## Appearance
Here's what a star-nosed mole looks like:

[US National Parks Service, Public domain, via Wikimedia Commons](https://commons.wikimedia.org/wiki/File:Condylura.jpg)
Isn't it adorable?!
The Markdown preview will give you a fairly good idea of what the page will look like and at least show you if you got the image URL right.
Save the edited Markdown, then go to GitHub desktop, add a commit message, commit, and push the changes to GitHub.
After waiting a few moments for Jekyll to re-render the page, go to the landing page tab and refresh the page. If the changes don’t show up for a long time, make sure that you actually saved the file in Atom, that the commit with the changes shows up in the commit history, and that there isn’t any little 1 in the Fetch/Push origin tab.
Controlling appearance of elements using HTML
One of the nice things about creating a website using GitHub Pages is that you don’t need to learn HTML – you can create most page elements with simple Markdown. However, there are times when the element doesn’t render the way you want. You can achieve finer control over elements by using some HTML mixed in with the Markdown on the page.
To learn more about this topic visit this page.
Themes
Adding a theme to a GitHub Pages website applies styling to the site and enables special features of the website.
Selecting one of the 12 built-in themes (5m07s)
When we turned on GitHub Pages in the repository settings, we opted not to set a page theme. The easiest way to apply one of the canned GitHub Pages themes is to return to the settings page and select one of the themes.
.
Go to Settings, then Pages, and click Choose a theme if you don’t already have one or Change theme if you already have one and want to change it. See these instructions if you need screenshots.
When you click on one of the theme options at the top of the selection page, it will show you the style of the theme in the lower part of the page. Here’s an example:
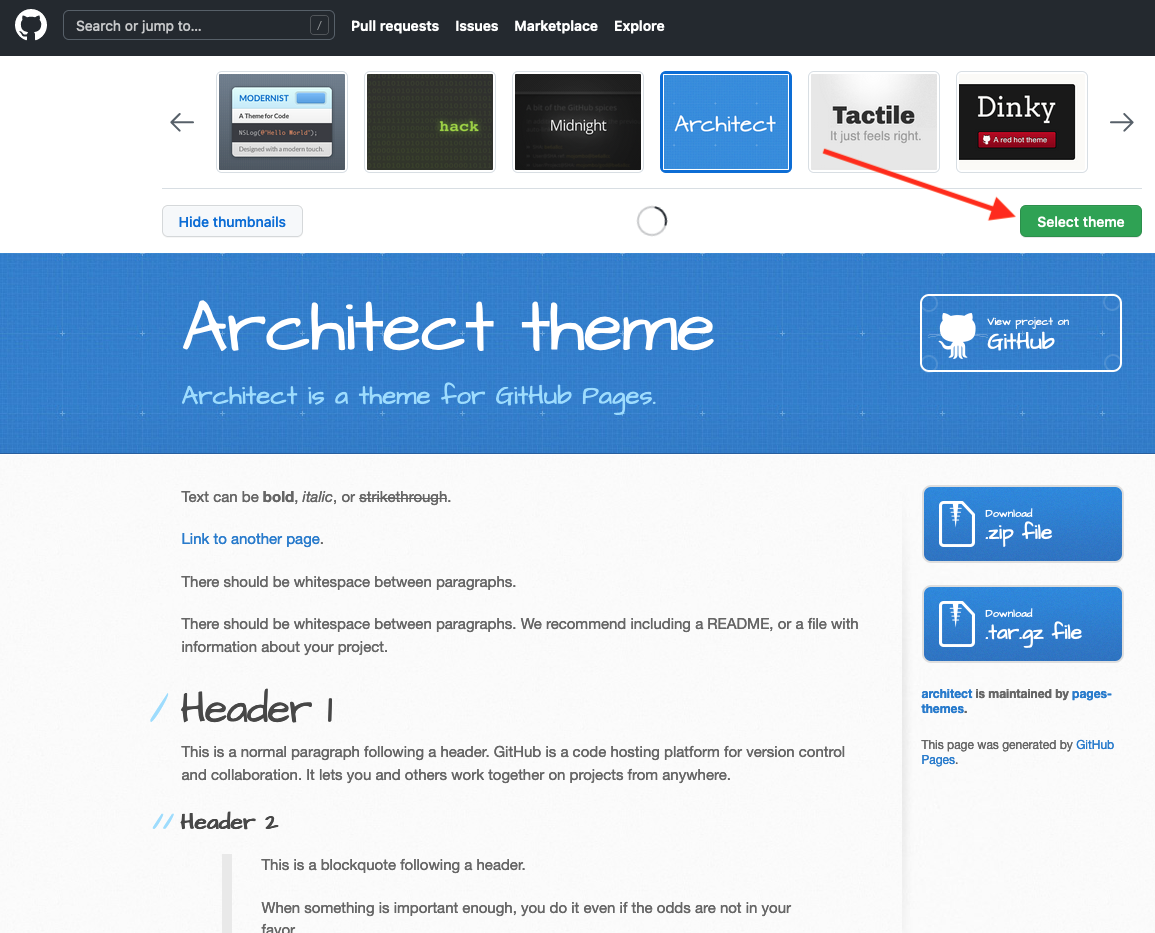
Click on the Select theme button to apply it to your website. Here’s how my home page looked without a theme:
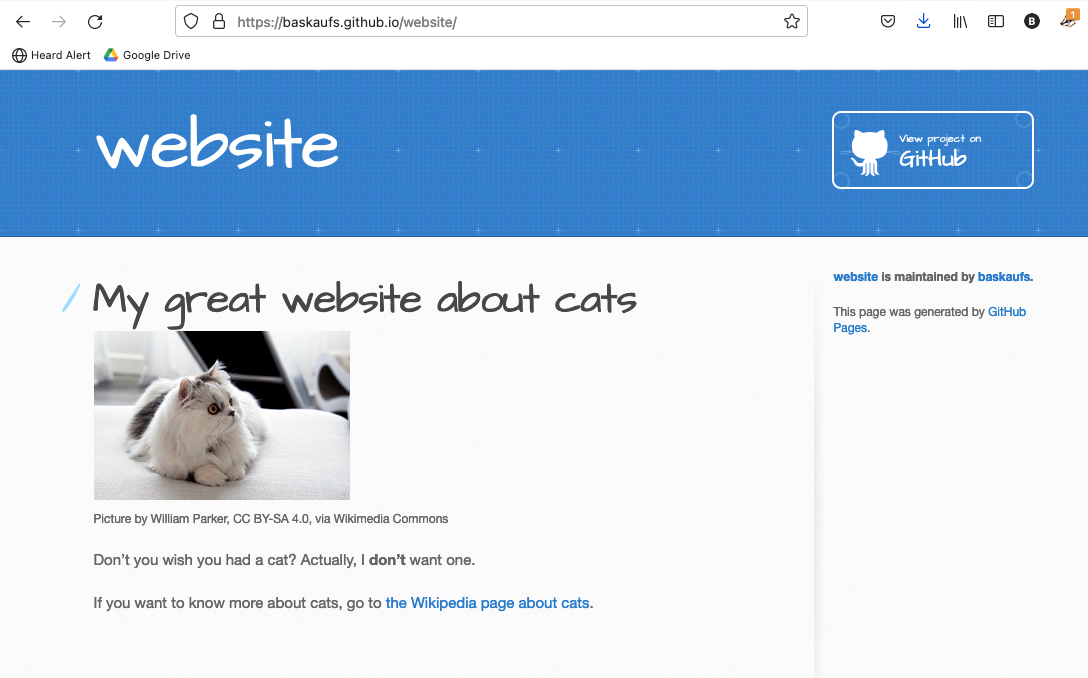
Here it is with the Architect theme:
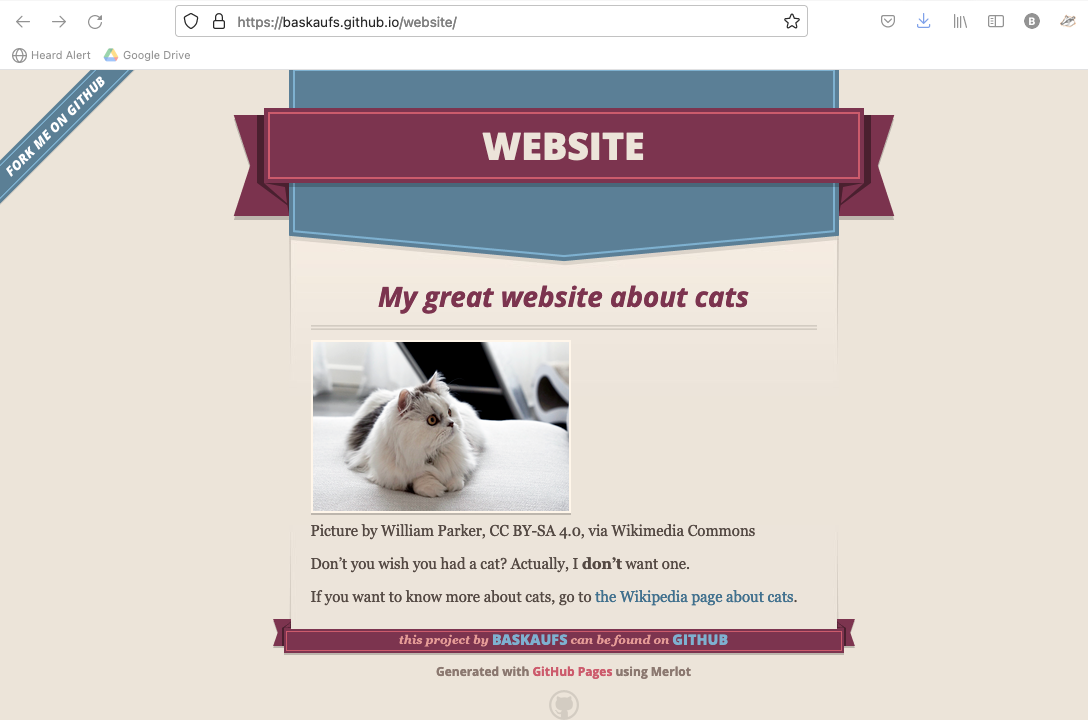
Since the page styling is all handled by the theme, it is very simple to just go back into the theme chooser and pick another one. Here’s the same page with the Merlot theme:
If we examine the commit history, we see that selecting or changing the theme resulted in a commit that added or changed a file within the docs folder called _config.yml.

The theme and other configuration settings are controlled by this file.
Editing site settings in _config.yml
Since _config.yml is just a text file, you can edit it and change the theme without going to the settings page. The format of the settings page is YAML, which stands for “YAML Ain’t Markup Language”. It is a commonly used format for configuration files and is very simple. YAML settings generally include a key (or variable), then a colon, then the value for that key. For example:
theme: jekyll-theme-architect
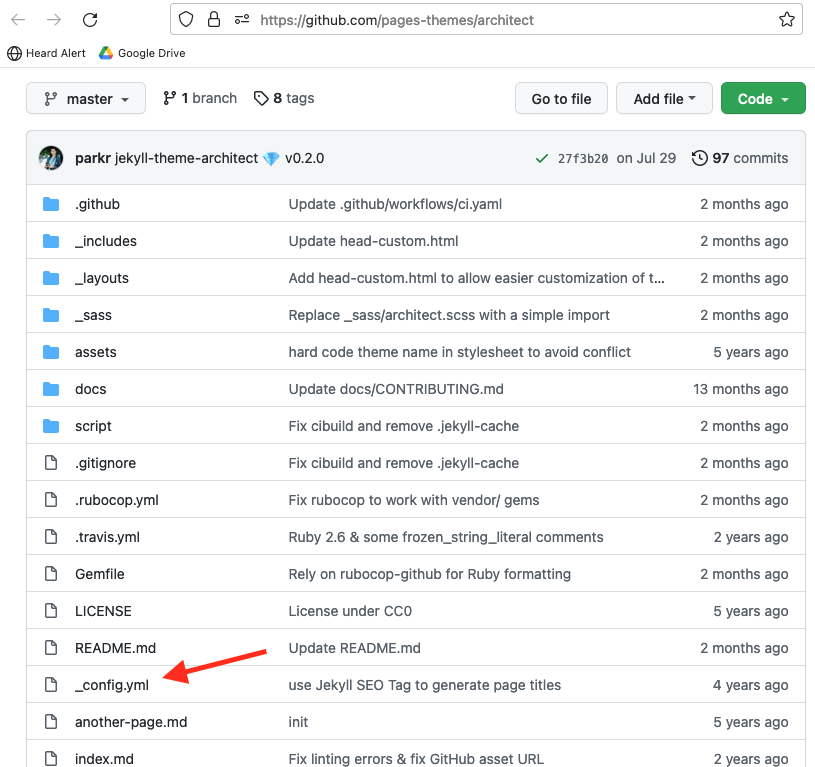
Depending on your theme, there may be other settings that you can edit to change the appearance of the site as well as site metadata. On the theme preview page in Settings, you can right-click on the View project on GitHub button and open the link in a new tab.
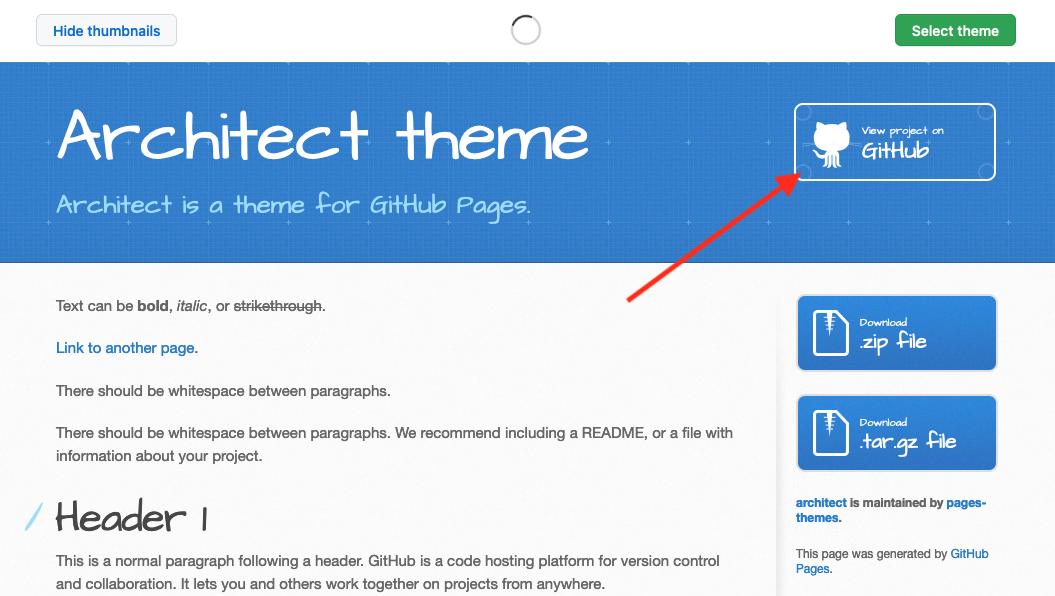
That will take you to the GitHub site where the theme is maintained. Scroll down the README.md page until you find the Customizing section. It will tell you what variables can be set to customize your theme.
Adding an author variable may also add that information to the page metadata in the HTML head section.
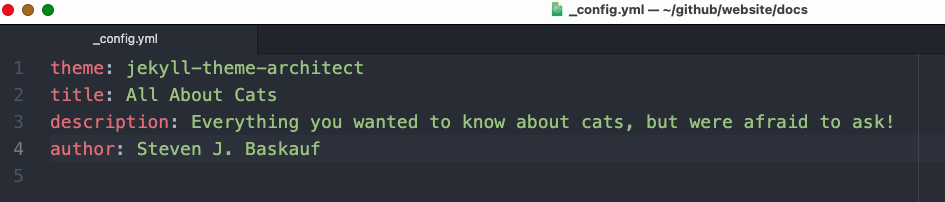
You can also navigate to the theme’s _config.yml file to see how the options are listed there.

Here’s what it looked like when I edited my _config.yml file using Atom
After I committed and pushed the changed configuration file to GitHub, then waited a little while, here’s how my homepage looked:
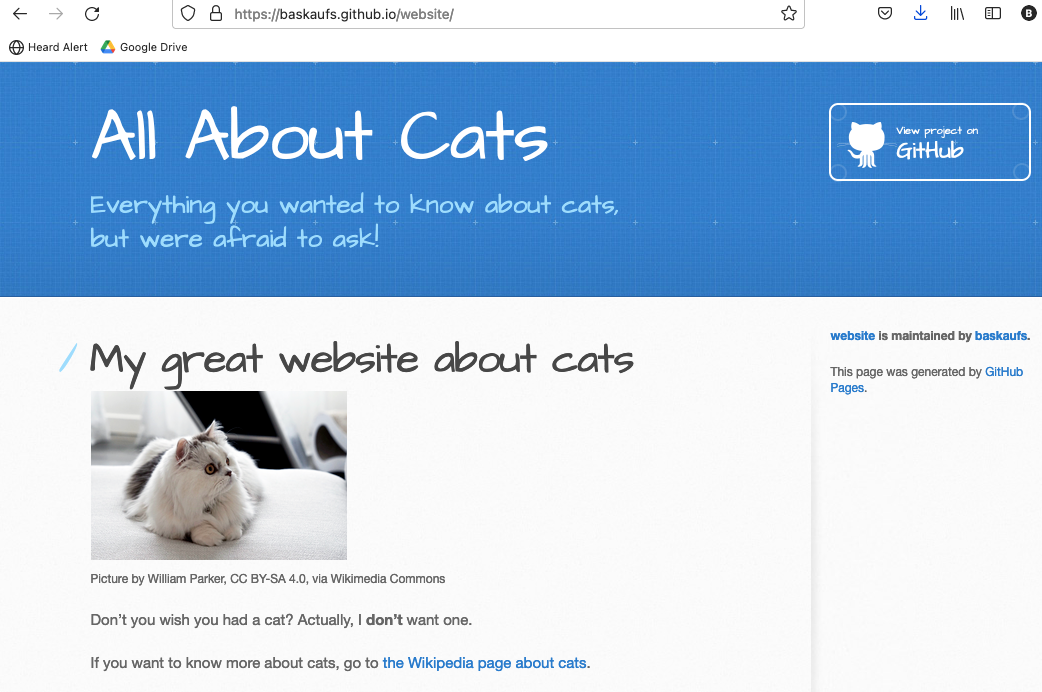
You can see that the previous site name (taken from the repo name) was changed to the one I set in the configuration file and the site description was added below it.
Creating and linking static pages (6m38s)
There are two ways to create child pages below the website homepage. The first method involves creating differently-named Markdown files within a directory. Since that method is less extensible and can cause some problems with URL usage, we recommend the method described here. In this method each child page is represented by a subfolder of the docs folder bearing the page’s URL subpath, and the content of that page is described by an index.md file within the folder.
The following video explains and demonstrates this method in more detail.
.
Linking between parent, child, and sibling pages
When creating links between pages on the site, it’s best to use relative links. That makes the website more portable. Here’s how to set up relative links between sibling pages in the same level of the hierarchy, child pages, and their parent pages.
linking to child pages
In the parentheses for the hyperlink, place the name of the child page, followed by a slash. For example, to link from the landing page to the folklore page, use
[learn about folklore](folklore/)
To link from the folklore page to the virginia page, use
[folk stories from Virginia](virginia/)
Linking to parent pages
In the parentheses for the hyperlink, use the relative path for a parent element (..) followed by a slash. For example, to link from the folklore page to the landing page, use
[back to the landing page](../)
The link from the Virginia folklore page up to the general folklore page would be similar.
Linking to sibling pages
To link from one page to another page at the same level below the same page, use the parent element path as in the previous example, followed by the name of the sibling page followed by a slash. For example, to link from the folklore page to the habits page, use
[habits of the mole](../habits/)
To link from the Virginia folklore to the Maine folklore page, use
[folklore from Maine](../maine/)
Using a remote theme with only content locally (8m02s)
The built-in themes provided by GitHub itself are few and not very sophisticated. However, there are over a thousand freely available themes that have been created by others, and many of them have more features than the built-in themes. These themes are called remote themes because their styling is controlled by configuration details that are not included within the user’s website. The theme developers maintain the themes and may update them periodically.
Finding a theme
The Jekyll documentation website has a themes page that provides links to four other websites that have extensive galleries showing what available themes look like when they are rendered.
In most cases, the theme info page will link to a demo page that will show you what the theme looks like and will have a link to the GitHub site hosting the theme. For example, academic is a theme for an academic website. It has a demo page and the GitHub site contains information about installing and configuring the site. We will use this site in the examples that follow.
NOTE: to see the final configuration of the example files, see this repository. To see the website in rendered form go to the homepage.
.
Specifying a remote theme
To switch to the remote theme, you need to change the _config.yml file to replace the built-in theme that you were using before. First, get the path to the remote theme. Go to the GitHub site for the theme.

Copy the last part of the URL after https://github.com/. Open the _config.yml file, which should be located within the docs folder of your website repo. Delete the line for the theme you had before and replace it with the key remote_theme and paste the last part of the URL that you copied as the value.

Save the file, then use GitHub Desktop to push the changes to GitHub.
After some time has passed, go to the website URL and refresh the page. Eventually, you should see the new theme applied to the web page you had before.
Since this theme has more features than just the styling, I will need to make additional changes to the configuration.
Configuring the theme
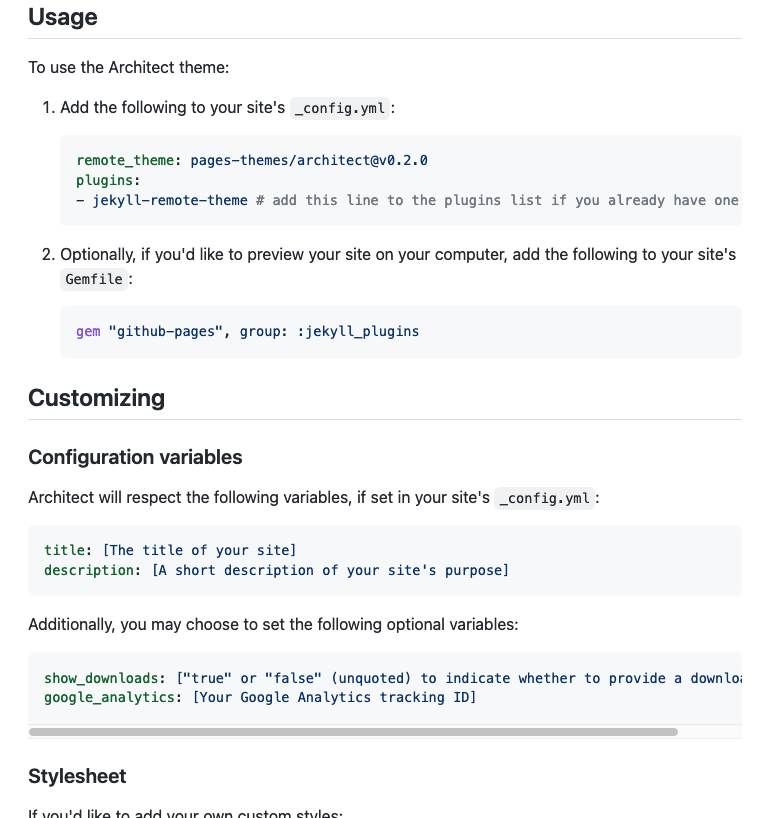
The exact mechanism for controlling the appearance of the theme depends on the specific theme. The GitHub repository for the theme should include an explanation of the files that need to be modified to customize the theme. In the example, the Usage section of the README.md page explains how the various components are controlled.
The general principle is that a file on your website will replace the content of the corresponding file in the remote theme. So if I want to change something, I need to download the appropriate file from the theme repository and place it in the same place in the file navigation structure on my website repository.
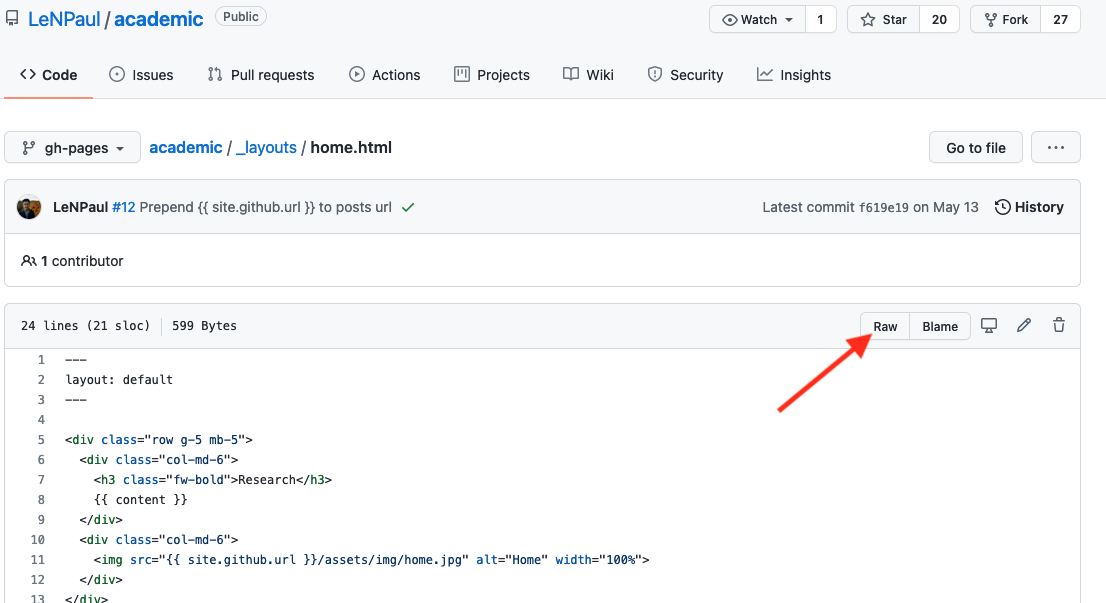
Let’s start with the home page. The usage information says that the file _layouts/home.html defines the homepage. If I navigate to that page on GitHub, I see that most of the page is filled in by Jekyll using information from elsewhere (the stuff in curly brackets). For example, in this code:
<div class="row g-5 mb-5">
  <div class="col-md-6">
    <h3 class="fw-bold">Research</h3>
     {{ content }}
  </div>
  <div class="col-md-6">
    <img src="https://heardlibrary.github.io/digital-scholarship/assets/img/home.jpg" alt="Home" width="100%">
  </div>
</div>
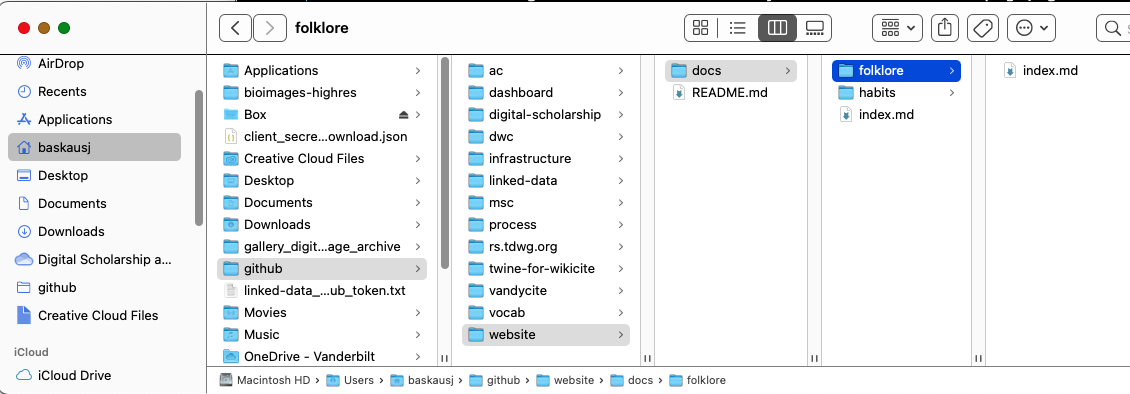
the level 3 header Research is hard-coded here, so I could change that in the file. I also see that the homepage image is supposed to be in a subfolder on the path /assets/img/. I’ll start by going to Finder/File Explorer and creating a subdirectory of my docs directory called _layouts.

On the home.html page in the remote theme GitHub site, right click on the Raw button, then selecte Save Link As....
Save the file in the _layouts folder you just created.
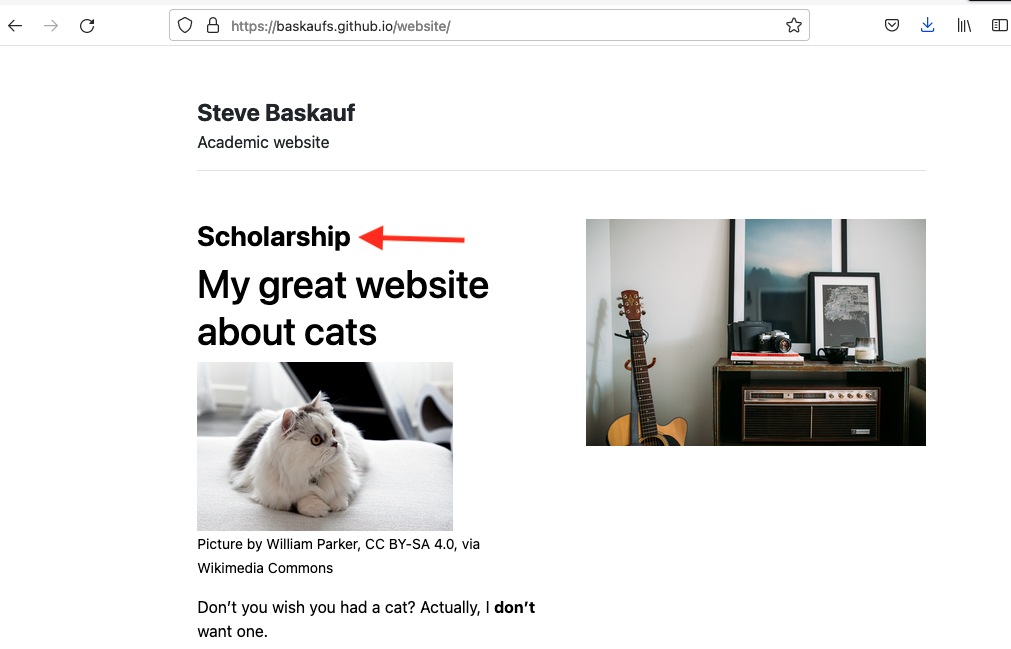
I’ve decided to change the homepage title from “Research” to “Scholarship”, so I opened the file and changed the h3 text:
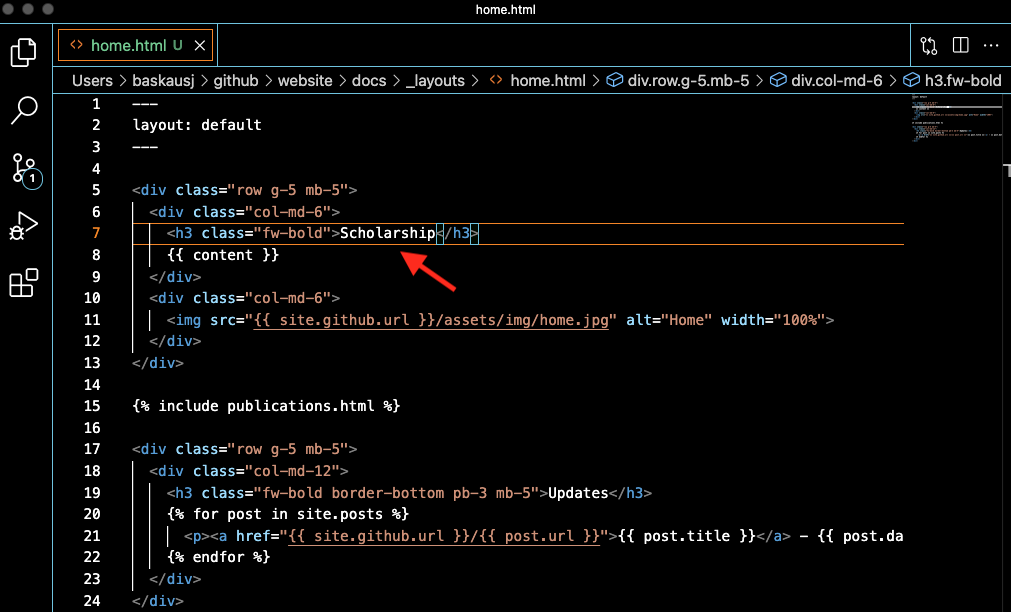
Save the file and push the changes to GitHub.
After a few moments, I see the change on the homepage.
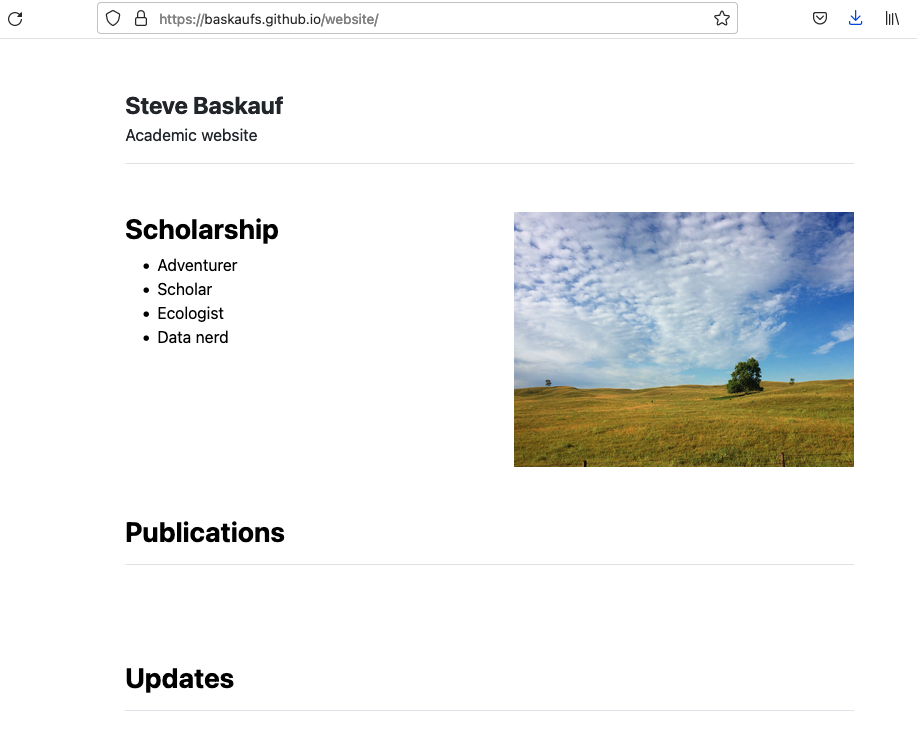
There are two other major things that I want to fix on the home page. The content is still stuff from my practice website. To change that, I need to edit my index.md Markdown homepage file. I’ll change it to this:
- Adventurer
- Scholar
- Ecologist
- Data nerd
To change the image, I need to make an assets and img folder, then put my homepage image into it with the name home.jpg as specified in the homepage layout HTML file.
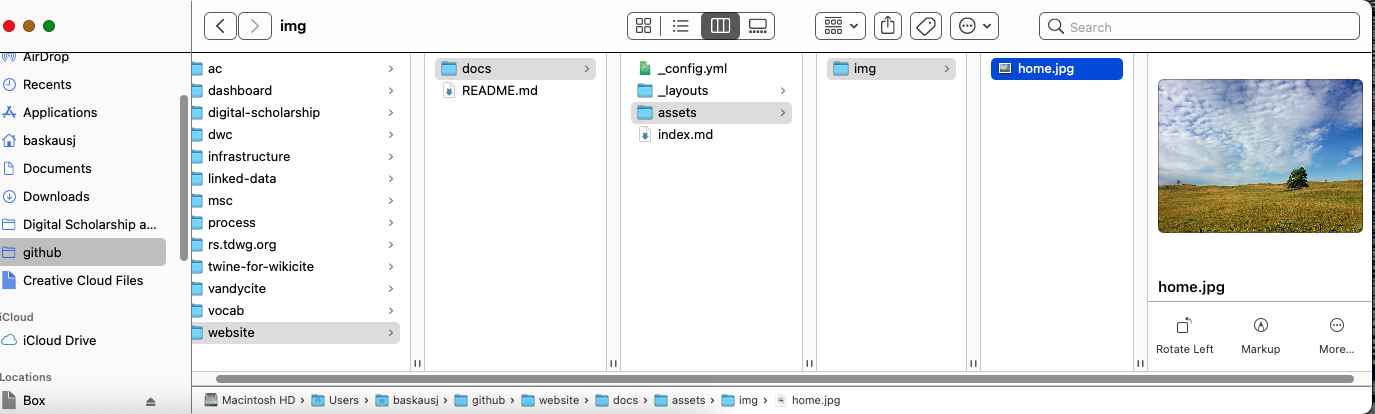
Here’s the result:
The goal here is that once the website is set up, changes should easily be made by just changing content (the Markdown pages and images) without having to actually change any of the page templates.
Changing included data
Metadata that’s included in the site (email addresses, Twitter buttons, etc.) and the navigation structure are controlled by data in a YAML file rather than hard-coding it. The metadata are inserted in the appropriate spots when Jekyll builds the site.
The Usage instructions say that contact information is defined in the _data/settings.yml file. In most remote themes, there is typically some YAML file like this in an obvious directory (e.g. “data”) that controls such settings. As we did with the homepage layout file, create a _data folder, then download the settings.yml file from the theme GitHub site. Open it with your text editor and change the settings to fit your circumstances.
menu:
- {name: 'publications', url: '/publications'}
- {name: 'cv', url: '/cv'}
- {name: 'contact', url: '/contact'}

social:
- {icon: 'github', link: 'https://github.com/baskaufs'}
- {icon: 'twitter', link: 'https://twitter.com/baskaufs'}
- {icon: 'instagram', link: 'https://instagram.com/baskaufs'}

contacts:
- {name: 'Steve Baskauf', title: 'Data Science and Data Curation Specialist', department: 'Digital Scholarship and Communications (DiSC)', institution: 'Vanderbilt University Libraries', institution_address: 'Nashville, Tennessee, USA', phone: '(615) 123-4567', email: 'steve.baskauf@vanderbilt.edu', office: 'Eskind Biometical Library 111', image: 'assets/img/contact.jpg'}
Notice that since I don’t have lab personnel or courses, I deleted that information from the data. Similarly, I don’t use LinkedIn, so I deleted that line from the social settings.
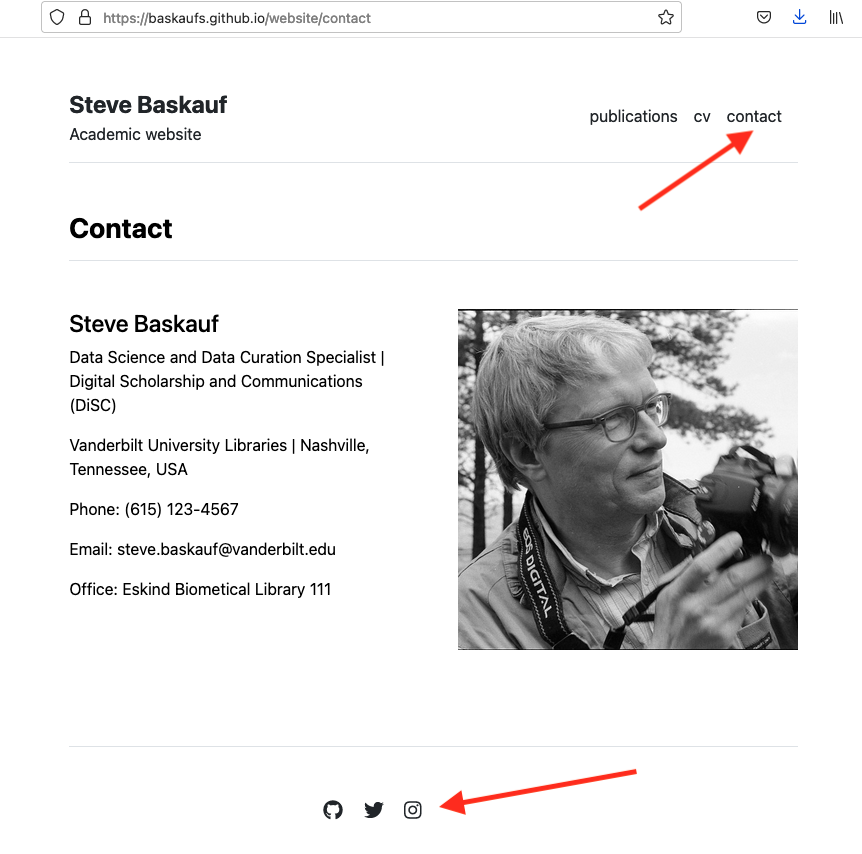
In order to get the contact page to work, I need to download the skeleton contact.md page. It only consists of a YAML header and the rest will be built from the contact page template and the data I provided in the settings.yml file. (Note: in the video, I didn’t read the instructions and destroyed the contacts template page rather than populating it with data from the settings.yml file. It worked, but I didn’t get the styling that was included in the website design. So read the directions!) Similarly, the cv page is built from cv.md using data from YAML files defined in the _data/cv directory.
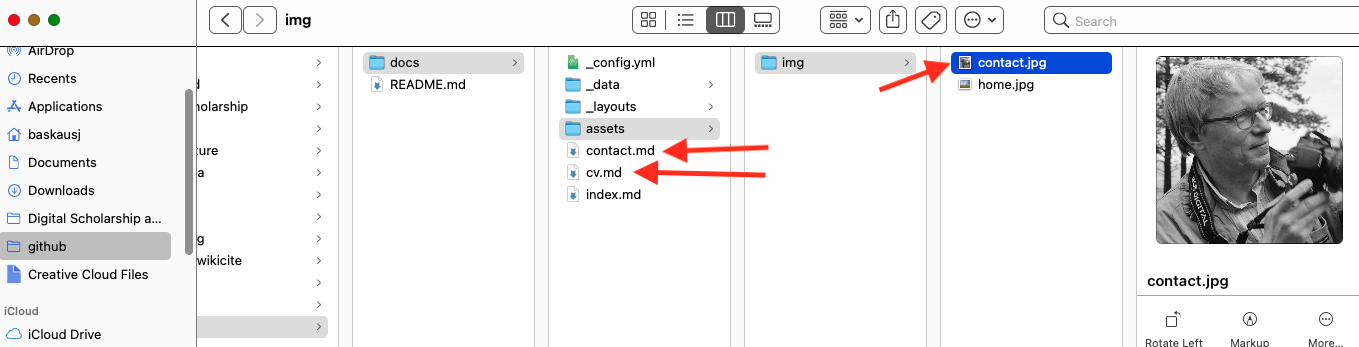
Here’s how the contact page looks after saving the settings and adding the skeleton contact.md file.
According to the Usage instructions, publications can be defined using the _data/publications.yml file and PDFs can be served from the publications directory. (NOTE: for some reason, I didn’t get the direct display of uploaded PDFs to work.) The index section shows up on the publications page accessed through the publications tab. I think the featured category is supposed to show up on the homepage.
featured:
- {name: 'Baskauf, SJ and JK Baskauf. 2021. Using the W3C Generating RDF from Tabular Data on the Web Recommendation to manage small Wikidata datasets. Semantic Web Journal (in press).', url: '/publications/swj2810.pdf'}
- {name: 'Groom, Q, P Desmet, L Reyserhove, T Adriaens, D Oldoni, S Vanderhoeven, SJ Baskauf, A Chapman, M McGeoch, R Walls, J Wieczorek, JRU Wilson, PFF Zermoglio, A Simpson. 2020. Degree of Establishment Controlled Vocabulary List of Terms. Biodiversity Information Standards (TDWG)', url: 'http://rs.tdwg.org/dwc/doc/doe/'}

index:
- {name: 'Baskauf, SJ and JK Baskauf. 2021. Using the W3C Generating RDF from Tabular Data on the Web Recommendation to manage small Wikidata datasets. Semantic Web Journal (in press).', url: '/publications/swj2810.pdf'}
- {name: 'Groom, Q, P Desmet, L Reyserhove, T Adriaens, D Oldoni, S Vanderhoeven, SJ Baskauf, A Chapman, M McGeoch, R Walls, J Wieczorek, JRU Wilson, PFF Zermoglio, A Simpson. 2020. Degree of Establishment Controlled Vocabulary List of Terms. Biodiversity Information Standards (TDWG)', url: 'http://rs.tdwg.org/dwc/doc/doe/'}
“Updates” can be provided by placing Markdown files named using a particular scheme demonstrated in the _posts directory (ISO date at beginning of filename). I can download and hack one of the example ones in order to get the correct YAML header, replacing the Lorem ipsum content with my own. Here’s an example:
Filenames:
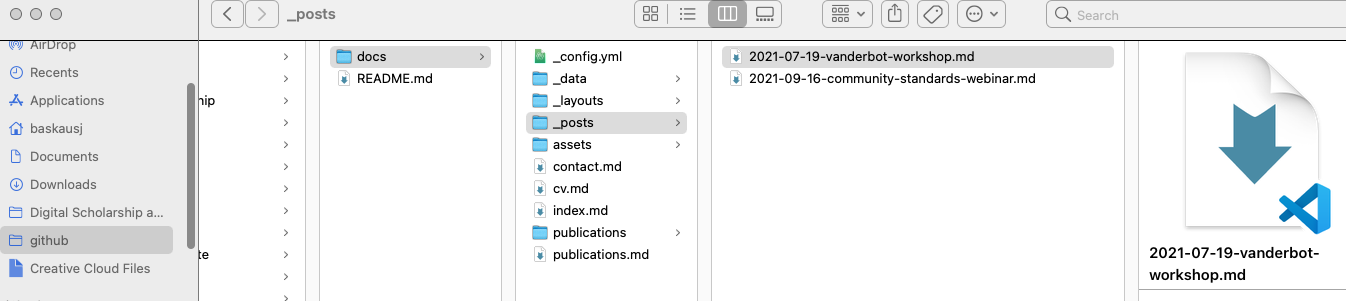
Markdown:
---
layout: post
title: "VanderBot workshop"
---

I conducted a workshop at the LD4 Conference on Linked Data called "Writing data to Wikidata using spreadsheets". You can watch a [video of the presentation on YouTube](https://youtu.be/ZukSQB8fki8).
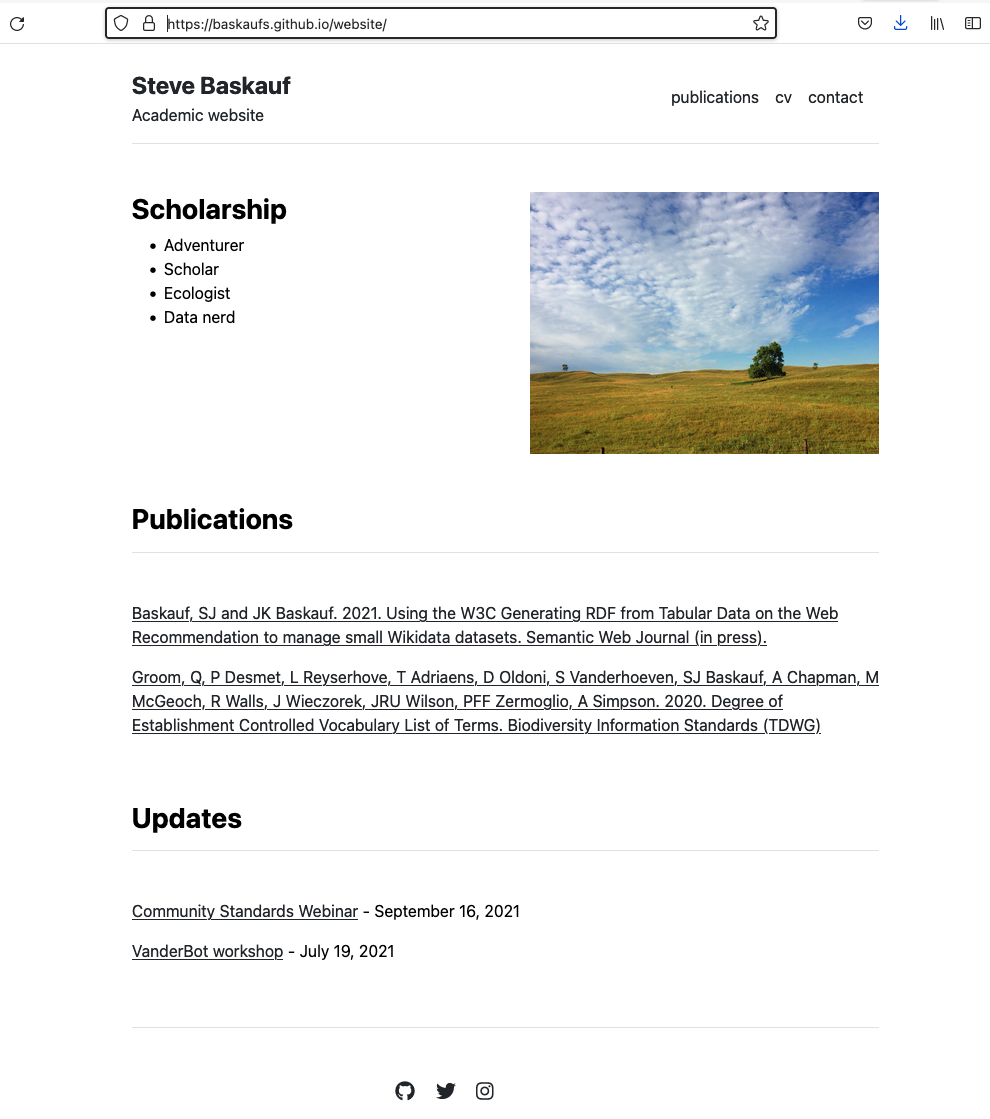
The final rendered homepage looks like this, with the publications and updates being summarized as links there.
Changing the page styling
It is possible to change the styling by modifying the theme CSS. If you change the CSS locally, it will override the CSS of the remote theme. For example, if you want to change the colors used for elements in the page, you can change those elements in the CSS files in your repository. They will take precedence over the default colors in the remote theme repository. This is not for the faint of heart, since CSS isn’t very user-friendly and one of the whole reasons for using GitHub Pages is to avoid having to learn it.
Fortunately, in some cases, the styling of the site can easily be changed using skins. If a remote theme uses skins, you can usually select the one you want in the _config.yml file.
For examples and more information about skins and modifying the CSS, visit this page.
Troubleshooting
Although every theme operates differently, the general principles shown here tend to apply to most remote themes. However, you will generally have to play around with the settings to get the theme to work the way you want. Before you commit to a theme and putting a lot of work into creating content for it, you should make sure that you can get its important features to work. If you can’t figure out how to get them to work, you may want to change themes.
Using a remote theme by forking the theme repository (12m50s)
When a remote theme is complex, with special features like a blog, storefront, page hero images, etc., it isn’t practical to try to set those features up page by page. Instead, it makes more sense to just copy the entire website from the source repository and then edit the files you copied (or delete them if they aren’t necessary).
NOTE: to see the final configuration of my website (shown in the video), see this repository. To see the website in rendered form go to the homepage. The bulma-clean-theme remote theme repository is here, The rendered example website for bulma-clean-theme (with configuration instructions) is here.
.
The steps for setting up a remote theme by forking the theme repository are:
- Fork repository (some themes will have a clickable button). If you want to know more about how forking a repository is different from using a branch, visit this page.
- Set remote theme in
_config.yml. This is necessary even though you forked the entire repository. You may also need to set thebaseurlvalue to match the repository path in your Pages URL. - Figure out the site structure to see how features like blog posts, special galleries, storefronts, etc. are organized. There is also often a data folder that contains additional YAML files beyond
_config.yml. The theme repository landing page should include some instructions for customizing the site, or direct you to some other documentation. - Customize
_config.ymland modify data YAML pages as necessary to make the features work. - Add/delete/modify files to include the components you want. Depending on how the site is set up, unneeded features or pages may just be ignored if you don’t configure them in the settings YAML pages. In other cases, the website picks up the pages simply by their presence in an appropriate folder. For example, if the site has a blog feature, the blog posts will generally appear when the Markdown files that contain them are placed in an appropriate folder. Similarly, generic content pages may be added to the site as was shown in the instructions for the built-in themes.
- Modify page header YAML as necessary. Depending on the site, there may be various page-specific settings that are controlled by YAML at the top of the page. Examples are: presence or absence of sidebars, headers, or footers; “hero” images in the banner, page titles, color scheme for the page, etc. Usually you can figure these out by looking at example pages included in the template site.
Controlling the URL of your GitHub pages site (4m32s)
Creating an effective website is only one important aspect of reaching your audience. The URL of your website is part of its branding and makes it easier for users to access the site. A good URL for a website is both memorable and easy to type. In this part of the lesson, we’ll talk about ideas for creating a good URL for your GitHub Pages website.
.
Terminology
Domain name The domain name is the last two pieces in the first part of a URL. For example, vanderbilt.edu is the domain name for Vanderbilt University’s websites and it’s composed of the primary domain vanderbilt and the top-level domain .edu.
Subdomain A subdomain is an optional third piece in the first part of a URL. For example, the subdomain library is a subdomain of vanderbilt.edu used to form the subdomain name library.vanderbilt.edu. A common subdomain for websites is www (for World Wide Web) and it usually is used for the primary website of an organization, for example www.vanderbilt.edu. Domain name owners have the ability to create many subdomains. In the GitHub pages system, the subdomain is assigned as the user account name and prepended to github.io.
DNS DNS stands for Domain Name System. It’s a decentralized system that associates domain and subdomain names with Internet Protocol (IP) addresses. Because the system is decentralized, it may take some time (up to an hour) for changes made by your DNS provider to proliferate throughout the network. Thus, changes that you make may not immediately be visible when you test them in a browser.
DNS provider A DNS provider is a company that manages domain names for users. When you “buy” a domain name, your DNS provider takes care of the technical details of associating your domain name and any subdomains with the actual place where the website is hosted. For example, you may have acquired a domain name from GoDaddy and are hosting your website on GitHub. You would go into the GoDaddy system to map your domain name to the actual website location at GitHub. In some cases, the same provider will both host the website and manage the DNS.
Site URL options
There are three options for controlling the URL of your GitHub Pages website:
- Using the default URL based on the repository name.
- Using a special repository name that allows you to drop the repository name from the URL.
- Using a custom domain name that you have purchased from a DNS provider.
Each of these options will be discussed below.
The default site URL
In the first lesson, we saw that there was a relationship between the repository name and the URL at which the website pages will be displayed. Here’s the pattern:
Repository URL pattern https://github.com/accountname/repository/blob/branch/path
Website URL pattern https://accountname.github.io/repository/path
The implication is that if you are going to have a meaningful URL for your site without paying for a custom domain, you would like to have both account and repository names that tell the users something about your site. For example, if your name were Juanita Schmidt and you were creating you lab website, you might try to get the GitHub account name “schmidtresearch” and set up your website in a repo named “lab”. That would make the URL for your web homepage: https://schmidtresearch.github.io/lab/.
This URL isn’t great, since it requires users to include the subpath /lab/ in addition to the subdomain name.
Simplifying the URL by dropping the repository name
It’s possible to use only the subdomain name as the root URL for the website, and eliminate the subpath for the repository name.
The trick is to name the repository as the eventual subdomain name when the website is rendered. Here is an example. I have a repository named baskaufs.github.io:
https://github.com/baskaufs/baskaufs.github.io
To go to the website homepage, I can simply enter https://baskaufs.github.io without any additional path. If I want to go to the page within the repo that has the path /civil-war/about.htm within that repository, I can simply use the URL https://baskaufs.github.io/civil-war/about.htm, that is, the subdomain name followed directly by the path.
Since you can only have one repository named account.github.io, you can drop only drop the repository name for one website in the account.
If you are using this method, then you would want to have a GitHub account name that is memorable for users. In the previous lab website, Dr. Schmidt might try to set up a GitHub account named schmidtlab so that her website homepage could be at the URL https://schmidtlab.github.io.
Unfortunately, the great repository name that you want to use might already have been taken by another user. In that case, you need to think of another good name that isn’t taken (the free option) or pay for a custom domain name.
Using a custom domain name
If you have purchased your own domain name, then it doesn’t matter what your account and repository names are. When you set up the redirect, it will point directly to the website’s source directory and the custom domain name will be followed immediately by the path.
The generic GitHub Pages documentation for setting up custom domain names is complicated because it describes all possible options. There are simplified instructions on this page. They assume that you want both www.pdomain.tldomain and pdomain.tldomain to go to your home page.
Practice assignment
- Create a new repository to be used as a website. Choose a repository name that will give you the desired URL when it’s rendered. On the repository settings page, select the
mainbranch anddocsdirectory for the site. Do not select a theme yet. Clone the repository to your local computer using GitHub Desktop. - On your local computer, create a
docsfolder and use your code editor to create a Markdown page calledindex.md. Create some markdown that includes an image and a hyperlink. Push the website to GitHub, then visit the website link (found at the top of the settings web page) to see how it looks. (You may need to wait a short time for Jekyll to render the site.) - On the repo settings page, select one of the built-in themes. Use GitHub Desktop to pull the
_config.ymlfile to your local computer. After there has been enough time for the website to render, reload the home page to see the styling. Change the theme to a different one of the built-in themes by changing thethemevalue in_config.yml. Push the changes and reload the site again to see the changes. - Create two subfolders of
docs. Name them according the the page names that you want to appear in the path of their URLs. In each subfolder, create anindex.mdfile with some Markdown for page content. Create links: from each page to the home page, from the home page to each subpage, and between the two subpages. - Change your page theme to the remote theme
LeNPaul/academicin the_config.ymlfile and push the changes. Go to the academic theme GitHub site and see how to set uptitleanddescriptionin your configuration file. - Change the home page image located here to your own image by recreating the path locally and substituting your own image for
home.jpg. - Select a more complex remote theme and fork it to your own account. Set up a new website repository and copy the content of the forked repo into it. Change the
remote_themesetting in_config.ymlto the remote theme name and the website path if necessary. Push the changes and load the page URL to see the rendered site. - Read the instructions for your remote theme and customize the YAML settings file and Markdown page content until your website looks the way you want.
Revised 2022-02-23

Questions? Contact us
License: CC BY 4.0.
Credit: "Vanderbilt Libraries Digital Lab - www.library.vanderbilt.edu"